Monday, October 31, 2011

Halloween and Beef Stew


Here it is, Halloween! 
Don't you just love this time of year?  I sure do!
From the pumpkins and costumes to piles of crunchy leaves and chilly nights, Autumn is a very special time!

If Halloween hadn't been invented, we'd have had to come up with some sort of holiday to acknowledge this season!

As a kid, I'd worry for weeks over costumes and "bag strategy."  I grew tired of the princesses, pirates and clowns that were available at our local Five and Dime store.  My last such store bought outfit was a Micky Dolenz costume....I actually got it more for my growing Monkees collection than for actual trick-or-treating. 

What I enjoyed most of all through the years was when I made my own costumes....usually with just things I had around the house.   One year I was a sack of laundry, and when I was done with it as a costume I just popped the clothes into the washing machine! 

As I got older, I started going "Halloween Caroling" instead of begging for candy and doing tricks.  Doing this enabled me to crash parties without crashing them. 

My unsuspecting host or hostess would ask "Oh! You actually use that guitar?!  How's about a tune?"  
Of course I'd have to oblige....with songs like "Silent Night, Haunted Night," "Here Comes Frankenstein" (to the tune of "Here Comes Santa Claus"), "The Twelve Days Of Halloween," and "We Three Ghosts" to name a few.  Most folks seemed to like it.

This year we're celebrating the holiday in a more low-key fashion.  Jack's health issues makes him tire easily, so rather than going through a lot of stress we decided to spend the evening together, just the two of us; a nice meal, a couple of horror flicks on the t.v.....perfect!

My "cauldron"
I wanted something for dinner that would incorporate the colors of autumn within the confines of a one pan, healthy meal. Jack suggested Beef Stew with Biscuits.  So that's what I did. 

Grab yourself a cauldron and some Witches' Brew, chase the bats from the belfry and tell Dracula to go get some take-out....let's cook!

1/4 lb per person

AUTUMNY BEEF STEW


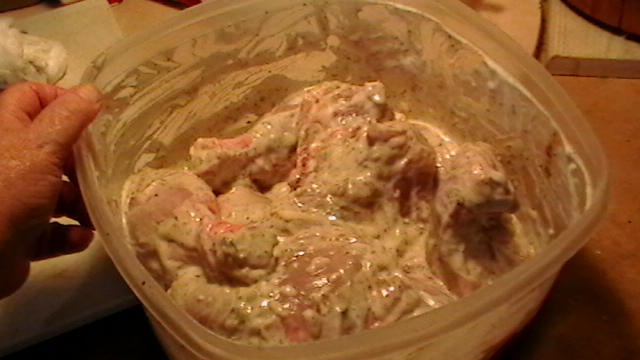
Meat-wise, 1/4 lb of uncooked cubed meat per person is the rule of thumb
1 onion
1 large or 2 small rutabaga
1 or 2 potatoes
3 or 4 large carrots or 1/2 bag of baby carrots, cut up
1 yam
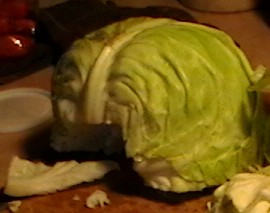
1 or 2 crowns of broccoli cut up
1 to 2 cloves of garlic
1 or 2 bay leaves
2 tsp corn starch
1/4 cup cold water
Seasonings to taste
2 cups of broth (from pan drippings after browning the cubed meat and veggie steaming water)
Any other ingredients you'd like to add....kitchen sink included!

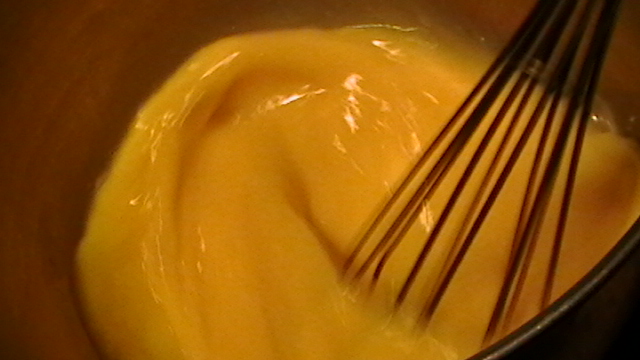
Prepare almost everything in the same pan to insure maximum flavor! The exception would be those veggies that require extra cooking.  Use a steamer for things like your chopped rutabaga, carrots, potatoes.  Steam them 'til they're about 3/4 done.  Use the steaming liquid as your "water" for the broth base.
Steaming the "hard" veggies


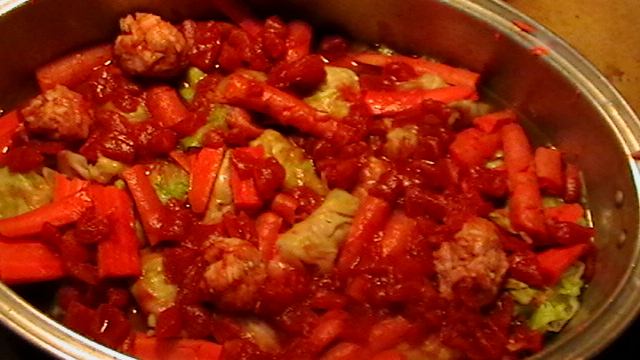
Brown the meat with chopped onions and garlic, set it aside.  Add 2 cups of  the steaming water to the pan drippings, let simmer for about 10 minutes.  Add bay leaves, veggies, starting with the steamed ones first. Let this cook for about 10 minutes.

Add , broccoli, what ever other "softer" veggies you might have.  Let this simmer for about 15  minutes. Taste.  Adjust your seasonings.  Add meat and any remaining ingredients.  Let simmer another 10 minutes and taste again.  Some folks like a thin stew, but if you want to thicken it, mix the cornstarch and cold water together then add to the stew.  Let simmer another 5 minutes or so.  Taste again, adjust seasoning.
Let sit 1/2 hour before serving

HERE'S THE SECRET- Let it sit for about 1/2 hour before serving, this allows it to cool down for a bit, and also helps the flavors to mingle and work with one another.

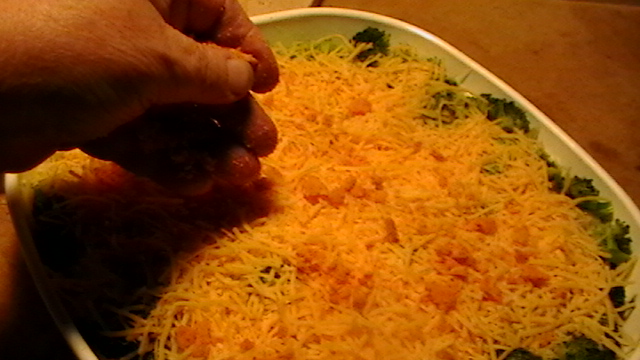
Serve with a salad and  good bread or rolls.
Serve with rolls and salad

As usual, if you have any suggestions, comments or recipes feel free to share!
Enjoy!

Friday, October 28, 2011

Chicken Cheesey Macaroni

Ingredients for a quickie
Okay, so you're in a hurry...I mean a really BIG hurry and ya gotta put something on the table - but there's no boxed Mac N Cheese to be found...not in the pantry, or the cupboard or even the emergency/camping stash! 
So now what?
That's where I found myself earlier tonight.
There was a chicken-looking left over thing that needed something-something to make it plate worthy. Thought I had it all figured out earlier but....I'd committed the deadly sin of assuming there's be some sort of boxed side dish that would pull a poor excuse for a dinner together. 
There wasn't.  Not surprising. I'd gotten away from depending on a lot of pre-packaged food through the years, with the exceptions of camping and/or emergencies that is.

Grating cheese
So with another quick tour of the pantry I came up with the following ingredients:
1 1/2 cups macaroni noodles, Nida brand powdered whole milk, Swanson's Chicken Broth. 
I had a couple bits of garlic and a good selection of spices in the racks.
The fridge contributed 3 Tablespoons of butter, some tomatoes for slicing on the side and of course the chicken.
Suddenly there lay before me the makings of a good meal.

Okay, so to begin I boiled the noodles then drained them.  Using the same pan, I heated up the chicken with  a dash of the broth then removed it from the pan and set it aside.

Cheese melt down

Next I grated the cheese and made up the milk according to package directions using chicken broth instead of water.  3 Tablespoons of butter and the milk mixture landed in the pan used for cooking the chicken and macaroni.  Then I added the grated cheese and stirred, stirred, stirred as the cheese melted.  The sauce thickened more and more until at last, about 4 minutes later, it seemed thick enough to add the macaroni....and so I did.

Melting
The trick is to use a kind of folding-in stir rather than a liquid stir if you want the noodles to stay whole.  This also insures a more even coating of cheese per noodle.

I added the chicken chunks and some left over peas to my bowl, but you don't have to.  Jack likes his chicken served separately....hey, what ever flies yer kite!

Mac n Cheese with Chicken n Peas
Anyway, this little recipe is one for the Just In Case files.  Feel free to share, contribute recipes, send comments!   Enjoy!

Tuesday, October 25, 2011

THOUGHT FOR FOOD - Passion

You've heard the question a million times..."What's your passion?"  W hen it comes to cooking, the term is used all the time....and I think it's appropriate.

Throwing a bunch of ingredients into a bowl, mixing them about then throwing the stuff into an oven for a specified amount of time can be considered  "cooking,"  if you want to get technical.  But is it really?

Have you ever thrown your heart and soul into a project?  By contrast, have you ever just "phoned something in"?  I believe there is a noticeable difference in the quality when extra effort is applied.  It's impossible to do that when distracted or your heart's not into it.

Being passionate about cooking doesn't mean you have to give up your present life, go to le Cordon Blu Academy and get a show on the Food Network.  Fundamentally, being passionate about cooking means that you are interested, engaged, enthusiastic about what you are doing and why.  

People can loose their passion. I've seen it a lot.  Folks who've been in the restaurant business can get burnt out as the burdens of running a business overshadow their love of preparing food.  Homemakers can get sick of things, too; being forced into a culinary rut because of finicky family members, having too many mouths and not enough food and having to cook after an already long, duty-filled day constitute only the tip of the iceberg.   Personally I'm amazed at how many mega-multi-taskers survive!

So how does one keep passion alive?   That question has been asked since the beginning of time.  Granted, most folks ask it with regards to their sex-life,  but passion is passion....to me, anyway.

The answer to both is surprisingly similar....keep it interesting.

Try new ingredients or new methods of preparation.  Consider involving family members, including kids, in cooking projects.  Change the meal menu once in a while; if Mondays are always meatloaf try burgers instead.   There's no reason why chicken and stuffing should be reserved for Sundays, either!

If you feel overworked, consider delegating some chores to those wonderful people who live in the house with you!  Why should everything fall on to your shoulders?  You'll be surprised at how much more time there is when others help keep the household in order!  You may even find some of that elusive "me time" hiding in the rafters!

Between the heat, manipulations and mess, one might say that cooking and making love have a lot in common.   Just like in the bedroom, you have to work at it to keep passion alive in the kitchen too.

We're heading into the "food holiday season" - a perfect excuse for bringing some fun back into your kitchen!
Try making food gifts...a way to try new and different recipes without alienating finicky family members.  Their curiosity may be aroused as they see new dishes being made....and who knows?
They may try something new, and like it!

So go ahead....turn up the tunes, put on your favorite comfy clothes and have at it! 
Enjoy!


v

Monday, October 24, 2011

Rarin' To Roast - Discount Cut Brings On Cooking Frenzy

I was at the grocery store the other day, just picking up some milk and eggs.  As is my usual custom, I paroosed the various aisles, just to keep current and to see if there was anything on sale to bring home for dinner.

Sure, we had hot dogs at home...some tuna...eggs....that sort of thing. This being the end of the month, it was to be expected.  What was also to be expected was for me to do something like I usually do. A souffle, casserole, or quiche would be predictable responses.  But I didn't want to do  "business as usual."  I wanted something different.

Ingredients for a roast
So once my listed needs were assured, it was time for The Hunt.  For a moment, I pictured being on the planes somewhere, foraging for sustenance for my brood and wondered what my prehistoric counterpart would make of our modern day "hunting ground."   Would they get the concept of meat already "off the hoof," prepackaged plant material and boxed cereal?

In my mind I played out a few moments of the scenario and realized that the poor cave person wouldn't even survive the parking lot, let alone the wonders inside that cavernous and well lit supermarket!  I caught an imagined glimpse at Ms. Neanderthal stalked and attacked one of the many S.U.V.s as it vied for a parking spot!  It wasn't pretty.

With a shake of the head I was instantly back at my post, leaning against the shopping cart at the veggie aisle.
The eggplants seemed like a good price until I looked at them.  Scuffed, pocked and dulling, they wouldn't be a good choice for main course.  As they age or get damaged, eggplants go sour.  I moved on.

There were plenty of other vegetables at home....and no shortage of green grocers in case of emergency, so I moved on.  Next stop was the specialty bread section, nope.

Along the back wall was the meat department.  This store has come a long way from when we first became acquainted.  Back then, about 15 years ago, I had to stop patronizing it because I questioned the sanitary conditions in the butcher's station.  It was one of those sections you could smell a mile away.

Just last year I finally had the chance to stop by again and boy!  What a difference!  They're apparently under new management, thank God.  The meat counter was immaculate, not a sour smell or hint of decomp to be had.

I stood before the gleaming open faced cabinets, scouting the terrain. Nobody seemed to be down by the Clearance bin, so that's where I went first.  There it was, buried beneath a package of chicken drumsticks a 2.7 lb boneless pork loin roast.  It would have to be used right away, but was a bargain at $2.50.

I staked my claim and made a bee line for the check-out line.

Once home, I settled in for a little cooking frenzy.

ROAST BONELESS LOIN OF PORK

2 lb. boneless loin of pork
3 cloves garlic, crushed
Crushing the rosemary
1 Tbs dried, crushed rosemary
Salt and pepper to taste
1/4 cup olive oil
Splash of apple cider vinegar
2 Tbs butter or margarine
1 cup apple juice, stock or water


Preheat oven to 350 degrees.   Pierce roast all 'round with a fork.  Sprinkle with salt and pepper.
Mix butter, dried rosemary crushed garlic, the splash of apple cider vinegar and 3 Tbs of olive oil in a bowl, rub roast both sides generously with this mixture.
Combine remaining olive oil with cup of liquid (juice, stock or water)
Spray oval baking pan and rack with release spray. Pour liquid into baking pan.
Place roasting rack into pan, place meat on rack fat side up.  Cover pan with aluminum foil. Bake for one hour, basting once.
Put meat thermometer into roast, baste once more then cover it and return it to the oven for another 45 minutes.  After 45 minutes, remove foil and let finish baking for another 15 minutes.  Internal temperature should be at 145 degrees.  Remove from the oven and let rest 10 minutes before carving.

Meanwhile,  strain the pan drippings, pour them into a sauce pan. Thicken with a mixture of 1 Tbsp. corn starch mixed with 1/4 cup of cooled broth, milk or cold water.  Season to taste and drizzle over meat servings.
So that's it.  How I turned an end of the month dinner into a culinary opportunity.  Sometimes the magic really does work!  If you have any recipes, suggestions, comments or anything feel free to submit them!
For now, enjoy!


Saturday, October 22, 2011

LIVING AND COOKING - Stuff and Stuffed Cabbage

Live goes on....and so it goes.
Sometimes it's so crazy
sometimes it just flows...

Been going through the aging process, aren't we all?  Remembering when things were so different.  Laughing at sounding so much like the "old heads" from our yesterdays. Funny how this window/mirror thing we glance through from time to time knows just which buttons to press. And when.
Gravity's no friend, either.
But what the heck.

Someone asked me the other day if I wanted to die my now grey flecked hair.  I want to wear the process of my living, and what better place than my head?  Doesn't mean I won't trim the bangs now and then. But hey. The grey hairs are mine.  I earned 'em!

This is the kind of stuff that goes through my head some nights when I can't sleep.  Err, well....I mean when I am still awake past 3 a.m..  Of course other nights hold different thoughts.  Tonight I'm thinking of my mother....the first person who taught me how to cook.

She had a large brood to feed on a limited budget but managed to not only feed us, but instill in us a good relationship with food, and interest in cooking and the importance of sharing meals with loved ones.  Her hair is the same soft, snowy white her father wore to his last.  It is beautiful to me.  Should I ever have the great fortune to sport the same feature, I'll grow it long and proud.

Anyway, one of Mom's dishes was a version of Stuffed Green Cabbage. I wrote a recipe for Stuffed Purple Cabbage in the blog "Fifty Five Is The New..." .  This dish uses the tight-headed green cabbage available at most grocery stores, farmers' markets and green grocers.

It's the one Mom prepared for us with her own special flair. She used canned tomato soup with 1/2 can of water per soup can, made her meat mix with ground beef, rice salt and pepper.  I believe she may have diced some onion or used some onion flakes in the meat mix too.

I remember the first time helping her steam the cabbage.  She showed me how to cut the great round things in half after taking off the outer leaves.  The halving not to occur 'til after a proper washing under some cool running water, of course.

There were carrots to cut in quartered lengths, onions to be coarsely chopped and, the funnest part of all, rolling the meat/rice mixture into steam limped leaves and tucking them sweetly into the bottom of a cabbage leaf-lined and sauced oval baking pan.  Mom would toss a few carrot and onion chunks hither and yon about the pan and between the swaddling morsels. Then she'd add some remaining liquid, cover the pan with aluminum foil and bake it for 45 minutes in an oven set to 350 degrees.  After 45 minutes she'd remove the foil and let it bake for an additional 15-18 minutes.

Anyway, we were in the mood for Stuffed Cabbage so I set about making it with what we had on hand.
Our last shopping foray garnered, among other things, a nice firm head of green cabbage so we were on the right track.
Oval pan

A quick pantry check showed no tomato soup around, but a can of chopped tomatoes.   Close enough.
We had plenty of rice, onion, carrots - even an oval pan!  Well, all-reet!

The plan was to make something similar to Mom's original.  I was using ground turkey, diced tomatoes , a few fresh tomatoes, some left over broth from a previous evening's roast as the broth, so there were going to be differences.

TURKEY AND RICE STUFFED CABBAGE with TOMATO and STOCK SAUCE

Ingredients for Stuffed Green Cabbage
3 lb ground turkey
1 1/2 cups cooked white rice
6 -10 carrots cut in quarters - reserve tips to grate into meat/ rice mixture
1 - 2 yellow onion(s) coarsely chopped
salt (optional) pepper (optional) to taste
2 fresh tomatoes, diced fine
1 large can diced tomatoes -
     if you prefer, 2 cans of tomato soup plus 1 can of water
1 large head of tight-leaf green cabbage
2 cups stock


Remove the outer cabbage leaves.  Wash the cabbage under cool water then chop it in half. Notice the hard section at the base of each half?  That has to be removed.  There will be some other hard features that will require surgery as well, but more on that in a bit.
The trick here is to use your knife more like a scalpel than a chopper for this maneuver.
You might consider using a smaller rather than larger blade for better control. Other than that, it's a matter of cutting around the stem base and inner core. You'll end up with something that looks like this picture.  It's a bit helmet-like, or even "brain-like."

 
Get the steamer water boiling and add the carrots. Put the steamer on the pot and start adding raw cabbage leaves to the steamer until it is only 1/2 full. Cover and steam for 5 to 7 minutes while you prepare the filling.

If you don't have a stacking steamer you can soften the carrots a bit by par-boiling them. I just like to partially cook them ahead of time so everything else doesn't turn to mush waiting for the carrots to be done.

The filling is simple.  Put meat in a bowl, add the cooled cooked rice, add spices to your individual taste, grate carrots this mixture. As the cabbage leaves soften, take them out of the steaming basket and lay them out on a large flat surface.

Pour some of your stock into the oval pan, so it just covers the bottom. Take any small pieces and line the bottom of your pan with them.

.  Put this ball in the center of one of the cabbage leaves and wrap the meat like a holiday parcel!   If you run into any hard pieces of cabbage....veins, bits of leave, etc. discard them.  They will not soften with cooking.

Stuffed Cabbage with Carrots and Tomaties
You may have more meat mixture than cabbage, that's okay.  Just form little balls and place them round the pan. They will cook in the soon-to-be bubbling broth.  Distribute the carrots and diced onion around the pan, Pour the remaining broth over everything then top with diced tomatoes.

Wrap in aluminum foil and cook at 350 degrees for 45 minutes, then remove the foil and allow to cook for 15 minutes more.  Serve with buttered rice.

Making and eating this dish dissolved the miles and other things between us. It was tasty and familiar, even with the differing ingredients.

As always, please feel free to share your recipes and ideas!

Enjoy!


Tuesday, October 18, 2011

Home Made Hot Chocolate

You ever have one of those days? You know the kind I 'm talking about..... the only thing that would help bring it to a close without being a total loss?  Hot chocolate.  Mmmmmmmmmm.

There's nothing like it for making a body feel hugged and special!  Of course, anybody can pull out the Hersheys, Nestle's or what-have-you....but that's not what I'm talking about!  Nope. See...I can't tolerate a lot of chocolate, stuff gives me racing headaches!  So if I'm gonna risk pain, it had better be worth it!

I'm talking about real live, direct from the chocolate block, melted to perfection then whisked with milk into submission......now THAT'S  hot chocolate!  Worth every headache I'll ever have!

Rolling pin therapy
Start with about 2 cups of milk in a sauce pan.  Heat to just warm then turn off. Set it aside.
Get 2 or 3 blocks of Baker's dark semi-sweet chocolate or similar product.  In my case I have the remains of a huge block of dark semi-sweet chocolate from a chef friend.  I had to break it down by beating it with my rolling pin, but that's okay...helped get rid of a few frustrations too.
Anyway, next put this chocolate in a 2 cup Pyrex measuring cup, add 2 Tablespoons of water.  Place in microwave oven and cook on high for 1 minute.  Stir, cook for an additional 30 seconds. Stir again.

Chocolate "paste"
Bring the chocolate "paste" to the stove.  Put a medium flame under the milk and add the chocolate, stirring constantly.  Put some of the milk into the cup to get all the "slurry," or remnants.  Add this to the milk too, and keep stirring.  You see the milk get darker and maybe even thicken slightly.

You may or may not need to add sugar, the choice is yours!  Give it a try!  Let me know how it works for you, if you have any recipe ideas, comments or suggestions!

 Enjoy!
Enjoy!

Saturday, October 15, 2011

KITHCHEN THOUGHTS - The "Go To" Room

Kitchen tools
The other day I caught a glimpse of the movie "Panic Room" and thought, gee...I don't exactly have one of those....I have something better
That "something better" can be summed up in two words...my kitchen.  It may not be equipped with the latest weapons or have sensors and cameras going to every opening, but what it offers in comfort far outweighs the latest techno-security gadgets.  At least in my books anyway.
This world's going to do what it's going to do, regardless of my defenses - or lack thereof.  I refuse to live my life in fear, refuse flatly to allow the misbehavior of a few loons to interfere with my pursuits.
That's not to say I won't stand up for a good cause.  Quite the contrary.  I can be a tiger when necessary.

There is a lot of anger in the streets.  People are occupying city parks, protesting in front of banks and stock exchanges. Some of me thinks I should be out there, like the old days, marching with my peers. But a lot of me is confused.  What am I fighting against?  What am I fighting for?  Those questions don't seem to have answers that are as clearly defined as in the'60s. Remember?  That's when we got our heads and backs beaten for the causes of Civil Rights and ending the "War" in Vietnam.

My "go to" room
I believe in change.  Change is part of life. I know we're a young country and we're bound to go through a number of changes...but I say we need to tread carefully.   We need to learn from our past as well as dream for our future.  We can't give up those unique traits that make us who we are.
We do need to change things...we need a better business ethic. We need to make sure people are investing in our nation instead of just milking it dry.  But we also need to encourage business to do business with and in our country.  That's not gonna happen if we tax 'em to death.  
Everybody is screaming things like "eat the rich."  Okay, then what?  After a while there won't be anybody left but each other.  Will we turn on one another then?  When and where will it end?
These are the thoughts I have at two-thirty in the morning, baking a carrot cake and sipping coffee. Does it matter what I think?  Who knows. But so long as I'm thinking...I'm alive, so there ya go. 

Thanks as always for reading the blog.  Please feel free to share your thoughts, ideas, recipes, pictures and so on.  Enjoy!

Monday, October 10, 2011

Non-Recipe Recipe - Life is more than a cereal


Families and nations are very similar.  From the way each feuds to the way each sometimes finds common ground, one seems to reflect the other.  Such is the nature of things.

"Out of Order" collage by rcw circa 1989


We've come a long way from segregated water fountains, lunch counters, city buses. We've come a long way from being denied jobs or housing because of an Italian or Jewish or Chinese or Japanese name or likeness.  Women have even made strides....although we're still only earning about $.58 on the dollar.

We live in an ironic world. A world in which the bearers of life are treated as second class citizens and murderers are allowed to roam free.  Weird.


But what, you may well ask, does any of this have to do with the price of pasta?  Good question.

To me there's nothing wrong with commerce done right.  Note the "done right" part?  That's important.
Unlike some folk, I believe that it's okay to reward good performance.  I don't believe that poor performance or even downright laziness or insubordination should be rewarded or even tolerated in a professional setting.

I am confused when I hear that poor performing teachers are given tenure.  No wonder our kids can't read!

This continued pattern is costing us, costing us dearly.

"1000 Points of Horror" collage by rcw circa 1989
What's to be done?
Get involved locally.  Even if you don't have kids in school, find out what's going on!  Our future depends on it!
That's a real recipe for change!

If you want to see a bigger view of the collage, click on it and you'll see it larger in a new window.

If you'd like to add a comment, suggestion or recipe, feel free!
Enjoy!

Friday, October 7, 2011

Freakin' Fried Chicken

Mom didn't do a lot of friend chicken when we were growing up.  Not that she couldn't. she just did it another way.  She did it in the oven with her own version of "Shake & Bake," and it usually came out moist, crunchy and tasty.

I've done it that way too, but once in a while I like to do it "old school."  So sue me, I like playing in mud, too!
"Old School" to me is on top of the stove using a deep walled pan, a mixture of Extra Virgin Olive Oil and Grapeseed Oil (cuts the cost a little), using crunched up seasoned cereal and/or potato chips and/or potato flakes and/or crackers and/or if nothing else, bread crumbs for the crust.  Of course there's the standard beaten egg....sometimes I use buttermilk, sometimes milk, sometimes yogurt....I'm flexible.

Flexible...this time with yogurt
Oh!  I also soak the chicken in the milk, buttermilk or yogurt for about an hour before cooking....this step really insures the meat will stay moist!

Always rinse and pat the chicken dry, do this for any meats for that matter. Pierce and season the meat  on both sides with your preference of seasonings.  I use some garlic powder, onion powder, poultry seasoning, thyme and crushed celery leaves.  Some folk like salt and pepper, some don't. Your preference.

I mix the marinating liquid (yogurt in this case) with beaten egg and some more seasonings - crushed garlic, finely diced onion or dried crushed onion flakes, and even a dash of apple cider vinegar then dredge the chicken pieces in this mixture. 

Crumb mixture
After that it's time to roll each piece of chicken in the crumb mixture.  Be sure to coat it evenly and shake off any excess. 

This time I used a combination of ingredients for the crumb mixture -  1/4/ cup each of crushed Cheeze It crackers, crushed Crispy Rice and Jiffy Baking Mix.   This jumble should be seasoned, just like the other components.   A dash of pepper, poultry seasoning, sage, another smidgen of crushed dried onion flakes and perhaps a sprinkle of paprika would be a good thing.   Mix everything thoroughly before dredging the chicken.

Drying on the rack
While doing this dredging, heat the oil in a deep walled pan.  I don't have an oil or candy thermometer so test the oil temp the old fashioned way...with a small cube of bread.   When the oil is ready, add a piece of chicken.  Deep fry five to seven minutes per side, depending on thickness. Let drip on a rack for a few minutes.  If it still needs a bit more cooking time, put in an oven set to 350 degrees for about 10 minutes. 

Fried chicken is a very individual thing, and there are a million ways to do it.  This is just one.   Feel free to submit your fried chicken recipe!  Enjoy!

Thursday, October 6, 2011

Diane's Turkey Parisian

Recipes are more than instructions on how to assemble a dish, they're little scraps of memory....bits of days gone by remembered when put into service.

Diane Sciara my friend
Diane Sciara was my best friend from 1977 through 2008 when she finally lost her battle with Ovarian Cancer.
We shared a lot through those years....parties, people, events and recipes.  We used to entertain often, which  meant inviting friends over for a pot luck supper or other gathering which usually resulted in a great meal.

She had a way of throwing ingredients together and coming up with something imaginative and tasty. We were always trading recipes, even after we were no longer roommates.  The food holidays were important to us.  We'd start planning for them weeks and even months in advance - from entrees through snacks, even if we were celebrating the event separately.  We'd even discuss what to do with leftovers.  Now that's a friend!

One of Diane's specialties was a dish created using left over turkey, broccoli, cheese, cream of mushroom soup and bread crumbs.  She called it Turkey Parisian.   

While at the store the earlier today, I found a special on boneless/skinless turkey breast cutlets and immediately thought of my friend and her wonderful signature dish.  Two guesses on what we had for dinner tonight!

DIANE'S TURKEY PARISIAN

4 to 6 boneless/skinless turkey breast cutlets seasoned and browned
2 - 2 1/2 cups steamed broccoli
3 cups shredded cheese (cheddar, jack, etc)
1 can cream of mushroom soup (or make your own white sauce w/ mushrooms)
1/2 of soup can worth of broth, sherry or white wine (apple juice is a good substitute for sherry)
1 1/2  to 2 cups breadcrumbs or crushed crackers - I used crushed Cheese It crackers this time.
Poultry Seasoning, salt or low salt and pepper to taste

Preheat oven to 350 F 
Lightly spray or grease the bottom and sides of a square casserole dish. Line bottom of dish with a thin coat of breadcrumbs or cracker crumbs.  Then slice the turkey cutlets into manageable pieces and line the dish with them. 
A fine veneer of cheese
Sprinkle a fine veneer of cheese on top of the turkey pieces - don't use all of the cheese, this is just a tad for flavoring.  While your at it, sprinkle some spices around too...but don't overdo it!  We'll be putting some more on top.

Spread the broccoli evenly on top
After the cheese bit comes the broccoli. Spread it out evenly across the top of the cheese and turkey.  Slice any pieces that seem too large.  This will make portioning - and eating- a lot easier! 

Pour sour/sauce over broccoli
Mix the cream of mushroom soup or your home made white sauce with the sherry, wine, broth or juice in a small sauce pan and stir until blended. It should thicken slightly.  Pour  this sauce over the broccoli.  

Cheese then bread or cracker crumbs
Next, sprinkle the remaining cheese over everything.  Make sure you get a nice, even coating over it all.  Then sprinkle the remaining breadcrumbs or cracker crumbs over top.  Finish assembly with a final flourish of spice, then cover it loosely and put it in the oven.

Bake for 15 minutes covered.  Remove cover and cook for an additional 15 to 25 minutes until top starts turning golden and sauce and cheese are bubbling.

This is a yummy stand-alone dish that can also be served with other holiday left overs, salad and/or veggies.  Great for pot lucks, too!

So here's to Diane and her Turkey Parisian! 
As always, please feel free to share your recipes, memories and comments!
Enjoy!

Diane's Turkey Parisian piping hot and ready to eat!

Wednesday, October 5, 2011

Confidence Building and the Six Egg "Julia"

Trying to make an exceptional omelet is difficult enough.  Trying to make a true French Chef-type omelet is a fairly daunting task....trying to make it a la Julia Child is, well, humbling and exhilarating at the same time.

It all seems easy enough; whisk some eggs, throw 'em in the pan, let it rip.  Sure.  Ever had to dance with a skillet on a hot burner? That's kind of how it goes when  working with this dish. 

Beat eggs well
Once you've committed yourself to the deed, go at it full steam ahead....stick to it 'til the bitter end.  You'll be amazed with what can be accomplished with a little patience and a lot of elbow grease. 

First make sure your eggs are beaten well.  For this particular omelet, we don't want to capture a lot of air.  That would be essential for the "puffy" omelet, but for this one we just want to beat the eggs into a liquid state.

Surf's up!  See the curl forming?
After that, it's all in the pan action.  Get it hot, get the beaten eggs into it....wait a few moments, then start shaking the pan vigorously across the flame.  As the eggs solidify, you'll notice a "curl" developing along the far end of the pan. Kinda looks like you'd expect a surfer riding on the thing. That's good! Keep it up!

You'll notice the egg acting more like a crepe, moving as a unit around the rest of the pan. This is when I start adding ingredients...cheese first, then tomatoes and this time some pepperoni that had been heated earlier in a pan to cut down on the greasiness.  In fact I used a dab of the pepperoni grease to lubricate the omelet pan.

Omelet fold close-up
Once your omelet "innards" are added give the pan another shake, this time when you shove forward, lift the far side of the pan slightly toward you.  This will help develop the fold.  Sometimes you'll need to coax this folding with a spatula, sometimes you don't.

In some circles, using a spatula to help with the fold is considered a no-no, but I'll not go there.  It's breakfast, fer cryin' out loud!  I need more than one cup of coffee and a dry piece of toast before venturing that perfection!

Anyway, after the fold is completed I sometimes top the omelet with a little cheese before serving. The cheese's  tanginess especially nice with all that pepperoni!

Some people say you can't make anything less than a six egg omelet...that anything less will not turn out.  I disagree.  I've made "Julia" omelets with as many as 12 and as few as 2 eggs and they all turned out fine. They require the same steps and the same amount of attention to detail.

This dish is appropriate for not only breakfast but lunch and dinner too.  Once mastered, the omelet will become one of your "go to" dishes for quick, tasty, even a little impressive fare for family and company.
Enjoy!  And as always, you're invited to share ideas, recipes and thoughts anytime!

Submit Express SEO Services

Free Web Submission

Powered By Blogger