Showing posts with label a recipe. Show all posts

Wednesday, December 28, 2011

Quick Chicken Soup For the Cold

There's no worse feeling than having a cold or flu.
Jack woke this morning with the sniffles and a sore throat so I knew we were in for some sort of germ invasion.
We were pretty good in the cold and flu OTC type things, but what Jack needed was some good old fashioned home made chicken soup!

Jack's face brightened beneath the kleenex as I offered to make him some.  There's just something about the stuff...the mere mention of its name sends shivers up the spines of many cold and flu germ!

As luck would have it, I'd been defrosting some chicken thighs in the fridge overnight.  The fridge wasn't brimming, but still had a good selection of soup-worthy options.  I didn't want to make a heavy soup, Jack's sore throat didn't need a lot of challenges. 
I decided to steam some broccoli, carrots and string beans after cutting them into bite-sized pieces. Some onion and garlic are always a good addition.

A lot of people just throw everything into a pot, pour water over the mess, set the heat to medium and let it boil away half the day.   I've tried it like that and to me that's just not soup!  The meat gets so dried out, the veggies get hopelessly limp and mushy, and the only way to get a definable flavor is to salt the poor thing to within an inch of its life.

Cooking isn't just about making food hot, it's about making food delicious.  That requires finding ways to bring out its flavors.  With soup, you can do that by seasoning your pan.  As you're chopping up veggies, throw some odd pieces in the bottom of a pan with a bit of extra virgin olive oil.  Same thing with bones.

See those brown bits that start sticking to the pan?  They're "flavoreins,"....very special combined bits of numminess made possible by the cooking process. Don't let your pan bottom burn.  Once you have a nice collection of golden brown bits, you're done with that process.  Turn off the heat, add some water or broth and stir the flavoreins loose.
You'll notice how the water starts turning into broth.

Strain off the old bones and bits. Their usefulness is done.
At this point, you'll want to add some other ingredients...namely any "hard" veggies you might have.  Things like potatoes, carrots and so on. They take time and the broth is a perfect vehicle for cooking 'em!
Let all that simmer for about 10 - 12 minutes or so, until the veggies are pretty much cooked.  Test it with a fork, the items should be done, but not mushy.

Then it's all about adding everything together.  I add cut up ramen noodles this time.  They only take about three minutes to cook and are a nice alternative to thick egg noodles.
Make sure to add the meat last, that way it won't get overcooked. Taste and make any spicing adjustments.  Then serve.  This bit of Kitchen Penicillin is just what the doctor ordered for cold and flu season.

As always, feel free to submit your recipes for sharing! Include your name (or an alias if you prefer) and you'll get full credit.  Above all else, Enjoy!


Friday, December 9, 2011

COOKIE CHRONICLES - Pitzelles

Pitzelles are a family tradition in many homes over the holidays.  And why not?  They're light, sweet but not too sweet and have a distinct anise flavor.  They can be served solo or if rolled into a cone shape while still warm, they can be used as a unique flavored ice cream cone.

This recipe comes from my mother, who probably got it from my Aunt Virginia who cooked real Italian for Uncle Rocky.

Things to remember about Pitzelles:
1) When they are first made they are pliable until they dry.  This can be good - like if you want to make them into cones or tubes for filling with ice cream or piped sweetened ricotta or whatever.

2) The batter should be runny.  If it isn't, your cookies will be gummy or chewy rather than crisp and firm.   The batter should literally pour like crepe batter because underneath it all that's what it is!

3) Pitzelles can be easily over-cooked.  They can also be easily undercooked. Try a few "practice presses" to get the hang of it.  Cooking time will vary depending on what you're using.  The electronic Pitzelle irons are nifty and most, like their close relation the waffle iron, have some sort of thermostatic light to let you know when they're done. 
   Heartier souls who like to go "old school" may opt for the stove top manual press.  Its harder to determine when the cookie is done and can be very labor intensive, but hey!  That's how they did it in the old days, and how some still do it today. 

If you don't like anise or want to change things up, try adding cocoa powder or cinnamon or what ever else might strike your fancy - providing it doesn't interfere with the integrity of the dough!

PITZELLES
3 eggs
1/2 cup vegetable oil
1/2 cup sugar
1 teaspoon vanilla, anise or what ever
1 1/2 cup flour

Sift flour, blend all ingredients. Drop by 1/2 teaspoon onto hot iron. Cook until golden brown. Shape into cones, tubes or leave flat. Dry on a rack.  Store in a dry place.
Pitzelle - photo from Wikipedia

You may notice the photo credit for the cooked Pitzelle goes to Wikipedia.  That's because I didn't get the chance to make 'em this year.  I tried, but found that my waffle iron is no substitute for a real Pitzelle cooker.
It actually got pretty messy, so I decided to hold off on making them until I have the proper iron.

At that time, I'll let you know if Pitzelle dough freezes well or not....because that's where the dough is right now, in the freezer.  This experiment should be interesting. 

As always, please feel free to share your thoughts, recipes, ideas and memories.  And as always, Enjoy!

Saturday, December 3, 2011

COOKIE CHRONICLES - Craving Chocolate Chips


Hello, Ms. Chips!
What's one of the most popular goodies on your cookie plate year after year?  In our house, it's Chocolate Chip Cookies, hands down.  There's just something very special about them....recalling childhood days of cool cups of milk and crunchy/chewy morsels packed with chocolate bits; a year-round cookie that never falls from favor and is an absolute MUST for the holidays!

There are about a ka-zillion recipes and adaptions - ranging from simple to extraordinary.  Each person, each family has their own likes and dislikes. For the most part, we can agree on one thing...Chocolate Chip Cookies rule!

Someone recently asked the question -  
What's the difference between Toll House and regular Chocolate Chip cookies? 
After some research and with much thanks to the Nestle website, here's the answer:
Chocolate chips ready
They are one in the same!  These cookies were invented in the 1930s by Ruth Wakefield of Cape Cod, who was making a batch of Butter Cookies for the Toll House Inn, the hotel she and her husband operated.  She cut up bits of a Nestle semi-sweet chocolate bar into the Butter dough, thinking they would melt completely, but they didn't.  Instead, those chips became chewy and yummy, retaining their self-hood amid the oven's heat.

The resultant treat was an instant sensation and soon the Nestle company was contacted by Ruth and started making chocolate bits for the home baker with Mrs. Wakefield's recipe on the back.  This is a very abbreviated version of the tale, for a more detailed version go to http://www.ideafinder.com/history/inventions/tollhouse.htm

Choco-Jalapeno Cookies
Through the years I've experimented with and had the opportunity to sample several interpretations of Mrs. Wakefield's invention; including but not limited to Chocolate Chip Oatmeal Raisin Peanut Butter Cookies, Choco-Mint Chip Cookies, Banana Chocolate Chip Cookies, Chocolate Chip Candy Cane Cookies (made with chunks of candy canes) and even Chocolate Chip Jalapeno Cookies. Personal favorite? The Jalapeno, of course!  I wonder what Ruth would think of all these variations.

For Christmas baking, I usually stick to the basics.  Plain CC (Chocolate Chip).  Due to dietary considerations I use Splenda.  This year, I'm trying some Crisco Butter flavored vegetable shortening too - no transfat....another dietary adaptation.

Crisco Butter Flavored Shortening
This Chocolate Chip recipe involves use of Crisco's Butter Flavored Vegetable Shortening. Mom used original Crisco in her Chocolate Chip Cookies years ago. She'd use butter or margarine in many of the other cookies, but for some reason always went to Crisco for her 'Chippers.  I remember her teaching me about measuring the stuff into a metal measuring cup.

I'm using "regular" brown sugar here, partially because I couldn't find any Splenda Brown Sugar in my local stores, and partially because I'm not sure how the sugar substitute will work with the Crisco.  I'll do a little research and report my findings to the blog....naturally this will involve a recipe, so stay tuned!

One important thing to remember - If you're hoping to substitute Crisco Butter Flavored shortening for butter or margarine, just follow the suggestion printed right on the product! 


CRISCO CHOCOLATE CHIP 
or TOLL HOUSE COOKIES

Preheat oven to 350 degrees
1 1/4 cup firm packed light brown sugar
3/4 cup Crisco Butter Flavored Shortening
2 Tablespoons milk
1 Tablespoon Vanilla extract
1 large egg
1 3/4 cups all purpose flour
1 teaspoon salt (optional)
3/4 teaspoon Baking Soda
3/4 cup semi-sweet chocolate chips
3/4 cup milk chocolate chips, coarsely chopped

Double spoon method
Combine all dry ingredients in a bowl.  Cream Crisco and brown sugar together until light and fluffy, add egg, beat until mixed in, add vanilla and milk. Mix together.  Add to dry ingredients and mix until fully blended. Add chocolate chips a bit at a time, making sure to distribute them easily throughout the dough.  Let dough rest a few moments.

Using the "double spoon" method, put 1/2 to 1 spoon of batter per cookie onto ungreased cookie sheet, spaced about 1 to 1 1/2 inches apart.  Bake 8 to 10 minutes for chewy cookies, 11 to 13 minutes for crunchy cookies.  This recipe makes about 3 dozen.  Recipe doubles easily.

As usual, feel free to share your ideas, thoughts, memories and recipes here via the comments box.
And as always....Enjoy!
Crisco Chocolate Chip Cookies


Thursday, November 17, 2011

What's For Dinner? Chicken, Asparagus, Coleslaw....Really?

Chicken, cole slaw, asparagus...ingredients for dinner
Food shopping near a Food Holiday is a tricky venture; not only are you getting what you need for the festivities, you have to remember about the "regular" days as well.

I do my best...don't we all?!
But there's bound to be a bit of menu strangeness when juggling like that.

Tonight's menu is a pretty good example.  I've been concentrating on apples a lot lately; Jack's sister gave us a bunch from her wonderful apple tree, so I was knee deep in pies, breads, apple sauce cakes and so on.   This morning when I looked up at the clock it was 11 a.m.; when Jack came down to the kitchen and asked "What's for dinner?"  I noticed the time....4:35 p.m.

Hmmmmm. "Chicken," I replied, then looked in the fridge.  Fortunately I'd remembered to defrost the chicken.  "It won't take long."  Jack smiled, grabbed a glass of water then left me to the task at hand.

I'd been in the process of chopping apples when Jack asked that fateful question.  So I decided to use them in the meal.   A second cruise of the refrigerator secured the ingredients for the meal; the aforementioned chicken, a bag of pre-shredded cabbage and carrots (a/k/a a "cole slaw kit"), some asparagus, an onion, some orange juice....didn't sound like things I could combine into one dish.  So I opted for separates.

I rinsed the chicken then patted it dry.  Lucky for me it was a pack of skinless, boneless thighs...lots less work! Thank heavens for sales!   After that, I sprinkled a little low salt, pepper, dried onions and garlic powder on both sides of the chicken and placed it in a bowl.  Then I poured some orange juice over it and covered the bowl.  This sat for about fifteen minutes while I prepared the rest of the meal.

The asparagus was a no-brainer.  Hot water, steamer, seven minutes....done!
Jack likes his asparagus with a side of mayo, so I didn't have to make a fancy sauce or anything. Yay!

Waldorf Coleslaw - slaw with walnuts
Cole slaw?  Been there, done that.   But I wanted something a little more interesting, so I found some walnuts, chopped 'em up and added them, along with the chopped apples and raisins...kind of a Waldorf Cole Slaw.
It's always better to make your slaw ahead time and let the flavors mingle and mature.  Best scenario is the day before service, but 45 minutes will do in a pinch.  So that's what I did.


Chicken in the pan
Then it was time to take on the chicken. I drained the meat and let it sit on a wire rack then put some heat under a cast iron skillet, chopped then added onion and garlic.  After the onions started going transparent, I added the chicken and browned it for five minutes on each side.  After browning, I poured the orange juice over the chicken, covered and cooked it for an additional 3 minutes per side then removed the chicken to a plate while making a pan reduction.

Reductions really make the flavor happen!   It takes a little time, but is well worth the effort!

Once the juice is reduced, add the chicken to the pan and coat each piece with the reduction.  I drained the asparagus, put it in with the chicken, mixed everything around a little  then put the skillet with everything in it in the oven (at 350 degrees) for about 10 minutes more.  Then it was time for plating and service.

Orange chicken w/cranberry sauce, asparagus and slaw
And you know what?  It was pretty good!  The flavors seemed to compliment each other, even the slaw. Jack thought I'd been planning the meal all day.  And in a sense he was right....after all I did defrost the chicken!

So feel free to try this idea, feel free to share your recipes and ideas too! I look forward to hearing from you!
Enjoy!

Friday, November 4, 2011

Boxing With Carrot Cake

Boxed mix basics
Some people think there's a standing rule about baking.  You're either baking from scratch or you're not baking at all.  I disagree

Boxed cake mixes have the same ingredients as you or I would be using.  Of course when it comes to brands some are better than others, but this article is not out to choose which is which.  I'm here to talk about using cake mixes rather than choosing which to use. I leave that part up to you.

I like cake, like making it, decorating it and eating it.  Lots of my friends like cake too...leastways that's how it seems.  They sure hold enough gatherings throughout the year and each one has at least one cake as its centerpiece.

This morning, one of our buddies called with an invitation to a party.  During the conversation they asked if I knew how to make carrot cake.  After fifteen minutes of trying to explain how to make it, I broke down and volunteered to make the cake.

Grating extra carrots into the mix
As luck would have it, I had a Betty Crocker cake mix in the pantry....and it was a carrot cake at that!  Yay!

I could do it the easy way, just follow the instructions, throw it in a pan and let it bake.  Piece of...pardon the expression...cake.  But that's not me.  So while the oven pre-heated to 350 degrees,  I set about augmenting what Betty Crocker began.

The original mix comes with flecks of carrot, but not enough if you ask me.  So I started by grating 2 carrots.
There were no raisins in the mix, so I got some out of the pantry and looked around for any other treasures.  Eureka! Walnuts!  This cake was gonna rock!

Mixing the mix
The thing about adding raisins to breads or cakes is that they will, by nature, sink to the bottom as the cake is baking - that is unless you prevent it from happening.  And how does one do that?  Simple! Take your raisins and put them in a little bowl.  Now take about 1/4 cup of cake mix (or flour mix if making from scratch) and add it to the raisins.  Stir until everybody is coated evenly, then add everything back into the cake mix...raisins and all.  That little trick will prevent raisins from sinking. Actually I did the trick with the raisins and walnuts mixed together....just in case the nuts wanted to "go south" too.

Cooking carrot cake
Follow all instructions on the cake mix box. You may have to allow for 5 extra minutes cooking time but don't just assume this is so.  Check the cake as you normally do, with a toothpick or thin knife.  Let it cool for about 10 minutes before removing from the cake pan.   This cake can be served frosted or not.  I usually just sprinkle some sifted powdered sugar over the top.  But if I'm really out to impress I make cream cheese icing.

Carrot, Walnut, Raisin Cake
Of course, there is a pre-made version of the stuff too if you want to follow the "store bought" theme to its very end.  But I'd suggest adding a little extra cream cheese to the boxed icing.

I'll be adding a from-scratch carrot cake recipe to the blog soon for all the purists out there.  If you'd like to send some of your cake recipes....from scratch or boxed additions, feel free.  And don't forget to Enjoy!

Monday, October 31, 2011

Halloween and Beef Stew


Here it is, Halloween! 
Don't you just love this time of year?  I sure do!
From the pumpkins and costumes to piles of crunchy leaves and chilly nights, Autumn is a very special time!

If Halloween hadn't been invented, we'd have had to come up with some sort of holiday to acknowledge this season!

As a kid, I'd worry for weeks over costumes and "bag strategy."  I grew tired of the princesses, pirates and clowns that were available at our local Five and Dime store.  My last such store bought outfit was a Micky Dolenz costume....I actually got it more for my growing Monkees collection than for actual trick-or-treating. 

What I enjoyed most of all through the years was when I made my own costumes....usually with just things I had around the house.   One year I was a sack of laundry, and when I was done with it as a costume I just popped the clothes into the washing machine! 

As I got older, I started going "Halloween Caroling" instead of begging for candy and doing tricks.  Doing this enabled me to crash parties without crashing them. 

My unsuspecting host or hostess would ask "Oh! You actually use that guitar?!  How's about a tune?"  
Of course I'd have to oblige....with songs like "Silent Night, Haunted Night," "Here Comes Frankenstein" (to the tune of "Here Comes Santa Claus"), "The Twelve Days Of Halloween," and "We Three Ghosts" to name a few.  Most folks seemed to like it.

This year we're celebrating the holiday in a more low-key fashion.  Jack's health issues makes him tire easily, so rather than going through a lot of stress we decided to spend the evening together, just the two of us; a nice meal, a couple of horror flicks on the t.v.....perfect!

My "cauldron"
I wanted something for dinner that would incorporate the colors of autumn within the confines of a one pan, healthy meal. Jack suggested Beef Stew with Biscuits.  So that's what I did. 

Grab yourself a cauldron and some Witches' Brew, chase the bats from the belfry and tell Dracula to go get some take-out....let's cook!

1/4 lb per person

AUTUMNY BEEF STEW


Meat-wise, 1/4 lb of uncooked cubed meat per person is the rule of thumb
1 onion
1 large or 2 small rutabaga
1 or 2 potatoes
3 or 4 large carrots or 1/2 bag of baby carrots, cut up
1 yam
1 or 2 crowns of broccoli cut up
1 to 2 cloves of garlic
1 or 2 bay leaves
2 tsp corn starch
1/4 cup cold water
Seasonings to taste
2 cups of broth (from pan drippings after browning the cubed meat and veggie steaming water)
Any other ingredients you'd like to add....kitchen sink included!

Prepare almost everything in the same pan to insure maximum flavor! The exception would be those veggies that require extra cooking.  Use a steamer for things like your chopped rutabaga, carrots, potatoes.  Steam them 'til they're about 3/4 done.  Use the steaming liquid as your "water" for the broth base.
Steaming the "hard" veggies


Brown the meat with chopped onions and garlic, set it aside.  Add 2 cups of  the steaming water to the pan drippings, let simmer for about 10 minutes.  Add bay leaves, veggies, starting with the steamed ones first. Let this cook for about 10 minutes.

Add , broccoli, what ever other "softer" veggies you might have.  Let this simmer for about 15  minutes. Taste.  Adjust your seasonings.  Add meat and any remaining ingredients.  Let simmer another 10 minutes and taste again.  Some folks like a thin stew, but if you want to thicken it, mix the cornstarch and cold water together then add to the stew.  Let simmer another 5 minutes or so.  Taste again, adjust seasoning.
Let sit 1/2 hour before serving

HERE'S THE SECRET- Let it sit for about 1/2 hour before serving, this allows it to cool down for a bit, and also helps the flavors to mingle and work with one another.

Serve with a salad and  good bread or rolls.
Serve with rolls and salad

As usual, if you have any suggestions, comments or recipes feel free to share!
Enjoy!

Saturday, October 22, 2011

LIVING AND COOKING - Stuff and Stuffed Cabbage

Live goes on....and so it goes.
Sometimes it's so crazy
sometimes it just flows...

Been going through the aging process, aren't we all?  Remembering when things were so different.  Laughing at sounding so much like the "old heads" from our yesterdays. Funny how this window/mirror thing we glance through from time to time knows just which buttons to press. And when.
Gravity's no friend, either.
But what the heck.

Someone asked me the other day if I wanted to die my now grey flecked hair.  I want to wear the process of my living, and what better place than my head?  Doesn't mean I won't trim the bangs now and then. But hey. The grey hairs are mine.  I earned 'em!

This is the kind of stuff that goes through my head some nights when I can't sleep.  Err, well....I mean when I am still awake past 3 a.m..  Of course other nights hold different thoughts.  Tonight I'm thinking of my mother....the first person who taught me how to cook.

She had a large brood to feed on a limited budget but managed to not only feed us, but instill in us a good relationship with food, and interest in cooking and the importance of sharing meals with loved ones.  Her hair is the same soft, snowy white her father wore to his last.  It is beautiful to me.  Should I ever have the great fortune to sport the same feature, I'll grow it long and proud.

Anyway, one of Mom's dishes was a version of Stuffed Green Cabbage. I wrote a recipe for Stuffed Purple Cabbage in the blog "Fifty Five Is The New..." .  This dish uses the tight-headed green cabbage available at most grocery stores, farmers' markets and green grocers.

It's the one Mom prepared for us with her own special flair. She used canned tomato soup with 1/2 can of water per soup can, made her meat mix with ground beef, rice salt and pepper.  I believe she may have diced some onion or used some onion flakes in the meat mix too.

I remember the first time helping her steam the cabbage.  She showed me how to cut the great round things in half after taking off the outer leaves.  The halving not to occur 'til after a proper washing under some cool running water, of course.

There were carrots to cut in quartered lengths, onions to be coarsely chopped and, the funnest part of all, rolling the meat/rice mixture into steam limped leaves and tucking them sweetly into the bottom of a cabbage leaf-lined and sauced oval baking pan.  Mom would toss a few carrot and onion chunks hither and yon about the pan and between the swaddling morsels. Then she'd add some remaining liquid, cover the pan with aluminum foil and bake it for 45 minutes in an oven set to 350 degrees.  After 45 minutes she'd remove the foil and let it bake for an additional 15-18 minutes.

Anyway, we were in the mood for Stuffed Cabbage so I set about making it with what we had on hand.
Our last shopping foray garnered, among other things, a nice firm head of green cabbage so we were on the right track.
Oval pan

A quick pantry check showed no tomato soup around, but a can of chopped tomatoes.   Close enough.
We had plenty of rice, onion, carrots - even an oval pan!  Well, all-reet!

The plan was to make something similar to Mom's original.  I was using ground turkey, diced tomatoes , a few fresh tomatoes, some left over broth from a previous evening's roast as the broth, so there were going to be differences.

TURKEY AND RICE STUFFED CABBAGE with TOMATO and STOCK SAUCE

Ingredients for Stuffed Green Cabbage
3 lb ground turkey
1 1/2 cups cooked white rice
6 -10 carrots cut in quarters - reserve tips to grate into meat/ rice mixture
1 - 2 yellow onion(s) coarsely chopped
salt (optional) pepper (optional) to taste
2 fresh tomatoes, diced fine
1 large can diced tomatoes -
     if you prefer, 2 cans of tomato soup plus 1 can of water
1 large head of tight-leaf green cabbage
2 cups stock


Remove the outer cabbage leaves.  Wash the cabbage under cool water then chop it in half. Notice the hard section at the base of each half?  That has to be removed.  There will be some other hard features that will require surgery as well, but more on that in a bit.
The trick here is to use your knife more like a scalpel than a chopper for this maneuver.
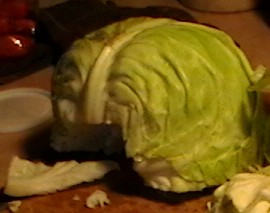
You might consider using a smaller rather than larger blade for better control. Other than that, it's a matter of cutting around the stem base and inner core. You'll end up with something that looks like this picture.  It's a bit helmet-like, or even "brain-like."

 
Get the steamer water boiling and add the carrots. Put the steamer on the pot and start adding raw cabbage leaves to the steamer until it is only 1/2 full. Cover and steam for 5 to 7 minutes while you prepare the filling.

If you don't have a stacking steamer you can soften the carrots a bit by par-boiling them. I just like to partially cook them ahead of time so everything else doesn't turn to mush waiting for the carrots to be done.

The filling is simple.  Put meat in a bowl, add the cooled cooked rice, add spices to your individual taste, grate carrots this mixture. As the cabbage leaves soften, take them out of the steaming basket and lay them out on a large flat surface.

Pour some of your stock into the oval pan, so it just covers the bottom. Take any small pieces and line the bottom of your pan with them.

.  Put this ball in the center of one of the cabbage leaves and wrap the meat like a holiday parcel!   If you run into any hard pieces of cabbage....veins, bits of leave, etc. discard them.  They will not soften with cooking.

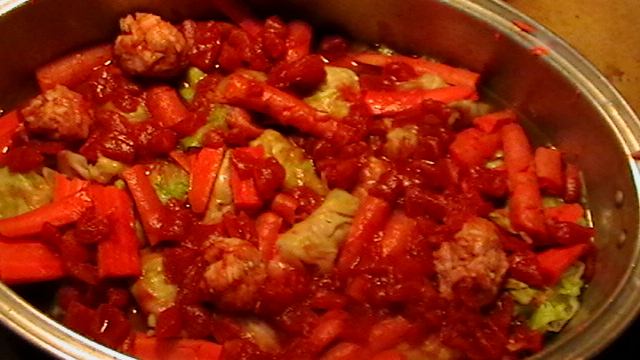
Stuffed Cabbage with Carrots and Tomaties
You may have more meat mixture than cabbage, that's okay.  Just form little balls and place them round the pan. They will cook in the soon-to-be bubbling broth.  Distribute the carrots and diced onion around the pan, Pour the remaining broth over everything then top with diced tomatoes.

Wrap in aluminum foil and cook at 350 degrees for 45 minutes, then remove the foil and allow to cook for 15 minutes more.  Serve with buttered rice.

Making and eating this dish dissolved the miles and other things between us. It was tasty and familiar, even with the differing ingredients.

As always, please feel free to share your recipes and ideas!

Enjoy!


Friday, October 7, 2011

Freakin' Fried Chicken

Mom didn't do a lot of friend chicken when we were growing up.  Not that she couldn't. she just did it another way.  She did it in the oven with her own version of "Shake & Bake," and it usually came out moist, crunchy and tasty.

I've done it that way too, but once in a while I like to do it "old school."  So sue me, I like playing in mud, too!
"Old School" to me is on top of the stove using a deep walled pan, a mixture of Extra Virgin Olive Oil and Grapeseed Oil (cuts the cost a little), using crunched up seasoned cereal and/or potato chips and/or potato flakes and/or crackers and/or if nothing else, bread crumbs for the crust.  Of course there's the standard beaten egg....sometimes I use buttermilk, sometimes milk, sometimes yogurt....I'm flexible.

Flexible...this time with yogurt
Oh!  I also soak the chicken in the milk, buttermilk or yogurt for about an hour before cooking....this step really insures the meat will stay moist!

Always rinse and pat the chicken dry, do this for any meats for that matter. Pierce and season the meat  on both sides with your preference of seasonings.  I use some garlic powder, onion powder, poultry seasoning, thyme and crushed celery leaves.  Some folk like salt and pepper, some don't. Your preference.

I mix the marinating liquid (yogurt in this case) with beaten egg and some more seasonings - crushed garlic, finely diced onion or dried crushed onion flakes, and even a dash of apple cider vinegar then dredge the chicken pieces in this mixture. 

Crumb mixture
After that it's time to roll each piece of chicken in the crumb mixture.  Be sure to coat it evenly and shake off any excess. 

This time I used a combination of ingredients for the crumb mixture -  1/4/ cup each of crushed Cheeze It crackers, crushed Crispy Rice and Jiffy Baking Mix.   This jumble should be seasoned, just like the other components.   A dash of pepper, poultry seasoning, sage, another smidgen of crushed dried onion flakes and perhaps a sprinkle of paprika would be a good thing.   Mix everything thoroughly before dredging the chicken.

Drying on the rack
While doing this dredging, heat the oil in a deep walled pan.  I don't have an oil or candy thermometer so test the oil temp the old fashioned way...with a small cube of bread.   When the oil is ready, add a piece of chicken.  Deep fry five to seven minutes per side, depending on thickness. Let drip on a rack for a few minutes.  If it still needs a bit more cooking time, put in an oven set to 350 degrees for about 10 minutes. 

Fried chicken is a very individual thing, and there are a million ways to do it.  This is just one.   Feel free to submit your fried chicken recipe!  Enjoy!

Thursday, October 6, 2011

Diane's Turkey Parisian

Recipes are more than instructions on how to assemble a dish, they're little scraps of memory....bits of days gone by remembered when put into service.

Diane Sciara my friend
Diane Sciara was my best friend from 1977 through 2008 when she finally lost her battle with Ovarian Cancer.
We shared a lot through those years....parties, people, events and recipes.  We used to entertain often, which  meant inviting friends over for a pot luck supper or other gathering which usually resulted in a great meal.

She had a way of throwing ingredients together and coming up with something imaginative and tasty. We were always trading recipes, even after we were no longer roommates.  The food holidays were important to us.  We'd start planning for them weeks and even months in advance - from entrees through snacks, even if we were celebrating the event separately.  We'd even discuss what to do with leftovers.  Now that's a friend!

One of Diane's specialties was a dish created using left over turkey, broccoli, cheese, cream of mushroom soup and bread crumbs.  She called it Turkey Parisian.   

While at the store the earlier today, I found a special on boneless/skinless turkey breast cutlets and immediately thought of my friend and her wonderful signature dish.  Two guesses on what we had for dinner tonight!

DIANE'S TURKEY PARISIAN

4 to 6 boneless/skinless turkey breast cutlets seasoned and browned
2 - 2 1/2 cups steamed broccoli
3 cups shredded cheese (cheddar, jack, etc)
1 can cream of mushroom soup (or make your own white sauce w/ mushrooms)
1/2 of soup can worth of broth, sherry or white wine (apple juice is a good substitute for sherry)
1 1/2  to 2 cups breadcrumbs or crushed crackers - I used crushed Cheese It crackers this time.
Poultry Seasoning, salt or low salt and pepper to taste

Preheat oven to 350 F 
Lightly spray or grease the bottom and sides of a square casserole dish. Line bottom of dish with a thin coat of breadcrumbs or cracker crumbs.  Then slice the turkey cutlets into manageable pieces and line the dish with them. 
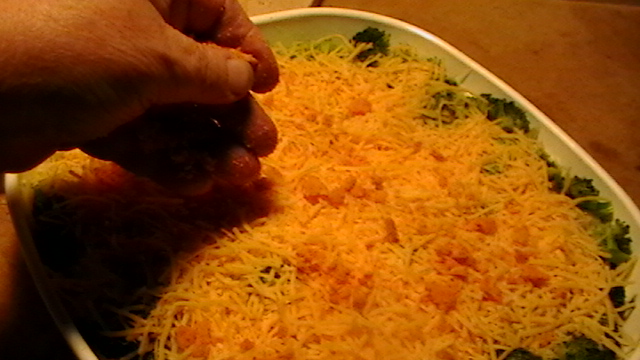
A fine veneer of cheese
Sprinkle a fine veneer of cheese on top of the turkey pieces - don't use all of the cheese, this is just a tad for flavoring.  While your at it, sprinkle some spices around too...but don't overdo it!  We'll be putting some more on top.

Spread the broccoli evenly on top
After the cheese bit comes the broccoli. Spread it out evenly across the top of the cheese and turkey.  Slice any pieces that seem too large.  This will make portioning - and eating- a lot easier! 

Pour sour/sauce over broccoli
Mix the cream of mushroom soup or your home made white sauce with the sherry, wine, broth or juice in a small sauce pan and stir until blended. It should thicken slightly.  Pour  this sauce over the broccoli.  

Cheese then bread or cracker crumbs
Next, sprinkle the remaining cheese over everything.  Make sure you get a nice, even coating over it all.  Then sprinkle the remaining breadcrumbs or cracker crumbs over top.  Finish assembly with a final flourish of spice, then cover it loosely and put it in the oven.

Bake for 15 minutes covered.  Remove cover and cook for an additional 15 to 25 minutes until top starts turning golden and sauce and cheese are bubbling.

This is a yummy stand-alone dish that can also be served with other holiday left overs, salad and/or veggies.  Great for pot lucks, too!

So here's to Diane and her Turkey Parisian! 
As always, please feel free to share your recipes, memories and comments!
Enjoy!

Diane's Turkey Parisian piping hot and ready to eat!

Thursday, April 28, 2011

Confessions of a Cereal Killer

WARNING: The story you are about to read is true.  No names have been changed to protect the innocent.
              
Yours Truly...Confessed Cereal Killer

It all began when I was a mere child.

Back then, we were taught to not waste things. My folks were Depression Era kids, so passed on their frugality to their young-uns.

So to this day, no matter how hard I've tried, it's always the same. Nope....can't do it!  Just can't bring myself to waste things that still have usefulness.

That includes bread ends, leavings from previous cooking ventures (like extra egg whites) and left overs.  Why not?  It's all food, it's all still good and it all cost money.

I actually make a little fuss over the whole thing, pulling what I call a Left Over Luau once or twice a week.
It's where I get to clean out the fridge and we all get to re-visit some of our favorite dishes before they fade into memory, or invent new things out of the combination of ingredients.

But there is one area of the kitchen that usually gets only scant attention.  You know the place; its where the boxes stand in rows like buildings on Wall Street, awaiting the morning's feeding frenzy.   Where Puffed Wheat, Rice Krispies, Oatmeal, Cheerios and Corn Flakes hold court.

It's the pantry....
It's where I hunt down innocent remnants of morning favorites and bring them to their end.
It's where I do my thing. 

I'm a Cereal Killer....no use hiding anymore.
I use up left over bits of flakes, ohs, krisps, puffs and so on....be it quiche or quick breads, entrees or entertaining snacks, I find a way to bring those mostly empty boxes to their demise.

I've used Oatmeal for breadcrumbs in meatballs, Raisin Bran in cakes and mixed in with brown sugar, butter and a little flour for topping peach cobbler, and even Rice Krispies (or their low-budget alternative) as coating for chicken, chops, veggies and-with added sweetening-confections.

I confess to it all...the endless rolling pin poundings, food processor crunching and even mortar-and-pestle torture of those innocent grains. It's me ! It's me! It's me!
And you know what? Given the chance I'd do it again!
Especially these days, when cereal prices are going through the roof! (providing you still have a roof left for them to go through!)
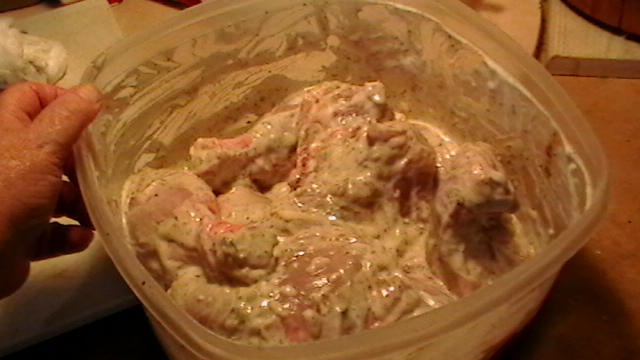
Chicken awaiting its fate


My most recent victim was a box of Crispy Rice that had seen fresher days.  (See...I don't often go after the newbies).
Oh, it still had a few snaps, crackles and pops left....albeit the bargain variety....so I knew there'd be some crunchiness.

And then there were those chicken thighs...just laying there, freshly washed and dried, skinned and boned....waiting for something to happen.

I confess to the killing of that box of Crispy Rice....and this is what I did.
You can check the forensics, they'll confirm my story. 

CRISPY RICE FRIED CHICKEN

Jack had been asking for fried chicken lately, but I didn't want the usual breaded variety. So I went to my usual haunt....the one place I knew where I could troll for something just right. 
There it was! My hunt was over!
Crispy Rice!  The cereal would be perfect for the job!  
So with rolling pin and ZipLock bag at the ready, I began my dastardly deed by pounding that semi-stale stuff into submission (for lack of better terms) so I could have my way with it....and produced what is now called Crispy Rice Fried Chicken. 

12 - 14 chicken thighs-skinned, boned, rinsed and towel dried
dash of salt/low-salt, pepper, garlic for chicken
2 cups milk (butter milk is better but regular is okay too)* for soaking
2 tsp (or more if you like) Worcestershire sauce
3 - 4 cups powdered Crispy Rice (Rice Krispies or which ever brand)
    (At this stage, I call it Crispy Rice powder for lack of better term)
1/2 to 3/4 cups sifted flour
1/2 tsp baking powder
1 large or 2 small eggs beaten
oil for deep frying

Get a heavy, deep skillet or wok and put enough oil into it for deep frying.

Have all your tools handy-slotted spoon for working with chicken in the oil, something for draining the raw, milk soaked chicken, something separate for draining the cooked chicken, paper towels, bowls, the whole bit.
Set up your "stations."   (prep over here....cooking over there....cooling yonder)  Having everything ready ahead of time really helps!  Take it from an experienced Cereal Killer.


Then turn your attention to the chicken.
Sprinkle both sides with the dashes of salt/low-salt, pepper, garlic and even what ever other seasonings you want under the coating.
Add the Worcestershire sauce to the milk. Put Chicken into the milk mix to soak for about 15 minutes.

Crispy Rice powder
Next, take the Crispy Rice powder and put it in a bowl.  Add the dried seasonings, flour and baking powder and stir around with a spoon until fully blended. If you like more spice, add more! If you like less, don't use so much.  Spices are like religion....a very personal thing.
Seasonings for Crispy Rice powder -
to taste, but assume about 1 to 2 TBS
dried thyme, dried sage, dried sweet basil, dried marjoram, garlic powder, dried celery leaves.
  The following seasonings also for Crispy Rice powder are to taste and dietary considerations.
         No measured assumptions given here!  Salt or low-salt, pepper,dash of cayenne and/or lemon pepper

When the chicken has soaked for 15 minutes or so (longer is okay too), remove it and let it drain.

Turn on the flame under the oil to medium so that the oil's temperature "comes up" rather than heats up too fast. Best oil temp for this task is between 350 and 375 degrees.
We don't want it to start smoking!

Take the milk mixture and add the beaten eggs. Whisk until everything is mixed up thoroughly.
 Dip the chicken into this milk mixture, then coat it with the Crispy Rice powder.  Shake or tap off any excess. You can coat several pieces at a time, but only put one or two pieces in the oil together for frying!
Crowding will cause the coating to crumble off the meat and burn, uselessly, in the oil.

Make sure the oil is hot enough by testing it with a bread cube.  If the cube starts cooking instantly and browns quickly, it's ready.  Remove the bread cube and have at it!

Put the coated chicken piece(s) into the oil -remember NO CROWDING! 
Wok as deep fryer
Fry for 5 to 7 minutes for side one,  5 minutes for side two.  Times may vary, of course, depending on a number of things...size of food, strength of flame-that sort of thing.  My best advice would be to start with one piece and see how it goes.  That should give you a timing benchmark.

Remember to allow the oil to come back up to temperature between frying. A kitchen thermometer is great for this! But if not, a couple of minutes should do the trick.
Draining the chicken

Put the cooked pieces of chicken aside to drain.

When done, allow the oil to cool COMPLETELY before doing anything to it. 
Some people strain the oil and use it a second time-for deep frying only-others put it in a coffee can and dispose it in the usual manner.

You may want to sprinkle some final seasonings over the finished pieces....it's up to you.
I'd suggest putting them in a warming oven for about 5 minutes while you get the rest of your meal together. Salad is a good thing.  I like baked, buttered yams too.  But it's a personal thing.
Fried Crispy Rice Chicken, Yams & Slaw

So there you have it...my full confession, given freely and of my own accord.  I am a Cereal Killer.
And I will strike again!

Saturday, April 23, 2011

Mmmmmmm! Coffee Cake!

Sit back and imagine for a moment if you will....you pulled an all nighter trying to get the last minutes of something important done, now you're tired. And hungry. And also in charge of having food ready for everybody when they wake up. 
Coffee Cake on my mind

Cold cereal would be okay....I mean, why not?  But after looking through the selection you come up with a different idea.  Something to warm the body and soul.

That exact situation is what got me thinking of coffee cake. I was too awake for sleeping, too sleepy for anything complicated but wanted something....something that tasted like morning that was good with coffee.

So here' my version of a Quick Coffee Cake.  This one doesn't have coffee as one of the ingredients, but a few of my other recipes do....so watch for them in upcoming blog entries!


QUICK COFFEE CAKE
Pre-heat oven to 375 degrees

Cake
1 1/2 cup flour
2 tsp baking powder
1/4 tsp salt (low salt is okay, too)
1/4 cup butter or margarine
1/4 tsp cardamon
1/4 to 1/2 cup of sugar - some folk like it sweeter. Start with smaller amount first.
1-2 tsp lemon or orange rind
2/3 cup milk
1 egg
1/2 tsp vanilla

Topping
1/3 cup packed brown sugar
3/4 teaspoon ground cinnamon
1/4 cup margarine

A quick bit of heaven
Grease a cake pan.  (Release spray is fine, so is a thin film of butter and flour)
Sift together flour, baking powder and salt (if used). Add cardamon, mix and set aside. Cream butter, add sugar and cream some more. Beat egg, milk and salt (if used) together. Add to sifted ingredients. Add rind. Mix until well blended. 
Put batter into cake pan, spread it evenly around. Hit bread pan against counter to let air out and get dough even on bottom. 
Mix topping ingredients together and sprinkle over cake batter.  Do not push topping into cake batter- let it rest on the surface. Place in the preheated oven and bake for 20 to 25 minutes.  Place in pan on rack to cool for about 10 minutes before cutting into it.
Then grab a cup of java and enjoy!

If you have any suggestions, comments, questions, recipes or what ever that you want to share, please feel free!

Submit Express SEO Services

Free Web Submission

Powered By Blogger