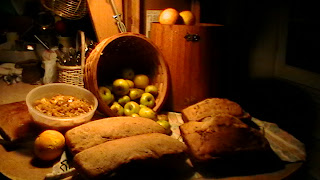
 Bread baking for the holidays!!!! I don't know of a better way to warm up the house on a chilly day (or night) than to crank up the oven and fill the space with that sweet aroma that only comes with the baking of bread!
For Thanksgiving at Jack's sister's house this year, we were asked to bring the bread. I didn't want to just stop by a store and pick up some biscuits...that would have been okay, but GEE!
Rather than do that, I decided to make a selection of wholesome whole grain offerings....2 corn breads, 1 whole wheat/oat and a whole wheat walnut loaf. It took a few days, but I loved every minute of it!
The whole wheat/oat bread is a yeast based so it takes a bit longer than the others, which could be classified as Quick Breads. So I started with that.
BREAD A THON PART ONE - Whole Wheat Oat Bread
1 1/2 Tablespoons active dry yeast
1/2 cup LUKEWARM water - for activating the yeast
1 teaspoon molasses or brown sugar - for activating the yeast
2 1/4 cup HOT water - for softening the oats
1/2 cup unprocessed oats or oat bran
1/2 cup white flour (pure gluten flour will make it rise higher)
1 Tablespoon salt or salt substitute
1/4 cup safflower oil
1/4 cup molasses
6 1/2 cups whole wheat flour (as needed)
2 Tablespoons powdered whole or nonfat dry milk
First things first....the yeast. I have a very fine opinion of yeast and want to treat it very well throughout the process of it becoming bread. So I'm careful to make sure the water used for activating it is Lukewarm....not too hot, not too cool.
 |
| Yeast starting to foam |
 |
| After foaming 15 minutes |
After activating the yeast, put it somewhere warm-not hot! Let those yeasties honker down on that molasses or brown sugar and let it rip! First time I did that, I was amazed!
The oats or bran need some attention, too. Put them in a small bowl, pour the 1 1/4 cups of HOT water over them and give the whole thing a stir. I let this rest and moved on to the dry ingredients.
While that was going on, I combined the dry ingredients in a large bowl.
Hint : Make sure these ingredients are well blended. This is a good time to add any dry base seasonings, too.
 |
| Blending wet and dry |
After that I added the oil, molasses and finally the yeast. Note that I added the yeast last. It's a personal preference....not sure why but it's how I've always done it. Then it was more elbow grease until the dough left the sides of the bowl.
 |
| Ingredients well blended-no longer sticking to sides of bowl |
 |
| Dough division |
 |
| Bread on the rise! |
 |
| Grow little yeasties, grow! |
A little coffee, a little soapy water and the kitchen no longer looked like a disaster area! That done, I double-checked the oven settings, made sure the bread had risen enough, removed the towels then put the filled loaf pans on the on a mid-oven shelf and let them bake for 40 minutes in a 350 degree oven.
Once done, the loaves were placed on a wire rack to cool before packaging for transport.
 |
| Breads cooling on a rack |
Feel free to share your recipes, too! As always, Enjoy!


