 |
| Little City Meats |
Hey. Dreams do come true!
But until then I went as usual to the local Safeway to take advantage of their special Five Dollar Turkey sale. Unfortunately they didn't have any of them left, but had a few in the next higher price range. So I got a 19.85 lb Tom Turkey for $9.00! Frozen, yes...but affordable. Yay! While there I trolled the aisles for any other deals and came home with most of the meal shopping done with ten days to spare! The remaining ingredients were picked up the following day at our local green grocer and Foods Co. market. No muss, no fuss.
Meanwhile, back at the flat.....
While the turkey hibernated in our freezer for seven days, other preparations were underway.
I made bread....lots of bread....different varieties of bread....for Jack's family's Thanksgiving dinner and our own pending feast, and planned to use some as the bread for our stuffing. As the time drew nigh, I collected the designated stuffing breads and broke them into pieces and stored the breads in a deep container. This mixture included cornbread, walnut bread and wheat/oat bread.
 |
| Stuffing packed to cure |
These spices included a bit of poultry seasoning of course, a dash of extra sage, dried celery leaves, dried onion flakes, dried garlic flakes, thyme, a dash of pepper and salt (optional). Naturally, seasoning is a very personal thing...each to their own! Please use spices that suit your tastes.
Once this was done, I set it in the pantry to dry-cure.
I made apple pie and apple sauce for Jack's family's feast and still had time on my hands, so used it to catch up on the blog. I also took this opportunity to make the herb/butter rub that would be used in the marination of the turkey. I put some butter in a container, added fine-chopped garlic, onion, poulty seasoning, sage and thyme and mixed it all together then put it in the fridge for a little blending time.
Then, at long last, it was time to begin the turkey process!
First thing was to defrost the thing. I'm old school on this...a standard take it out of the freezer, put it on a cookie sheet on the bottom shelf of the fridge and let it do its thing for two days, kind of girl.
So that's what I did.
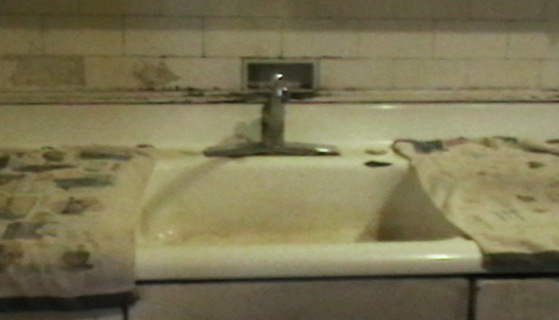 |
| Sink prepared |
Day two found me concentrating on the sink, stove and other work surfaces. Preparing the sink, particularly, took a lot of TLC. After scrubbing it with cleanser and rinsing with hot water, I went in for the kill with a coarse salt and vinegar wash followed by another hot water rinse. No self-respecting germ or bit of dirt dared show its face after such an onslaught of purification!
 |
| Turkey taking a bath |
Satisfied that all was fine, I continued by pulling out the package of giblets and neck that had been nestled within the turkey's large cavity, then put the main body in the sink and turned on the cold water. NOTE: cold not hot water, this is very important!
 |
| Turkey covered and soaking |
There were a few bits of ice inside the cavity, so I decided to let Mr. Gobbler soak in the sink for about 30 minutes. Since we have a cat who is a turkey fiend, I covered our soaking friend with a couple of cookie sheets while I started the giblet basting broth and gravy base.
The giblets (heart, kidneys and liver) and neck (that long thing) are very useful! There's a lot of flavor in those goodies and I was determined to unlock that yumminess, so put them in a pan of water on the stove for a good, long simmer. Soon the house was filling with that familiar, rich, wonderful aroma!
 |
| Piercing pathways for flavor |
Now comes one of the most important parts of the process, getting the turkey ready for marination.
I took the butter out of the fridge and opened the lid. Mmmmmmm!
Starting from the inside, I rubbed that bird from stem to stern with the herb butter, making sure to lift the skin along the two breast sides and rub some in there too. Pretty much anywhere that could have butter rubbed onto it or into it, got it. Then I sprinkled additional herbs throughout and on top of the turkey. Same rule of thumb; if it could be spiced, it was.
Then it was time for a very important decision; what liquid or liquids should I use for the marination?
Any body can soak a turkey in wine; I do it all the time. But gee whiz! I wanted to do something different! I saw the remaining oranges from Jack's sister sitting in a basket and began feeling twinges of inspiration.
There was some bourbon in the cupboard. Bourbon does something wonderful to to food, it goes well with oranges and I felt like doing something wild. Before thinking twice, I added a healthy cup or thereabouts to the marinating bag.
 |
| Marinating in the bag |
NEXT INSTALLMENT: Stuffing and cooking the bird.
As always, feel free to share your recipes here....simply write them as comments, include your name and email....I'll be most happy to give credit where credit is due! And above all else, Enjoy!


