Monday, October 10, 2011

Non-Recipe Recipe - Life is more than a cereal


Families and nations are very similar.  From the way each feuds to the way each sometimes finds common ground, one seems to reflect the other.  Such is the nature of things.

"Out of Order" collage by rcw circa 1989


We've come a long way from segregated water fountains, lunch counters, city buses. We've come a long way from being denied jobs or housing because of an Italian or Jewish or Chinese or Japanese name or likeness.  Women have even made strides....although we're still only earning about $.58 on the dollar.

We live in an ironic world. A world in which the bearers of life are treated as second class citizens and murderers are allowed to roam free.  Weird.


But what, you may well ask, does any of this have to do with the price of pasta?  Good question.

To me there's nothing wrong with commerce done right.  Note the "done right" part?  That's important.
Unlike some folk, I believe that it's okay to reward good performance.  I don't believe that poor performance or even downright laziness or insubordination should be rewarded or even tolerated in a professional setting.

I am confused when I hear that poor performing teachers are given tenure.  No wonder our kids can't read!

This continued pattern is costing us, costing us dearly.

"1000 Points of Horror" collage by rcw circa 1989
What's to be done?
Get involved locally.  Even if you don't have kids in school, find out what's going on!  Our future depends on it!
That's a real recipe for change!

If you want to see a bigger view of the collage, click on it and you'll see it larger in a new window.

If you'd like to add a comment, suggestion or recipe, feel free!
Enjoy!

Friday, October 7, 2011

Freakin' Fried Chicken

Mom didn't do a lot of friend chicken when we were growing up.  Not that she couldn't. she just did it another way.  She did it in the oven with her own version of "Shake & Bake," and it usually came out moist, crunchy and tasty.

I've done it that way too, but once in a while I like to do it "old school."  So sue me, I like playing in mud, too!
"Old School" to me is on top of the stove using a deep walled pan, a mixture of Extra Virgin Olive Oil and Grapeseed Oil (cuts the cost a little), using crunched up seasoned cereal and/or potato chips and/or potato flakes and/or crackers and/or if nothing else, bread crumbs for the crust.  Of course there's the standard beaten egg....sometimes I use buttermilk, sometimes milk, sometimes yogurt....I'm flexible.

Flexible...this time with yogurt
Oh!  I also soak the chicken in the milk, buttermilk or yogurt for about an hour before cooking....this step really insures the meat will stay moist!

Always rinse and pat the chicken dry, do this for any meats for that matter. Pierce and season the meat  on both sides with your preference of seasonings.  I use some garlic powder, onion powder, poultry seasoning, thyme and crushed celery leaves.  Some folk like salt and pepper, some don't. Your preference.

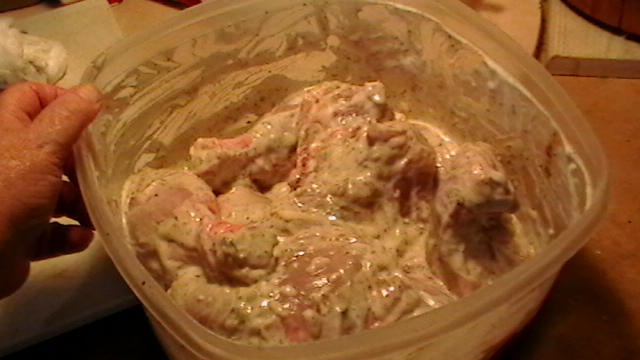
I mix the marinating liquid (yogurt in this case) with beaten egg and some more seasonings - crushed garlic, finely diced onion or dried crushed onion flakes, and even a dash of apple cider vinegar then dredge the chicken pieces in this mixture. 

Crumb mixture
After that it's time to roll each piece of chicken in the crumb mixture.  Be sure to coat it evenly and shake off any excess. 

This time I used a combination of ingredients for the crumb mixture -  1/4/ cup each of crushed Cheeze It crackers, crushed Crispy Rice and Jiffy Baking Mix.   This jumble should be seasoned, just like the other components.   A dash of pepper, poultry seasoning, sage, another smidgen of crushed dried onion flakes and perhaps a sprinkle of paprika would be a good thing.   Mix everything thoroughly before dredging the chicken.

Drying on the rack
While doing this dredging, heat the oil in a deep walled pan.  I don't have an oil or candy thermometer so test the oil temp the old fashioned way...with a small cube of bread.   When the oil is ready, add a piece of chicken.  Deep fry five to seven minutes per side, depending on thickness. Let drip on a rack for a few minutes.  If it still needs a bit more cooking time, put in an oven set to 350 degrees for about 10 minutes. 

Fried chicken is a very individual thing, and there are a million ways to do it.  This is just one.   Feel free to submit your fried chicken recipe!  Enjoy!

Thursday, October 6, 2011

Diane's Turkey Parisian

Recipes are more than instructions on how to assemble a dish, they're little scraps of memory....bits of days gone by remembered when put into service.

Diane Sciara my friend
Diane Sciara was my best friend from 1977 through 2008 when she finally lost her battle with Ovarian Cancer.
We shared a lot through those years....parties, people, events and recipes.  We used to entertain often, which  meant inviting friends over for a pot luck supper or other gathering which usually resulted in a great meal.

She had a way of throwing ingredients together and coming up with something imaginative and tasty. We were always trading recipes, even after we were no longer roommates.  The food holidays were important to us.  We'd start planning for them weeks and even months in advance - from entrees through snacks, even if we were celebrating the event separately.  We'd even discuss what to do with leftovers.  Now that's a friend!

One of Diane's specialties was a dish created using left over turkey, broccoli, cheese, cream of mushroom soup and bread crumbs.  She called it Turkey Parisian.   

While at the store the earlier today, I found a special on boneless/skinless turkey breast cutlets and immediately thought of my friend and her wonderful signature dish.  Two guesses on what we had for dinner tonight!

DIANE'S TURKEY PARISIAN

4 to 6 boneless/skinless turkey breast cutlets seasoned and browned
2 - 2 1/2 cups steamed broccoli
3 cups shredded cheese (cheddar, jack, etc)
1 can cream of mushroom soup (or make your own white sauce w/ mushrooms)
1/2 of soup can worth of broth, sherry or white wine (apple juice is a good substitute for sherry)
1 1/2  to 2 cups breadcrumbs or crushed crackers - I used crushed Cheese It crackers this time.
Poultry Seasoning, salt or low salt and pepper to taste

Preheat oven to 350 F 
Lightly spray or grease the bottom and sides of a square casserole dish. Line bottom of dish with a thin coat of breadcrumbs or cracker crumbs.  Then slice the turkey cutlets into manageable pieces and line the dish with them. 
A fine veneer of cheese
Sprinkle a fine veneer of cheese on top of the turkey pieces - don't use all of the cheese, this is just a tad for flavoring.  While your at it, sprinkle some spices around too...but don't overdo it!  We'll be putting some more on top.

Spread the broccoli evenly on top
After the cheese bit comes the broccoli. Spread it out evenly across the top of the cheese and turkey.  Slice any pieces that seem too large.  This will make portioning - and eating- a lot easier! 

Pour sour/sauce over broccoli
Mix the cream of mushroom soup or your home made white sauce with the sherry, wine, broth or juice in a small sauce pan and stir until blended. It should thicken slightly.  Pour  this sauce over the broccoli.  

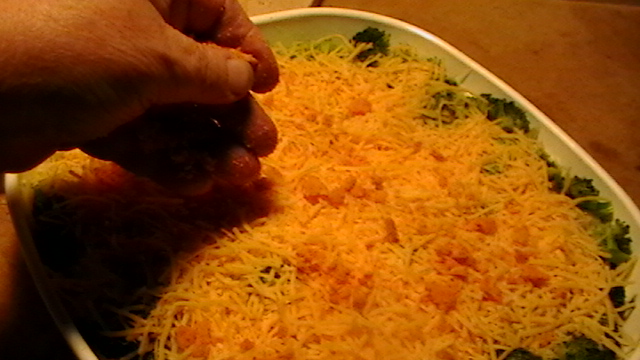
Cheese then bread or cracker crumbs
Next, sprinkle the remaining cheese over everything.  Make sure you get a nice, even coating over it all.  Then sprinkle the remaining breadcrumbs or cracker crumbs over top.  Finish assembly with a final flourish of spice, then cover it loosely and put it in the oven.

Bake for 15 minutes covered.  Remove cover and cook for an additional 15 to 25 minutes until top starts turning golden and sauce and cheese are bubbling.

This is a yummy stand-alone dish that can also be served with other holiday left overs, salad and/or veggies.  Great for pot lucks, too!

So here's to Diane and her Turkey Parisian! 
As always, please feel free to share your recipes, memories and comments!
Enjoy!

Diane's Turkey Parisian piping hot and ready to eat!

Wednesday, October 5, 2011

Confidence Building and the Six Egg "Julia"

Trying to make an exceptional omelet is difficult enough.  Trying to make a true French Chef-type omelet is a fairly daunting task....trying to make it a la Julia Child is, well, humbling and exhilarating at the same time.

It all seems easy enough; whisk some eggs, throw 'em in the pan, let it rip.  Sure.  Ever had to dance with a skillet on a hot burner? That's kind of how it goes when  working with this dish. 

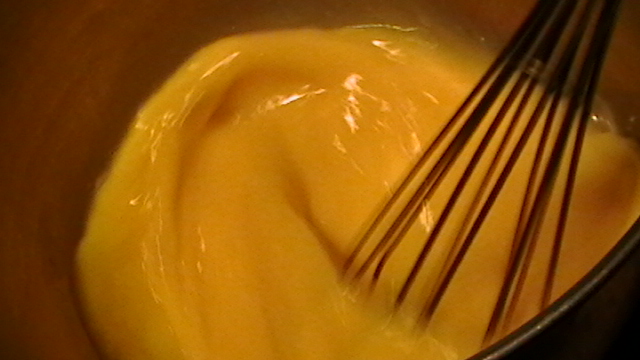
Beat eggs well
Once you've committed yourself to the deed, go at it full steam ahead....stick to it 'til the bitter end.  You'll be amazed with what can be accomplished with a little patience and a lot of elbow grease. 

First make sure your eggs are beaten well.  For this particular omelet, we don't want to capture a lot of air.  That would be essential for the "puffy" omelet, but for this one we just want to beat the eggs into a liquid state.

Surf's up!  See the curl forming?
After that, it's all in the pan action.  Get it hot, get the beaten eggs into it....wait a few moments, then start shaking the pan vigorously across the flame.  As the eggs solidify, you'll notice a "curl" developing along the far end of the pan. Kinda looks like you'd expect a surfer riding on the thing. That's good! Keep it up!

You'll notice the egg acting more like a crepe, moving as a unit around the rest of the pan. This is when I start adding ingredients...cheese first, then tomatoes and this time some pepperoni that had been heated earlier in a pan to cut down on the greasiness.  In fact I used a dab of the pepperoni grease to lubricate the omelet pan.

Omelet fold close-up
Once your omelet "innards" are added give the pan another shake, this time when you shove forward, lift the far side of the pan slightly toward you.  This will help develop the fold.  Sometimes you'll need to coax this folding with a spatula, sometimes you don't.

In some circles, using a spatula to help with the fold is considered a no-no, but I'll not go there.  It's breakfast, fer cryin' out loud!  I need more than one cup of coffee and a dry piece of toast before venturing that perfection!

Anyway, after the fold is completed I sometimes top the omelet with a little cheese before serving. The cheese's  tanginess especially nice with all that pepperoni!

Some people say you can't make anything less than a six egg omelet...that anything less will not turn out.  I disagree.  I've made "Julia" omelets with as many as 12 and as few as 2 eggs and they all turned out fine. They require the same steps and the same amount of attention to detail.

This dish is appropriate for not only breakfast but lunch and dinner too.  Once mastered, the omelet will become one of your "go to" dishes for quick, tasty, even a little impressive fare for family and company.
Enjoy!  And as always, you're invited to share ideas, recipes and thoughts anytime!

Saturday, October 1, 2011

Corn Bread Chronicles

Being corny
Isn't it an amazing feeling to open a door and have the wonderful aroma of corn bread greet you?  That sweet, rich almost textured scent....letting you know something special is waiting to be served. After a long, hard day there is one thing for certain....

Comfort comes with corn bread.

Done right, this baked good can be a very pleasing gastronomical experience....done wrong, a brick for yon garden wall. The question is, how can something so simple to produce go so horribly wrong?

But first, a moment to acknowledge the traditions of maize...of Corn Woman,  of the ancestors who first grew the maize, dried it and ground it to a flour to make food.  This grain is one without whom entire societies would not exist. Including our present one here in the United States.  Corn, its raising and preparations as taught by Native Americans made it possible for settlers to survive those first several mean seasons.

Corn Bread has gone through a lot of changes since those early times.  Once a simple thing made of coarse ground cornmeal, water and salt, it's gone through a series of make-overs to the point where there are as many variations as there are type of corn and stars in the sky.

There's Cheesy Corn Bread, Jalapeno Cheesy Corn Bread, Bacon Corn Bread, Bacon Cheese Corn Bread and of course Corn Kernel Corn Bread....Blueberry Corn Bread, Brown Sugar Corn Bread, Cranberry Orange Corn Bread, Banana Corn Bread....and so on.  See what I mean?   I've even heard of Chocolate Chip Corn Bread and Cherries with Corn Bread a la Mode. Honest!

We'll get to a few of those other recipes in other blog entries.

Suffice to say we humans must love the stuff; why else would we have it in so many varieties? 
Since we've been at it for so long, why is it we occasionally end up with something more akin to masonry than maize?  What gives?

Some say it's the addition of flour to the mix....the gluten wreaks havoc when it starts to react with the corn/egg/oven heat thing.  Purists don't allow flour anywhere near their cornbread! They shun the whole idea as if hearing blasphemy.  Go ahead!  I dare you to bring a flour sack to the mixing table in a proper Southern (or even Northern) traditionalist's home!  I'll sit over here until the storm blows over.

I've tried it both ways.  In fact, the first way I tried it was with cornmeal, flour, sugar, eggs, milk and shortening, cooked in a loaf pan. It was heavy, kind of gummy and well,  I wasn't pleased.

Luckily this wasn't a Home Economics assignment or anything....just an experiment.

Through the years I've tried dozens of recipes and methods.  Some of them were successful, brilliantly so.   Others were....well....not so brilliant. But from these trials and errors I learned a great deal.  The first thing is that maybe loaf pans aren't such a good idea for cornbread.  Such pans tend to force this bread's batter into strange behavior.  It wants to be cooked on the outside but stay pudding-like within.

Store brand yellow corn meal
Ingredients play a role too. Some people will insist on adding flour....saying that without it the bread will be hard as a rock.  I've had that experience too, which is why even without the flour I add "lifters."  What are these "lifters?" Eggs and baking soda, plain and simple.  Baking powder is another "lifter."  And don't forget to include the air that you beat into the egg before adding it to the batter - it has merit, too.

The type of cornmeal used can be important.  Stone or Coarse ground will act differently than fine ground.  The bread's texture and density will vary depending on the type grind used.

For cornbread, my favorite cooking vessel is a cast iron skillet, heated in the oven with bacon drippings or oil. Periodically I try a batch in a regular loaf pan with limited success.  When it does work out, it's because I've pre-heated the greased pan before filling it only half way with batter and placing it in the center of the oven all by itself for around 40 - 50 minutes.


So here are a couple of recipes that have worked for me.  I hope they work for you.  Let me know!


SKILLET CORN BREAD
Preheat oven to 375 F.

3 Tbs. bacon drippings, lard or oil
1 1/2 to 2 cups of coarse ground cornmeal
1 cup buttermilk
1/2 tsp baking soda
Salt to taste (optional)
1 egg, beaten.

Put the bacon drippings, lard or oil on a cast iron skillet, then put it in the oven to heat.

Add dry ingredients (cornmeal, baking soda, salt) together in a large bowl, pour in buttermilk, beat egg before adding to the batter.
Check to see if the pan is ready. It should be smoking hot.  Pour the batter into it. The pan should sizzle and begin to fry as it hits the fat-lined pan.  Put in the oven and bake until golden brown.  Check after about 30 - 40 minutes

You can add a can of creamed corn to this recipe if you want real corn "berries."  If you do, reduce the amount of buttermilk to about 1/4 to 1/2 cup.

QUICK CORN BREAD
Preheat oven to 400F 

3/4 cup yellow cornmeal
1 1/4 cups all purpose flour
1/4 cup sugar
2 teaspoons double acting baking powder
1/2 teaspoon salt (optional)
1 cup milk
1 egg beaten
1/4 cup bacon drippings or vegetable oil

Grease a heavy loaf pan and put it in the oven to heat. This step is very important.
While pan heats, blend all the dry ingredients together. Add remaining ingredients until dry ingredients are just moist. Check to see if the pan is ready.  Again, it should be smoking hot.  Pour batter into the pan and bake for about 20 to 25 minutes or until a toothpick inserted comes out clean.  Serve warm.

To add a can of creamed corn to this recipe, you'll need to lessen the amount of milk in your recipe to about 1/4 to 1/2 cup.

Cornbread is a great thing for any time of day....from breakfast through midnight snack.  It's a great accompaniment to chili, is perfectly at home sliced thin and pan toasted with melted cheese and can even be coaxed liven up that old stuffing recipe you've been using for years.

Here's to cornbread!!!
Please feel free to share your ideas, recipes and comments!
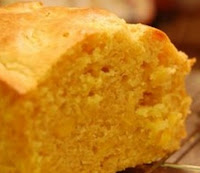
Skillet cornbread
Loaf pan cornbread

Friday, September 30, 2011

THOUGHT FOR FOOD - Grocery Shopping Doesn't Have To Be Gross

Site of the "dreaded deed."
Some people really hate grocery shopping.  They'd sooner get stuck with some other, far more grodie task than push a basket around looking for food bargains.  In fact, I know some people who can honestly claim that the only time they step foot in a supermarket is to pick up beer or for some other dire emergency. 
Disabled cart - my chariot.

Personally I like doing the deed.  I like comparing prices, seeing what's available and to be honest, I like driving those motorized carts around the store.
I walk with a cane or crutches; those ride-around thingies make the process so much easier.  Like the Beach Boys say....Fun ! Fun! Fun! I only wish the baskets were a little bigger.

Don't get me wrong - grocery shopping it is a chore, especially these days when prices are going up almost daily. In fact it's downright maddening to watch as coffee prices, for example, rise from $7.89 to a whopping $15.49 in one seven day span.  I know, I've seen it.  And we shop the "cheap" stores!


An intimidating sea of shelves
It can be downright intimidating....this sea of shelves. So what is one to do?  How does one get in there, get it done and get out of there without going into sticker shock?  Let's be honest....you can't.  But you can take charge of your choices, modify your eating habits when possible to incorporate less expensive items, check the ads for specials and, if need be, shop different stores for the best bargains.  Just remember to include the cost of fuel in your hunting expedition, that's the only way to get an understanding of your savings....if any.

Shop carefully.  Don't be in a hurry when gathering your foodstuff.  This isn't about just schlepping a basket around and grabbing things off shelves. You're in control of the health and well being of yourself, your household...and your wallet!

Realize that lots of stores have set up the shelves to their benefit, not yours. Look around, above and below your normal field of  vision.  Sometimes there's a deal right below or above the more costly item. These stores are literally banking on the fact that you're not paying attention.  As they say, "It's business."  So make it your business not to let them do their business on you!
Go into a store sometime when you're not shopping for the week.  Walk around and you'll see how things are placed. Call it marketing, call it manipulation. It's a real eye-opener!
Some have suggested shopping the perimeter of the store first. That's usually veggies, dairy, meat and breads first. The other items are in the aisles. It's worth considering this "map," as it gets most of the essentials out of the way first. 

Make a list before going to the store.  Categorize the list into sections that make it easier for you to find things.  If you normally start your foraging in the vegetable aisle, start your list with veggies.  Also, distinguish between "essentials," and "wanna gets, " taking care of the former before moving on to the latter. 

It would be good to have menu plans in mind before embarking on your expedition. This can be a little tricky, with prices changing every week.  Look for ads in the paper and online. Plan menus accordingly. Clip...click, print and use...coupons when they really are a bargain.  If you don't normally like or eat snails, why would you want to buy them just because they're on sale?  Impulse buying is bad for a budget!

Have an open mind. Don't be afraid to try store brands.  Sometimes they're pretty good substitutes.  For example Jack likes canned spinach....especially Popeye brand.  I understand. There's nothing like that crusty old sailor's face and name emblazoned on the label to bring back memories of childhood and Saturday morning cartoons.  But at close to $1.79 a can, we're talking a fairly expensive trip down memory lane!

So I bought one can of Popeye brand and one store brand and did a blind taste test.  Truth is, Jack couldn't tell the difference.  I might have noticed that the Popeye version was slightly more salty, but other than that it was fine.  Price comparison - Popeye brand $1.79  Store brand $1.19.  The math speaks for itself.

Chinatown, S.F.
Don't go food shopping on an empty stomach.  If you want to cause a negative impact on your food shopping dollar, going to the store with a mean case of the munchies will do the trick. It's amazing the things you'll bring home under the influence of a growling belly!  On the one hand it can open new vistas, like discovering lychee nuts.....but on the other? I don't even wanna go there!
Local green grocer
Some things are available cheaper at dollar stores.  I buy a lot of my cleaning supplies that way.  Same thing with local farmers' markets or, in my case, the local green grocer. I live near San Francisco's Chinatown, and not too far from the Mission District either, so have bargains practically at my front door! There are also plenty of Farmers' Markets throughout the city.  Talk about location!

Dollar store delights
 If you're fortunate enough to have these valuable resources nearby, take advantage of them!  The difference is astounding!  Just one example: Ginger at the local supermarket is about $2.00 for a tiny scrap.  At the local Chinese green grocer it's $0.75 for a whole hand! (that's what they call a whole ginger....and it kinda looks like a hand, too)

Food display theater
Use your senses. Learn to recognize when food looks old, feels old and smells old.  Don't trust the lighting right at the meat or vegetable counters. Go to the middle of the aisle and look at the thing under "real" lights.  If the bottom of the broccoli looks brownish or woody....if its tops have yellowish or brown patches...consider it too old for rock 'n roll.  Most certainly too old for your table!

Above all else, find ways to enjoy the task.  Don't go shopping when you're too tired.  Of course this can't be helped some times...schedules being what they are.  But when possible, go in a relaxed and unhurried frame of mind.  When possible.  I know.

If you can't do the shopping for yourself, write a detailed list and hope for the best.  If your helper is someone who knows your tastes and budget, you'll probably do fine.  But still, don't assume!  Make sure they know what's important - and if need be what options might be acceptable.  

There are times when I need help; arthritis being what it is there are days when even riding on one of those drive-around grocery carts is not an option. My grocery list for this situation is far more explanatory.  I'll include not only the item but if appropriate the brand (or off brand) name, quantity and even alternate suggestions in case the original item isn't available.

While this sounds like a lot of extra work, it's also one way to avoid the heartbreak of inferior or wrongly purchased products. There's nothing worse than friends at odds over a grocery run.  

In some stores you can save money packing your own groceries,  re-cycling grocery bags or using those cloth sacks.  Check your merchant's policy on this.

We've come a long way from hunting and gathering our food on the open planes, but it all still boils down to the same thing.  Trying to provide for ourselves and our families.   So perhaps we're not that different after all.

If you have any suggestions, comments or what ever please feel free to submit them!
Enjoy!

Wednesday, September 28, 2011

Biscuits in the Modern World

There's not a lot to be said about biscuits that hasn't been said already through the years....that doesn't mean they should be overlooked.  To the contrary!  Biscuits are important, some  might even go so far as to say mandatory with certain dishes.  And they're right!

Imagine if you will a piping hot bowl of stew without a crusty morsel or two getting dunked into the broth?  Horrors!   I know.  It's cruel of me to even suggest the possibility of such a situation.

Ingredients for home made baking powder biscuits
But you get my point.  Some foods just need a little accompaniment.  Like the difference between a solo musician and an orchestra member.  They both have talent and do what they do great....it's just that one doesn't need anybody else in a supporting role, the other one does.

Biscuits are part of that long breadline stretching all the way back through history to when the first of our ancestors pounded the heck out of something and made flour then mixed it with water and threw it on a rock in the fire. Mind you, they didn't have baking powder back then, so it would have been unleavened.

Still, imagine the "ughs" of approval around the dinner boulder that night!  Nothing like woolly mammoth stew with some freshly made cave biscuits!

Although this homey scene is fantasy, biscuits really do have a lengthy history.

Romans were issued portable breads with their rations.  They called these things  "bis coctus""  "Bis coctus" means "twice baked."  If you've recognized the root base of the term "biscotti" in that Latin, you're right!

In America, we reserve the term "biscuit" for very specific bread-types.  In England, "biscuits" mean what we call "cookies." Now the term "cooky" and "cookies" have their own language and history. We'll go into that in our upcoming holiday cookies extravaganza - a week of recipes, info and more in November!

At this point, I do want to give a shout out to a great website.  It's one I depend on for a lot of the food history info you see in this site.  Food Timeline. org.  Here's the link - http://www.foodtimeline.org!

Anyway, back to the action.
Life goes on, the cave people get tired of camping and make houses...they master the art of raising crops and improve upon their culinary skills. Some become Romans and bring the idea of  "bis coctus " into being.  Of course knowing their propensity for "incorporating" other cultures into their own, no doubt "bis cotus" had its origins on some other shore.
No matter. It all leads up to now where we have mixes, brown and serves and even fast food biscuits as possible accompaniment to our daily fare.

So how do we justify this starchy disk in these days of health consciousness and loosing weight?  We don't. We don't have to.  As in the rest of life, what someone eats is a personal choice. Besides, who said biscuits have to be unhealthy? Remember, they can be made using whole grains, just modify the recipe to allow for the density. And if you're someone who should watch their carbohydrate intake, there are great recipes out there that will allow you the enjoyment of biscuits without the no-no factor. That's why God made the Internet!

Check out this site, among many others, for diabetes recipes and info: http://www.informationaboutdiabetes.com , it's one of a ka-zillion sites out there just waiting to help you!

But enough of this talk already!  Let's cook!

BASIC BAKING POWDER BISCUITS
Recipe makes about 24 1 1/2" round biscuits       Preheat oven to 450 degrees

1 3/4 cups sifted flour   
1/2 tsp. salt (optional) 
3/4 cup milk
3 tsp. double acting baking powder
4 to 6 Tablespoons butter, margarine or shortening (or a combination thereof) solid and slightly chilled.

Dough leaving side of bowl
Sift flour again with baking powder and salt.  Cut the butter into the flour.  Make a well int the center, pour in milk then work the flour/butter combination into the milk.  Keep working until the dough freely leaves the side of the bowl.

I use a wooden paddle type spoon for this, so the heat of my hands doesn't mess with the dough. 

Turn onto a lightly floured surface.  A sheet cake pan or sided cookie sheet works wonders here.  Much better than having that mess all over the counter. Or you could try taping a few sheets of waxed paper to the counter if you want to for easy clean up.  Either way works, just don't go too wild with the rolling pin on the waxed paper....sometimes it tries to peel up and join the dough!

Knead your dough gently and lightly, folding it only 8 to 10 times. Cut this kneaded clump in half and let one half rest in the bowl while you roll the other out to your desired thickness...about 1/4 to 1/2 inch (depending on  how puffy-tall you want your biscuits).

Cut the dough into shape using a cookie or biscuit cutter that's been slightly floured.

Cut biscuits
Cap biscuit cutter
NOTE: for all you recycling fans out there, try using the caps or lids to things.  I use the release spray caps.   Being an arthritic, this re-use is as much a form of revenge as it is recycling.  See, it's hard for me to get those bloody things to snap off like they're supposed to.  So once liberated, I don't put them back.  Rather than have a bunch of caps laying around, I've found other uses for many of them. Stash cups for paper clips, bin cups for some of my larger spice jars and of course cookie and biscuit cutters! Go green!

Once cut, place the newly formed biscuits on an ungreased sheet.  While you might be tempted to give a distance between each doughy disk, when it comes to these baking powder biscuits - closeness counts!  Rather than having flat crackers, you'll have puffy, tall goodies if you don't space these things far apart. Seriously.  It's better for them to just touch one another, like those tube biscuits we all grew up with.  The closeness inhibits spreading, allowing the little bread-lets to rise together, shoulder to shoulder like a sheet full of Roman soldiers, facing the heat with brave determination.

Out of the oven, ready to eat

Okay, then put them in the oven and bake 12 to 15 minutes.
Serve piping hot with honey and butter, or as a side dish with stews, roasts, chili...you name it.

ALTERNATIVE:
To make drop biscuits, simply use 1 cup of milk, stir dough for only one minute.  Drop by spoonfuls onto an ungreased sheet and bake 12-15 minutes.

YUM!

As always, feel free to share your ideas,  recipes and comments! 


Sunday, September 25, 2011

Remembering Tom and Breakfast For Dinner

Good food...humble fare
Humble fare on a Saturday night....too tired....don't wanna cook.  
Tom King Solomon Jones
It's been a long day getting ready for, then attending our friend Tom's memorial service.  Tom King Solomon Jones was a force in the Medical Cannabis Community; his physical presence will be sorely missed, but his presence in the movement will remain forever. 

He was one of the first people I met at Dennis' Market Street facility.  First there was Hazel, then Teri then Tom.  Long live Tom, long live 'em all!  The service was nice; this was the second one we attended actually.
Dennis 1444 Market St. @ 1997
Some people reverberate in life, their passing causes waves of the need for friends and family to be together...to remember.


The first memorial had been a bit more formal and was held early in the day.
This second one was an outdoor event in Golden Gate Park.  It was foggy and damp, but there were people we hadn't seen since the Co-Op closed. We laughed and cried, as much for seeing one another again as on Tom's behalf. 

It was wonderful, healing. Each hug, each smile soothing some deep pocket of our souls.We remembered Tom,sang, had food, shared our healing herbs after the traditional 420 blessing.  We talked about the real need of a Medical Cannabis Community Center.  Then we sang some more.


On the way back to our apartment, my heart and mind were so full....I whispered a prayer that some day, some how we could make the Medical Cannabis Community Center a reality. 


Once home and changed into our comfies, we were relaxed enough to feel hungry.  There'd been food at the gathering - some day I'll talk about the gastronomical fun to be had at a Community bash.  I just don't want to get side tracked.  

Suffice to say, there'd been food.  We didn't eat much; too busy catching up with everybody to grab a plate. 
So there I stood in the kitchen doorway, not wanting dinner.


The first thing that came to mind was breakfast.  "That's certainly not dinner."  I said to the cat, who is usually terribly interested in kitchen related things. "Okay Wylie, up on your stool. Let's find something."   


Wylie T. Katz

I swear our kitty must have been a chef in a former life.  He sits on his perch - far enough away from the work surface but near enough for him to watch.  And he really watches.  Sometimes I swear I see him wrinkling his nose in disapproval over something I've done. 


So while he got settled in, I parroosed the pantry.  My eyes paused briefly on the Jiffy Baking Mix.  Pancakes? Too much work. Cold cereal? Too cold.  Oatmeal?  Not tonight.  Grits.  Hmmmmm.  Too tired to argue, I grabbed the container.  I also found some corn meal and brought it to the table.  Why cornmeal? You may well ask!  It actually improves the flavor and texture...if done right that is.  Done wrong, it'll create little yellow balls that are impossible to break down.  So if you don't want to add the cornmeal, don!t.  It's okay.
"This is gonna be good." I smiled.  Wylie looked at my findings, seemed to loose interest and hopped down.  I'm sure he was hoping I'd opt for tuna salad.  That can was just sitting there. He'd have been able to bribe a tiny morsel with a well calculated mew, but grits?  To him they weren't worth the effort.

Jack likes his grits "cereal style,"  that is with brown sugar, butter and milk in a bowl.  The consistency he likes is that of pudding - if pudding had goose bumps.  Not lumps, just texture.


I like mine any number of ways.  Most favorite is buttered grits with country gravy, sausages and eggs. These grits are thick, like stiff peak mashed potatoes.  But I like "cereal style" too.  Especially when I don't want to fuss. 


NO FUSS CEREAL STYLE GRITS

2 1/4 cups water (if not adding cornmeal, reduce to 2 cups)
salt (optional)
3/4 cups grits (I use the 5 minute kind)
1/4 cup corn meal (optional -remember to adjust the milk measurement accordingly)
butter or margarine softened
milk warmed

Rapidly boiling water
Use a large enough pot to allow for cereal to expand without spilling over.  Fill with water, cover and heat  to rapid boil.  Lower flame, uncover pan. Add corn meal, stir with wire whisk then cover and cook for 3 minutes.  Uncover and stir with whisk.  Add grits gradually, continuing to whisk while doing so.  

Whisking is essential
Once added, whisk around a few more moments then cover and lower flame to simmer for 5 minutes.  Then remove from heat, keeping it covered for 5 more minutes.  Then whisk it around.  This is where having a larger pan comes in handy.  Add some of the butter and whisk some  more.


If every body wants brown sugar on their grits, you can add it at this point, whisking  it in.  You can add some milk at this point too...whisking while doing so.   This whisking breaks down any large lumps and insures everything gets mixed well.  Spoons don't do this.


Dinner is served
Serve with milk and a bit more butter drizzled over the top.  I always put some extra brown sugar on the side in case anybody needs more.   

NOTE:  For those with dietary issues - you can use a brown sugar substitute with this dish and it'll taste just fine. 


Friday, September 23, 2011

End of the Month Souffe'

Well, here it is....getting near the end of the month and our pantry is looking somewhat ravaged.  And why not?  Since stocking up 30 days ago, we've been cooking (and eating) our way through its contents.  But we still have enough left to get us through, providing we use our larder wisely.


Of course it helps to have planned for this eventuality. 


Every time I go to the store, I pick up a few "extra" things.  Call it insurance. I'd rather do that than be panic-stricken, wondering how to make a meal out of crackers and capers! (Although I might try doing something with that some time....stay tuned! :) )


Looking around  the pantry today, I spotted the ingredients for one of my favorite things to cook....believe it or not, souffle. In this case, Tuna Souffle'-because that's what we had on hand.   

Some people are intimidated by it...all the whisking and beating and thissing and thatting; so much to do!  And so many things to worry about!  White sauce, eggs, egg whites....ugh!  The first time I ever attempted one, it looked like....well, let's just say it didn't look like a souffle!  The thing didn't rise and it was raw in the middle. Thankfully, mine was not the only dud. 


Our Home Economics teacher (shout out to Mrs. Schlosser) was there with patience and sympathy.

As she walked around the room examining each dish, the teacher pointed out what might have gone wrong.  In many cases we simply hadn't done the eggs right.  Either the yellows had started to cook when added to the white sauce creating "scrambled egg islands," or the egg whites weren't beaten enough to help make the dish rise to the occasion.  The other problems were oven not hot enough, cooking time, oven doors slamming and not keeping the oven door closed until cooking time was done.  Picky! Picky! Picky!


When she got to my dish, the instructor nodded.  "What do you think went wrong?"  I looked at her squarely and said "I did."  Naturally.  

Home Ec and I weren't exactly getting along to that point. I mean, wasn't I the kid who just about sewed their hand to the skirt they were supposed to be making for a class project?  The one who sewed the skirt pleats inside out once their hand was liberated from the sewing machine's death grip? And wasn't I the one who was transferred over to cooking to save myself from myself?


Now this....this....puffy cakey thing, for lack of a better term, was about to be my undoing!  Ugh!  


The teacher, a true saint, smiled.  "Looks like you didn't do the roux correctly. Probably not enough flour."  If cooking ever needed a CSI, she'd have been perfect for the job!


The next day we tried it again....and voila!  It worked!  The thing puffed up like it should and was done clear through!   All it took was a bit of patience and a lot of attention to details. 

Those two things still hold true.  Patience and attention to details. You can't rush through making a souffle'...but you can use short cuts.  We'll get to those in a few moments.  But first things first.


BASIC 4 EGG CHEESE SOUFFLE'

Pre-heat oven to 350°
4 eggs (white and yolks separated)
    1 cup milk,warmed
    1/4 cup flour
    1/4 cup butter
    1 1/2 cup cheese grated
    1/4 tsp creme of tartar (optional)
    FOR TUNA SOUFFLE', add 2 cans of drained tuna, 2 diced green onions

Butter the bottom and sides of a large, tall walled bowl. It should be deep enough to allow your souffle' to expand and rise to almost double its size.
Sometimes I coat this with a bit of fine seasoned bread crumbs or a mixture of bread crumbs and Parmesan cheese.  Set it aside.


Beat the egg yellows until they are smooth. They'll probably even get a little lighter in color and stream evenly when you raise the whisk out of the bowl.  Set these aside.
The egg whites will be handled a little later...for now just make sure there are no bits of egg yellow floating in them.
Egg whites are finicky...they won't whip up if there are any impurities hanging around, even if those impurities are other egg parts. Sheesh!

Anyway....
Prepare your roux by melting about 1/4 cup of butter in a deep pan, as it's melting add 1/4 cup of flour and whisk, whisk whisk or stir, stir, stir while this cooks.  The flour/butter mixture should thicken and turn light brown.  (If you're using whole wheat flour it'll get darker than with regular flour). Turn off the heat but keep pan on the burner.

Add a small amount of the roux to the milk and mix. Set the burner on low,then add this milk/roux mixture back to the remaining roux while stirring. Stir until fully blended.  The roux will thicken the milk, which is a good thing.  If you go no further, you have made a white sauce.  Gee!  But we're not done yet.

Tempering egg with a little roux
Reduce the heat. Add a bit of this roux stuff to the egg yellows while whisking. This is how you "temper" the eggs-that is, add them to a hot ingredient without partially cooking them first. Once you see that the eggs and roux have incorporated, add it all back to the remaining roux/milk mixture in the pan...continuing to whisk over a low flame.

Once this is all mixed together, you can add the cheese. Stir constantly while the cheese melts.  If you go no further, you'll have mastered a basic cheese sauce.  Yay! But we're still not done.  Turn off the flame and let this rest while you handle the egg whites.

This is a make or break situation.  Done right, your souffle will be light, airy, soft and moist.  Done wrong, you'll have a dry, hard, springy thing that may or may not be edible.  Maybe as a bread? Hmmmm.
Beating egg whites
Eggs softly peaked
Watch carefully as your egg whites develop.  Some people use cream of tartar to help with this process, but its not necessary.  Sometimes it even makes them too stiff, but what ever is your preference so be it.
Personally I don't use cream of tartar in souffle', preferring it in meringue.

Folding egg white into batter
Now comes the next important step....folding the egg whites into the batter.  Notice I said "fold" not "stir" or "mix" or even "incorporate."

Batter and prepared bowl
You want the egg whites to still be and act like egg whites, so the batter is going to look wrong.
Our Home Ec teacher gave us a hint that still rings true today...when it comes to souffle' the wronger it looks the righter it is!

Next, pour the batter into the prepared bowl and put it in the oven to cook for 30-35 minutes.
While that happens, and if you want, you can make a nice simple sauce utilizing some of the steps we worked on at the start of this recipe. Of course, you'd use a lot less flour!  White sauce, cheese sauce, you name it.  Although not necessary, such a thing would add an extra dimension of flavor to the dish

WHITE SAUCE FOR SOUFFLE'
 1 cup milk
3 Tablespoons flour
3 Tablespoons butter or margerine

Put butter in pan, add flour and whisk over heat until butter and flour thicken.
Add milk and continue to whisk while this mixture thickens more.  Season with salt and pepper to taste. You can add other seasonings too. Some folk even add a bit of nutmeg.


The finished product, Cheese Souffle' with White Sauce will be an unexpected surprise for end of month dining. You don't have to stick to just cheese, either.  Add some tuna, chicken, ham or beef...veggies like diced onion, artichoke hearts, shaved carrots, peas...the sky's the limit!


Thanks to my Home Economics teacher, I learned that cooking is more than a chore and that making a souffle' can be a lot of fun.

Experiment! Enjoy!

Souffle' with white sauce and salad

SHORT CUT!          SHORT CUT!         SHORT CUT!
 
Sometimes there just isn't time to make a conventional white sauces. That's why God made condensed cream of whatever soups! They come in lots of different flavors and sure cut down on the preparations!
Of course you'll still have to make the roux, no way around that. The roux contains the flour that helps to hold the whole thing together. 
I learned that the hard way in Home Ec class.


Submit Express SEO Services

Free Web Submission

Powered By Blogger