Showing posts with label pictures. Show all posts

Wednesday, December 28, 2011

Quick Chicken Soup For the Cold

There's no worse feeling than having a cold or flu.
Jack woke this morning with the sniffles and a sore throat so I knew we were in for some sort of germ invasion.
We were pretty good in the cold and flu OTC type things, but what Jack needed was some good old fashioned home made chicken soup!

Jack's face brightened beneath the kleenex as I offered to make him some.  There's just something about the stuff...the mere mention of its name sends shivers up the spines of many cold and flu germ!

As luck would have it, I'd been defrosting some chicken thighs in the fridge overnight.  The fridge wasn't brimming, but still had a good selection of soup-worthy options.  I didn't want to make a heavy soup, Jack's sore throat didn't need a lot of challenges. 
I decided to steam some broccoli, carrots and string beans after cutting them into bite-sized pieces. Some onion and garlic are always a good addition.

A lot of people just throw everything into a pot, pour water over the mess, set the heat to medium and let it boil away half the day.   I've tried it like that and to me that's just not soup!  The meat gets so dried out, the veggies get hopelessly limp and mushy, and the only way to get a definable flavor is to salt the poor thing to within an inch of its life.

Cooking isn't just about making food hot, it's about making food delicious.  That requires finding ways to bring out its flavors.  With soup, you can do that by seasoning your pan.  As you're chopping up veggies, throw some odd pieces in the bottom of a pan with a bit of extra virgin olive oil.  Same thing with bones.

See those brown bits that start sticking to the pan?  They're "flavoreins,"....very special combined bits of numminess made possible by the cooking process. Don't let your pan bottom burn.  Once you have a nice collection of golden brown bits, you're done with that process.  Turn off the heat, add some water or broth and stir the flavoreins loose.
You'll notice how the water starts turning into broth.

Strain off the old bones and bits. Their usefulness is done.
At this point, you'll want to add some other ingredients...namely any "hard" veggies you might have.  Things like potatoes, carrots and so on. They take time and the broth is a perfect vehicle for cooking 'em!
Let all that simmer for about 10 - 12 minutes or so, until the veggies are pretty much cooked.  Test it with a fork, the items should be done, but not mushy.

Then it's all about adding everything together.  I add cut up ramen noodles this time.  They only take about three minutes to cook and are a nice alternative to thick egg noodles.
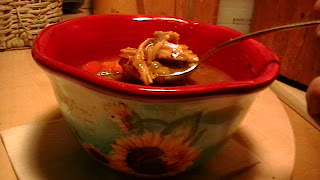
Make sure to add the meat last, that way it won't get overcooked. Taste and make any spicing adjustments.  Then serve.  This bit of Kitchen Penicillin is just what the doctor ordered for cold and flu season.

As always, feel free to submit your recipes for sharing! Include your name (or an alias if you prefer) and you'll get full credit.  Above all else, Enjoy!


Sunday, December 25, 2011

Christmas/Holiday Wishes from Boo Boo's Bargain Basement Band


View from under the tree
Greetings and Blessings of this Season to You and Yours!

When not cooking, blogging about cooking or doing community work, Jack and I can be found working on our music, videos or other projects. Our musical collaboration, Boo Boo's Bargain Basement Band, has been peforming and creatig music since the mid '90s.


Jack and Randi  Boo Boo's Bargain Basement Band


Anyway,here's our Christmas/Holiday card....sent with love.

Click to play this Smilebox greeting
Create your own greeting - Powered by Smilebox
This digital ecard customized with Smilebox

Sunday, December 11, 2011

COOKIE CHRONICLES - Wrapping it up.

So, you're finally done, or at least done enough that you can start dividing cookies into tins, bags, plates and keepers for storage, travel and gifting! This is a milestone in the life of a true preparer of holiday foods! An accomplishment!  Sit back for a moment...maybe take a swig of well deserved Egg Nog!  Well done!

Okay....now back to it!
Antique cookie tin
I usually start collecting coffee cans, cookie tins and little dishes for gifting well in advance of the Holiday season. Garage sales and thrift stores are great for this sort of thing.  But don't overlook your friends for these resources! Many of them received tins of cookies in previous years, or have odd dishes, bowls or baskets they don't want anymore.

Offer to liberate your friends of these contrivances.  Then try to remember not to give the same things back to them filled with your cookies!  Good for a laugh, but gee.

There are folks out there who collect tins for collecting sake; they've been around a very long time and many have interesting designs on them.  Some tins come in the shape of other objects, like gingerbread houses, barns and even fire engines!

Imagine your special recipient's face when they open a specialty tin to reveal your very special cookies nestled snugly inside!  Talk about two gifts in one!

What ever you decide to use, there are a few things to remember if you want your cookies to survive travel and handling.

Storing stars and angels
1) Cookies break.  Pack cookies as follows: Heavy ones first - like Oatmeal Raisin, for example.  That's a nice, heavy base, albeit a bit bumpy.  Next should something like the chocolate chip, peanut butter or molasses.  This due to their density and/or rigidity.  Light cookies and cut-outs should go on top, as they have a tendency to break easily.  Putting them on top cuts down on the amount of shifting they might do between the other layers....thereby improving their survival rate.

2) Cookies go stale. All your hard work could be for naught if the cookies arrive stale, hard and otherwise inedible.  Hey, we're not making refrigerator magnets here!  It might be wise to put the cookies in plastic bags within the tins....especially if you're not distributing right away.

3) Flavors transfer.  If you don't want your Peppermint Pinwheels interfering with your Peanut Butter & Jelly Drops, put them in separate tins and only combine at the last minute.  I'd recommend putting each variety in its own plastic bag. 

4) If sending through the mails, I'd recommend all of the above, plus bubble wrap around the cookie tin before putting it in the shipping box.  Mark "Fragile" everywhere and hope for the best.  Hey!  Sometimes the magic works, sometimes it doesn't.

5) Make sure you keep a few cookies for yourself!

If you have any other suggestions, ideas, recipes or memories feel free to share them!
And as always, Enjoy!


Thursday, December 8, 2011

COOKIE CHRONICLES - Oatmeal Peanut Butter Raisin Chocolate Chip Yummy and Healthy Cookies!

There's more than one way to make oatmeal a pleasing experience! 
Jack doesn't like the stuff as a cereal, but put it in a cookie and he's a number one fan!  This particular version is one of his favorites.  A little chocolate chip, a little raisin....and a whole lot of yummy goodness!


OATMEAL PLUS COOKIES
(Long Name: Oatmeal Peanut Butter Raisin Chocolate Chip Yummy and Healthy Cookies)
Preheat oven to 350 degrees
4 Sticks butter or margarine softened, 4 eggs beaten, 1/2 cup peanut butter (creamy or crunchy), 2 1/2 cups firm packed dark brown sugar, 2 tsp vanilla, 3 c flour (whole wheat - 2c white flour - 1 c), 6 cups rolled oats, 2 tsp baking soda, 2 tsp cinnamon, 1 tsp cloves, 1 tsp dried ginger, 2 c raisins or other dried fruit, chips (chocolate, butterscotch, peanut butter, white chocolate or combination)

Blend sugar, butter 'til creamy.  Add peanut butter, blend some more. Add eggs and vanilla, beat well. Combine flours, Baking Soda, spices, stir into sugar/butter mixture, add remaining ingredients. Spoon or hand-roll and place 1-2 inches apart on slightly greased cookie sheet. Bake for 10 to 13 minutes. Cool on rack completely before storing.

Healthy, tasty, and easy to make.   Batter can be made ahead of time, rolled in wax paper and kept in the freezer for those times when you just want to slice off some batter and bake some cookies.  Defrost it first to insure even cooking.

Monday, December 5, 2011

COOKIE CHRONICLES - Classic Cookies - Oatmeal Raisin

Cookies with oatmeal
What could be more comforting than a nice warm cup of coco and a couple Oatmeal Raisin Cookies after a long winter's day out in the elements?  And the aroma that fills the house when such a thing is baking is beyond beyond!
A little bread-like, a little desert-like....suddenly all the cares of the world drift away as the cookie's homey nature envelopes the day-weary soul!

There's not a self-respecting cookie plate that would show it's face in public without a good representation of this treat upon it!  Gawd!

There are tons of Oatmeal cookie recipes out there....ranging from simple to sublime.  Some have apples as well as raisins, some include nuts and or chocolate chips, and some even include peanut butter!  My personal favorite is a conglomeration I call Oatmeal Raisin Chocolate Chip Peanut Butter.   As the title indicates, there's a lot going on in that cookie!   I'll include the recipe for it in a separate blog entry.  But for now.....may I present a version of a very simple, very classic Oatmeal Raisin cookie.


OATMEAL RAISIN COOKIES
Pre-heat oven to 350 degrees F
1/2 cup of butter, softened
3/4 cup firmly packed brown sugar - I prefer dark brown
1/2 cup granulated sugar
2 eggs, slightly beaten
1 teaspoon vanilla
1 1/2 cups all purpose flour
1 teaspoon Baking Soda
1 teaspoon ground cinnamon (more if you like cinnamon)
1/2 teaspoon salt (optional)
3 cups Rolled oats - quick or old fashioned - uncooked
1 cup raisins


Beat butter and sugars in a large bowl until creamy.  Add eggs and vanilla. Beat well. Add combined flour, baking soda, cinnamon and salt.  Mix well. Add oats and raisins.  Mix well again...I use a trusty wooden spoon during this part of the process.  It's easier than burning out your electric mixer motor.
Drop by rounded Tablespoons full (or teaspoons full if you want smaller) onto ungreased cookie sheets. Flatten slightly with back of spoon or hand.  Bake 8 to 10 minutes or untily light golden brown.  Cool one minute on sheet. Move cookies to wire rack, cool completely.  Store in air tight container. Makes about 4 dozen.

Sunday, December 4, 2011

COOKIE CHRONICLES - Specialty Cookies - Sugar Peppermint Pinwheels and Cut Outs

Randi and Jack
So how are your holiday preparations going?
Between the decorating, shopping, baking and so on it's amazing any of us survive!  But we do.  And our loved ones are grateful for all the effort.

It's important that everyone gets involved though, so don't take it all on by yourself.  Make a party of preparation and you'll be amazed at how much help is available!

Trimming the tree is an obvious reason for a party, why not decking the halls, too?  That's an opportunity for some kinda fun.  For that matter, make it happen all at once if you can.  Keep in mind that others may not want things the way you do, so be mindful of your tolerance level and just what kind of "help" you want!

We've been concentrating on baking in our household because baked goods are our gifts to folks. This requires a lot of work, so the decorations will happen a little later in the month.  Heck! I know some folks who don't get the tree done 'til right before Christmas Eve.  For now I'm decking the kitchen with coats of flour!

Anyway....
Today's cookies are Sugar Cookie based, but then I took a left turn somewhere and went Peppermint Pinwheel.
And since there was some dough left over that was mixed up, I made some Peppermint Cut-Outs, too.

SUGAR PEPPERMINT PINWHEELS

Add butter mix to flour mix
1 cup butter
2 eggs
2 cups sugar
1 teaspoon Baking Soda
4 cups flour (more or less)
1 teaspoon vanilla extract
1/2 teaspoon of peppermint extract (more if you like it real minty)
3 Tablespoons flour
10 drops red food coloring

Mix dry ingredients in a large bowl.  Cream butter, add sugar and vanilla and beat.  Add eggs one at a time, mix until blended.  Cut dough in half.   Take one section of the dough and wrap it in waxed paper.
Take the remaining dough section, add peppermint extract, food coloring and flour.  Mix until thoroughly blended.  Some folk like mixing with their hands at this stage.  Suggestion: wear gloves if you don't want your hands to turn red!  Of course if they do, at least they'll be minty-fresh!
Wrap in waxed paper. Put both wrapped dough sections in refrigerator for at least one hour.


Prepare surface for rolling dough.  I use an old 1/4 or 1/2 sheet cake pan with waxed paper taped to it.  Sure makes clean-up easy!  Start with either section, but roll it out flat, then add the second layer to it.

Rather than overworking the dough, do this process in small sections, cutting bits off each to make the layers.  I began with the vanilla layer first for this photo.  Kinda looks like pizza, eh?

3 layers rolled
Make sure when you're rolling layers on to one another that you don't mix them together.  You want them to maintain their individuality, as much as possible.  As you can see from the photo, there's sometimes a bit of "bleed through."

Next, roll this dough pizza up like a jelly roll, cut off the rough edges and lookie there!  How pretty!
A real live pinwheel pattern!  Roll up your roll in some waxed paper.  Do the same 'til you've used all the dough.  You'll have some crumbs and cast-offs of mixed up dough....don't throw it away!  We'll use it in the next recipe!

Place your "pinwheel logs" in the fridge for another hour's nap.
Then, Preheat your oven to 400 degrees F.
Cut each log into thin slices and place them on ungreased cookie sheets about 1 inch apart. Bake for about 8 to 12 minutes or until bottom is just done. The baking time depends on the slice thickness.  Thinner slices take less time, so you'll have to do a bit of trial and error.

Let the cookies it on the sheet for one minute then put cookies on a wire rack to cool completely.

Sugar Peppermint Pinwheel
 
SUGAR PEPPERMINT CUT-OUT COOKIES

Sugar Peppermint Cut-Outs
Take all of your scraps from the Pinwheels recipe and sort of smoosh them together.  Don't worry about blending anything...the "marbling" will be an interesting affect.

Roll it out and give your cookie cutters a go at it!  Fun! Fun! Fun!  Decorate as you like....sprinkles, sugars, whatever! Peppermint cut-outs!
They go into a 400 degree oven for about 6 minutes.  Let them sit for one minute on the cookie sheet then set them to dry on racks to cool completely.

As always, thanks for your interest in this blog.  Please feel free to share your thoughts, memories, ideas, opinions and even recipes!  I'd love to try some of your favorites!

More cookie madness tomorrow!
For now, Enjoy!

Saturday, December 3, 2011

COOKIE CHRONICLES - Craving Chocolate Chips


Hello, Ms. Chips!
What's one of the most popular goodies on your cookie plate year after year?  In our house, it's Chocolate Chip Cookies, hands down.  There's just something very special about them....recalling childhood days of cool cups of milk and crunchy/chewy morsels packed with chocolate bits; a year-round cookie that never falls from favor and is an absolute MUST for the holidays!

There are about a ka-zillion recipes and adaptions - ranging from simple to extraordinary.  Each person, each family has their own likes and dislikes. For the most part, we can agree on one thing...Chocolate Chip Cookies rule!

Someone recently asked the question -  
What's the difference between Toll House and regular Chocolate Chip cookies? 
After some research and with much thanks to the Nestle website, here's the answer:
Chocolate chips ready
They are one in the same!  These cookies were invented in the 1930s by Ruth Wakefield of Cape Cod, who was making a batch of Butter Cookies for the Toll House Inn, the hotel she and her husband operated.  She cut up bits of a Nestle semi-sweet chocolate bar into the Butter dough, thinking they would melt completely, but they didn't.  Instead, those chips became chewy and yummy, retaining their self-hood amid the oven's heat.

The resultant treat was an instant sensation and soon the Nestle company was contacted by Ruth and started making chocolate bits for the home baker with Mrs. Wakefield's recipe on the back.  This is a very abbreviated version of the tale, for a more detailed version go to http://www.ideafinder.com/history/inventions/tollhouse.htm

Choco-Jalapeno Cookies
Through the years I've experimented with and had the opportunity to sample several interpretations of Mrs. Wakefield's invention; including but not limited to Chocolate Chip Oatmeal Raisin Peanut Butter Cookies, Choco-Mint Chip Cookies, Banana Chocolate Chip Cookies, Chocolate Chip Candy Cane Cookies (made with chunks of candy canes) and even Chocolate Chip Jalapeno Cookies. Personal favorite? The Jalapeno, of course!  I wonder what Ruth would think of all these variations.

For Christmas baking, I usually stick to the basics.  Plain CC (Chocolate Chip).  Due to dietary considerations I use Splenda.  This year, I'm trying some Crisco Butter flavored vegetable shortening too - no transfat....another dietary adaptation.

Crisco Butter Flavored Shortening
This Chocolate Chip recipe involves use of Crisco's Butter Flavored Vegetable Shortening. Mom used original Crisco in her Chocolate Chip Cookies years ago. She'd use butter or margarine in many of the other cookies, but for some reason always went to Crisco for her 'Chippers.  I remember her teaching me about measuring the stuff into a metal measuring cup.

I'm using "regular" brown sugar here, partially because I couldn't find any Splenda Brown Sugar in my local stores, and partially because I'm not sure how the sugar substitute will work with the Crisco.  I'll do a little research and report my findings to the blog....naturally this will involve a recipe, so stay tuned!

One important thing to remember - If you're hoping to substitute Crisco Butter Flavored shortening for butter or margarine, just follow the suggestion printed right on the product! 


CRISCO CHOCOLATE CHIP 
or TOLL HOUSE COOKIES

Preheat oven to 350 degrees
1 1/4 cup firm packed light brown sugar
3/4 cup Crisco Butter Flavored Shortening
2 Tablespoons milk
1 Tablespoon Vanilla extract
1 large egg
1 3/4 cups all purpose flour
1 teaspoon salt (optional)
3/4 teaspoon Baking Soda
3/4 cup semi-sweet chocolate chips
3/4 cup milk chocolate chips, coarsely chopped

Double spoon method
Combine all dry ingredients in a bowl.  Cream Crisco and brown sugar together until light and fluffy, add egg, beat until mixed in, add vanilla and milk. Mix together.  Add to dry ingredients and mix until fully blended. Add chocolate chips a bit at a time, making sure to distribute them easily throughout the dough.  Let dough rest a few moments.

Using the "double spoon" method, put 1/2 to 1 spoon of batter per cookie onto ungreased cookie sheet, spaced about 1 to 1 1/2 inches apart.  Bake 8 to 10 minutes for chewy cookies, 11 to 13 minutes for crunchy cookies.  This recipe makes about 3 dozen.  Recipe doubles easily.

As usual, feel free to share your ideas, thoughts, memories and recipes here via the comments box.
And as always....Enjoy!
Crisco Chocolate Chip Cookies


Friday, December 2, 2011

COOKIE CHRONICLES - Sugar Cookies Secrets and Two Recipes

Crank up the Holiday music, it's time for our cookie bake-a-thon!

Christmas (or Holiday if you prefer) cookies are very special, very magical things....from plain to fanciful decorated cut-outs, Sugar Cookies hold a firm place on the plate; one not to be taken lightly.

Although they may seem easy to make, don't let their simple ingredients and recipe descriptions fool you!  It's ever so easy to overwork the dough, especially when making the cut-out variety!

Hand stirring to avoid over work
How does dough get overworked?  Too much handling.  Everything from your hands' heat to over rolling can cause lots of changes within that complex system of ingredients that are trying to mesh together!  Flour's gluten wants to be sticky, fat wants to attach to everything, sugar wants to dissolve...so does salt but they each do their own thing in the process.  In short, that bowl of stuff sitting before you is alive with interaction!  The trick is to make it work for you, not against you.

One thing that helps is to let your cookie dough rest.  I like to separate the dough into two or three balls after it's been mixed, then put the dough in the fridge for about 1 hour before rolling anything.  When rolling time comes, only take one ball out at a time that way the rest remains fresh and retains its workability.

Read your recipe BEFORE beginning the process.  Gather all your ingredients and tools so everything is right at hand.  If the recipe says, sift...sift!  Some say the alternative to this chore is taking 2 Tablespoons out of the measured flour.  Sometimes this works, sometimes not.
I like to play it safe.  So for me, sifting is a lot less trouble than serving sub-par cookies!

If you want to use something like Splenda please know that it will affect your recipe.  Not to discourage using substitutes if you need them!  I found an article that's interesting and educational...a little food for thought so to speak. They experimented by making marshmallows with regular sugar vs. making them with Splenda.  You can read the article via this link: http://www.sheharaw.com/Files/Splenda%20Paper.pdf


Some sugar substitutes are also available for brown sugar.  I've tried Splenda's version, because that's what the household uses so am most familiar with it's proclivities.  I'd appreciate any input about other substitutions, including natural, vegan and so on.   

CONVERSION INFO -
"Regular" Sugars to Splenda substitutes

Granulated White Sugar - 1 cup   -
Splenda Granulated Sweetener - 1 cup
Granulated White Sugar  - 1/3 cup -
Splenda Granulated Sweetener -  8 teaspoons

CONVERSION INFO -
"Regular" Sugar to Splenda Sugar Blend (sugar/Splenda blend)
Granulated White Sugar -  1 cup - 
Splenda Sugar Blend  - 1/2 cup
Granulated White Sugar -  1/3 cup -
Splenda Sugar Blend - 8 teaspoons

CONVERSION INFO -
"Regular" Brown Sugar to Splenda Brown Sugar Substitute
Brown Sugar - 1 teaspoon -
Splenda Brown Sugar - 1/2 teaspoon
Brown Sugar - 1 cup -
Splenda Brown Sugar - 1/2 cup

Thanks to Splenda's website for the info: http://www.splenda.com

Butter vs. margarine vs. shortening?  Hmmm....depends.  Some people can't eat butter, some can.  Some can't abide by anything but margarine...others could care less.  Some swear by shortening like Crisco, others wouldn't touch it with a ten foot spatula.  Where does that leave me?  I've done it all three ways and usually make my choice based on two things: 1) what results do I want? and 2) budgetary considerations.

Result-wise, something like Crisco Butter Flavored Shortening works pretty good, in most recipes.  However I've had some problems combining it with Splenda.  It didn't work at all well, and the resulting taste was nothing like the Sugar Cookie I was expecting.  This combination requires some additional experimentation.
  
Margarine works fine too, providing it's a type that's labeled "good for baking," or something like that. Some margarine is really just for "spreading," rather than cooking or baking.  Read labels!

Butter may burn easier than margarine, but for something like Butter Cookies I'm a purist.

Sprinkles, icing or plain?  Personal choice wins out here.  Have a good time, that's what counts most.  Some folks make a little intention and add a dab of jam or jelly to the center of each round.  Some like to crumble bits of hard candy into the batter and make drop Sugar Candy Cookies. There are a lot of things to do with a good, basic recipe.  The main thing is to have fun!

I'll start with the Non-Sugar Cookies because that way the household can have some cookies to munch on while the others are baked. 

Splenda
SPLENDA Non-SUGAR COOKIES

1 cup unsalted butter*, softened
1 cup SPLENDA® Sugar Blend
2 large eggs
2 teaspoons vanilla extract
4 cups all-purpose flour
1 teaspoon baking powder
1/2 teaspoon salt
           *butter or margarine


Method
Beat butter at medium speed with an electric mixer in a medium mixing bowl until creamy.
Gradually add Splenda, beating well.
Add eggs, one at a time, mixing well after each addition. Stir in vanilla.
Wrapped dough
Combine flour, baking powder, and salt in a separate mixing bowl.
Gradually add flour mixture to Splenda/butter bit, beating until blended.
DON'T OVER MIX!
Place dough on a lightly floured work surface.
Divide the dough in half; pat each half into a circle and wrap with plastic wrap.
Chill cookie dough for one hour or until slightly firm.


Preheat oven to 325 degrees F.
Take the dough from refrigerator, one portion at a time.
Roll each portion to 1/8-inch thickness on a lightly floured surface.
Cut with a cookie cutter, and place on lightly greased cookie sheets.
Sprinkle with decorative candies or colored sugars, if you want.
Bake in preheated oven 8 to 10 minutes or until edges of cookies are lightly browned.
Cool slightly on cookie sheets; remove to wire racks to cool completely.

Not every Christmas (or Holiday) cookie on my plate will be made with Splenda, but it's sure nice to be able to have some available for folks who can't eat sugar!

Okay, now for the "regular" ones.....with a little bit of the Archies' "Sugar, Sugar" playing in the background....(didn't Neil Sadaka write that one? Rumor has it that Don Kershner wanted the Monkees to record the song, but was ousted from Colgems before that happened.)

Then it's back to holiday music and the continuation of this baking frenzy!

Sugar Sugar
SUGAR, SUGAR COOKIES
1 1/2 cups butter, softened
2 cups white sugar
4 eggs
1 teaspoon vanilla extract
5 cups all-purpose flour
2 teaspoons baking powder
1 teaspoon salt


Method
In a large bowl, cream together butter and sugar until smooth. Beat in eggs and vanilla. Stir in the flour, baking powder, and salt. Cover, and chill dough for at least one hour (or overnight).  
Preheat oven to 400 degrees F (200 degrees C). Roll out dough on floured surface 1/4 to 1/2 inch thick. 
Cut into shapes with any cookie cutter, round is fine too. 
Place cookies 1 inch apart on ungreased cookie sheets. 
Bake 6 to 8 minutes in preheated oven. Cool completely. 

Sugar, Sugar Cookies
 As always, please feel free to share your recipes on this site....just use the comments box!  Naturally you'll receive full credit and I promise to even try the recipes you send.  For now, Enjoy!


Thursday, December 1, 2011

COOKIE CHRONICLES - 'Tis The Season! Cookie Bake-A-Thon PROLOGUE

Blog wallpaper - last year's Bourbon Cookies
December 1 marks the start of a major cooking frenzy in our house.  I know what you're thinking....didn't we just go through one of those with that Turkey Day thing?
Yes, we did.
But hey!  I didn't invent the holiday schedule! Like everybody else, yours truly is merely a cog in the machinery.   So with wheels still spinning from the previous endeavor, we're off to the races again!

Christmas (or Holiday if you prefer) cookie baking time is a feat of planning, imagination and even a bit of fun. Through the years I've developed a mental checklist to help bring sense through the chaos.

1) Make a list of the cookies that "worked" the previous season.  Decide which ones you want to make again.
2) Make a list of recipes you want to try. It can be fun to add some variety to your cookie plate. Be realistic though.  If the recipe is complex (like the Bourbon Cookies) be mindful of how much work will be involved and be sure you're able to commit to it!
     The holidays are a busy time and unless you have an army of kitchen elves around you may stretch yourself too thin and be too exhausted to enjoy the season.
Allergy alert!
2 a) Some suggest making cookies with similar ingredients to help keep the costs down.  This is a good idea, but remember that if you're baking for someone with gluten or nut allergies or diabetes for example, you'll still have to buy the right fixin's for the job.
     Be sure to include these and any other variations in the budget!
 2b) Be very sure not to allow nut and non-nut cookies to intermingle. Some people's allergies are so severe that even a bit of nut dust can send them to the hospital!
    Clean all tools and utensils thoroughly between batches!
3) Make a list of all the people and events that will be needing your cookies...include what you know about likes and dislikes, allergies and other dietary restrictions too, if possible. See item #2a. 
4) Clean the kitchen - make sure the oven has recovered from its time with the turkey! (There's nothing like a bit of burning charred guck on the oven floor to ruin the flavor of a perfectly good cookie!)
5) Take inventory of your ingredients. See items 2 and 2a.
Oatmeal Raisin Cookies
6) Make sure your baking equipment is in good working order.
6a) Make sure you have enough waxed paper, release spray or other anti-stick agents of preference, cooling racks, potholders and storage containers.
     For the "main storage," I use coffee cans with their snap on lids.  Each cookie type gets stored in its own can and I label each can. This makes keeping stock and gift-making time a lot easier! I even make a can for the "pogens," those odd-shaped Chocolate Chip and amputated portions of Gingerbread People that are an inevitable by product of the process. These come in handy for household snacking.  They can even be ground up in the food processor and used for making things like pie crusts.  No lie! A Pogen Pie Crust recipe will appear in an upcoming blog entry.
7) Make sure cookies are thoroughly cooled and dry to the touch before storing!
7a) Put waxed paper between layers of cookies that are filled or in any other way have a tendency to get sticky.
7b) Don't pack stored cookies tight!  It's better to use more than one container than to have an entire batch ruined!
8) Look at the calendar...plan baking accordingly - plan for shipping dates, party dates, etc.
9) Consider making this a group or family event.  Kids love to bake, so do some adults.  Besides, it could help cut work-time in half.  Baking parties can be fun!
10) Relax. Plan baking for a time and day when you can really enjoy the process. Spread it out over several days or evenings if you can.
11) Reserve some cookies for yourself!  Your family will love you for it!
12) Consider holding a cookie swap! It's a great way to compare notes and get ideas for your next Cookie Extravaganza.
I'm sure there are other things that can be put on the list, so please feel free to send your ideas!

Anyway....with recipe books, notes and a few cook books serving as "wing men," I began my holiday baking earlier today with a large cup of coffee while taking an inventory of supplies.

After the review it was apparent that we needed to restock. Food store time again!  Thanksgiving had taken a major toll on the staples, but that was to be expected.  While writing the shopping list I thought about which delicacies would be made this season. 

Cranberry Chocolate Chip Oatmeal Cookies
"These cookies will be more than 'hostess fare,' they will be gifts for friends and family."  I mused.
I've been kind of planning for months but as the sun lifted itself over our city's skyline I sorted through the ideas and came to some final conclusions. 

First thoughts of course - what worked and what didn't work last year.
One thing's for sure, the Bourbon Cookies were a big hit with the adults!  The Chocolate Chip Oatmeal Raisin and White Chocolate Chip Oatmeal Cranberry ones satisfied everybody and the Sugar Cut Outs had all the kids happy...admittedly the older crowd loved them too. All these went to the final list....although I have been re-thinking the Bourbons and may do a drop cookie with a Bourbon/Chocolate drizzle if time gets too dear.

Gingerbread People are essential. If time gets too tight, I thought,  I may opt to make Ginger Snaps rather than Gingerbread People, but will cross that bridge when I get to it. 
Chocolate Chip and Peanut Butter are a Holiday necessity, at least in my household.  In truth, I could keep our larder stocked with these varieties year 'round and there'd be no complaints!

My sister requested Pizelles (those Italian anise cookies made with a special press or iron). I don't have a real Pizelle Iron so when the time comes I'll be using our ancient waffle iron.  Stay tuned to this blogsite for further details and coverage of the event. Including pictures!

As you can see, there's a lot of work ahead and a limited time to get it all done.  But with a little planning, a little attention to detail and a lot of humor the whole Cookie Bake-A-Thon can be a beautiful thing.

As always, please feel free to share your ideas, recipes and memories on this site.  Just use the handy comments space below each blog entry.  You'll be properly credited, I promise.  Try to include a photo of the finished product if you can.

And above all else.....Enjoy!

Wednesday, November 30, 2011

HOLIDAY LEFTOVERS - Turkey Soup

Leftover holiday turkey
Just when you think you're done with all that turkey business, along comes the question of what to do with the leftovers.   There are pot pies, stews, casseroles, and sandwiches....croquettes, salads and so on. 

The most common use of leftover turkey, most notably the odd wing, orphan leg and that old Pope's Nose? Soup.  Lovely, warming, wholesome soup. King of comfort food, a dish for any season, there's nothing like a steaming bowl of the stuff to make you feel cozy when ya need it most!

Everybody has their own version of the stuff; some like it creamed, some like it hot and spicy....there are as many variations as there are people in the world; here's just another version to add to the pile.

Broth and veggies
Make sure your stock pot is deep enough for the job, because the very first thing you need to do is boil the carcass. Soup making is not pretty work.  Done right, some parts of the process can be downright yucky!
But done right, you end up with a wonderful soup rather than a flavorless liquid with junk floating around in it.

I usually take the meat off the bone before putting the turkey away after its first serving.  Years ago folks left the cooked meat on the bone, put a damp towel over it and put it in the fridge, but in these days of CSI and forensic science, we've come to know it's not such a good idea. 

Anyway, once done with the dismantling I'm usually dog tired so I wrap the bones in plastic and put all the meat in containers and put everything in the refrigerator until the next morning. 

That's exactly what I did this time, too.  After our Thanksgiving feast, Jack cleared the table while I dissected the remains, then stored it all in the fridge for the next day. I mean, heck!  After three plus days of prepping and cooking, a good night's sleep was in order!  Besides, the L-tryptophan was kicking my butt!


This morning I woke feeling pretty good for someone who'd been on a cooking jag for the previous several days.  While the coffee brewed I began by pulling the bones out of the fridge and putting them in the big stock pot, filled the pot with water and put it on a back burner for a long simmer.
Broth set aside to cool

While that was going on, I chopped veggies and put them aside in covered bowls in the fridge. Then I enjoyed a couple cups of coffee and a piece of Sweet Potato Pie for breakfast....one of my favorite breakfasts!

As the carcass simmered, it filled the house with that great turkey aroma!  Two hours later those bones were cooked and the base broth was done.  I removed the big pieces by hand, reserved the still-useful pieces of meat and threw the bones away.   Then I strained the broth and poured it into a tall storage container and set it aside to cool.

I pulled out the veggies, including the ends which were reserved too, and began the rest of the process. 

I've seen lots of people make soup. Most of the time they just toss everything together with some broth and let it rip.  That's perfectly fine....but I like to go the extra distance for the extra flavor. To me cooking is more than just heating things to a palatable point....it's about textures and flavors and dimensions and finding the best ways to bring it all together.  
Veggie ends browning

First things' first.....seasoning the soup pot.

Wing bits browning
I took the veggie ends and scraps and put them in the pan along with some grape seed oil and let them brown on all sides.  The brown bits that develop in the pan are good sources of flavor. Then I added the wing bits and browned them.
Straining the pan seasoning brew

I added a bit of water and let this simmer for about 20 minutes, then removed the big pieces and poured the liquid through a strainer.  This liquid is dark and concentrated and contains a great deal of the flavor that forms the backbone of this soup.
I shudder to think of all the yumminess that would have been lost by skipping this step! 
"Hard" veggies added

While this cooled, I added the "hard" chopped veggies (carrots, turnips and potatoes) to the still warm stock pot along with some grape seed oil.
I use grape seed oil sometimes because it doesn't add much flavor and is lighter than other oils. 

Skimming fat from broth

 Anyway, as the vegetables browned, I skimmed the base broth made from the carcass.  Because it had cooled, all the fat had risen to the surface and was easy to remove.  What remained behind was lovely and slightly gelatinous.  Perfect.
Skimmed broth

Then I added this broth and the darker reduction made earlier to the still browning vegetables and let it come up to temperature. I added some previously browned and chopped onion, celery and garlic at this point, too. Anything for a bit of taste!

Jack came down the hallway to see what was going on.  "Smells good in here!" he said, licking his lips.  I smiled, turned down the heat and covered the pot so it could simmer for about 35 minutes.

After 35 minutes
When this cooking time was done, I opened the stock pot and smiled.  It looked and smelled great!  The coloring was a rich, golden brown....vegetables done but not mushy.  It was time for the next installment; a hand full of broken up angel hair noodles, soft veggies (mushrooms, cooked peas),  the left over turkey....and, since it was available, stuffing that I rolled into tiny little balls.   

Pan covered loosely to simmer
After tasting and seasoning, a little salt and pepper, a little poultry seasoning and a dash more garlic, I covered the pan loosely and let it simmer for another fifteen minutes.
Mmmmmmm, good!
The object here wasn't so much to cook anything further as to allow the flavors to mingle.  Fifteen minutes is about the maximum simmering time you want to give the soup at this point.  Any longer and the turkey begins to dry out!  Then, after a final tasting and seasoning, you're done!

It's soup!
 Well, that's my version of Turkey Soup...a little complex, but worth the extra effort.
As always, please fee free to share your ideas, memories and recipes.
Enjoy!


Submit Express SEO Services

Free Web Submission

Powered By Blogger