Showing posts with label eggs. Show all posts

Sunday, January 1, 2012

Morning After Munchies - Egzactly!

So it's now officially 2012!  You've tripped the light fantastic, painted the town red and rung it in 'til there's no self respecting bell what ain't been rung!

Now here it is, the morning after...or maybe it's noontime by now, but it's still morning to you.
Your mouth feels like an army just trudged through it and your belly is rumbling for something...QUICK!
And to make matters worse, there's a whole house full of overnight guests - intentionally or not - and they feel the same way, too.  Muggy mouths and empty tummies!   Thank goodness for eggs!
French Toast Waffles

Depending on the degree of your hangover, these little ovals can be simple as Over Easy or complex as an Omelet or Fritata, or anything in between.

What I like to do at times like this is something I call French Toast Waffles.  It's French Toast - you know, bread dipped in egg then fried, but rather than using a frying pan I use my ancient waffle iron.  It's quick, easy and is something you can even make ahead then just heat up in the toaster!  Now there's a nifty idea! 
No muss, no fuss....done ahead of time would certainly make that morning after a little less crusty!

On that note, have a Happy New Year and a great breakfast!
And as always, feel free to submit your ideas, memories, recipes and so on.  And don't forget, Enjoy!


Wednesday, October 5, 2011

Confidence Building and the Six Egg "Julia"

Trying to make an exceptional omelet is difficult enough.  Trying to make a true French Chef-type omelet is a fairly daunting task....trying to make it a la Julia Child is, well, humbling and exhilarating at the same time.

It all seems easy enough; whisk some eggs, throw 'em in the pan, let it rip.  Sure.  Ever had to dance with a skillet on a hot burner? That's kind of how it goes when  working with this dish. 

Beat eggs well
Once you've committed yourself to the deed, go at it full steam ahead....stick to it 'til the bitter end.  You'll be amazed with what can be accomplished with a little patience and a lot of elbow grease. 

First make sure your eggs are beaten well.  For this particular omelet, we don't want to capture a lot of air.  That would be essential for the "puffy" omelet, but for this one we just want to beat the eggs into a liquid state.

Surf's up!  See the curl forming?
After that, it's all in the pan action.  Get it hot, get the beaten eggs into it....wait a few moments, then start shaking the pan vigorously across the flame.  As the eggs solidify, you'll notice a "curl" developing along the far end of the pan. Kinda looks like you'd expect a surfer riding on the thing. That's good! Keep it up!

You'll notice the egg acting more like a crepe, moving as a unit around the rest of the pan. This is when I start adding ingredients...cheese first, then tomatoes and this time some pepperoni that had been heated earlier in a pan to cut down on the greasiness.  In fact I used a dab of the pepperoni grease to lubricate the omelet pan.

Omelet fold close-up
Once your omelet "innards" are added give the pan another shake, this time when you shove forward, lift the far side of the pan slightly toward you.  This will help develop the fold.  Sometimes you'll need to coax this folding with a spatula, sometimes you don't.

In some circles, using a spatula to help with the fold is considered a no-no, but I'll not go there.  It's breakfast, fer cryin' out loud!  I need more than one cup of coffee and a dry piece of toast before venturing that perfection!

Anyway, after the fold is completed I sometimes top the omelet with a little cheese before serving. The cheese's  tanginess especially nice with all that pepperoni!

Some people say you can't make anything less than a six egg omelet...that anything less will not turn out.  I disagree.  I've made "Julia" omelets with as many as 12 and as few as 2 eggs and they all turned out fine. They require the same steps and the same amount of attention to detail.

This dish is appropriate for not only breakfast but lunch and dinner too.  Once mastered, the omelet will become one of your "go to" dishes for quick, tasty, even a little impressive fare for family and company.
Enjoy!  And as always, you're invited to share ideas, recipes and thoughts anytime!

Friday, September 23, 2011

End of the Month Souffe'

Well, here it is....getting near the end of the month and our pantry is looking somewhat ravaged.  And why not?  Since stocking up 30 days ago, we've been cooking (and eating) our way through its contents.  But we still have enough left to get us through, providing we use our larder wisely.


Of course it helps to have planned for this eventuality. 


Every time I go to the store, I pick up a few "extra" things.  Call it insurance. I'd rather do that than be panic-stricken, wondering how to make a meal out of crackers and capers! (Although I might try doing something with that some time....stay tuned! :) )


Looking around  the pantry today, I spotted the ingredients for one of my favorite things to cook....believe it or not, souffle. In this case, Tuna Souffle'-because that's what we had on hand.   

Some people are intimidated by it...all the whisking and beating and thissing and thatting; so much to do!  And so many things to worry about!  White sauce, eggs, egg whites....ugh!  The first time I ever attempted one, it looked like....well, let's just say it didn't look like a souffle!  The thing didn't rise and it was raw in the middle. Thankfully, mine was not the only dud. 


Our Home Economics teacher (shout out to Mrs. Schlosser) was there with patience and sympathy.

As she walked around the room examining each dish, the teacher pointed out what might have gone wrong.  In many cases we simply hadn't done the eggs right.  Either the yellows had started to cook when added to the white sauce creating "scrambled egg islands," or the egg whites weren't beaten enough to help make the dish rise to the occasion.  The other problems were oven not hot enough, cooking time, oven doors slamming and not keeping the oven door closed until cooking time was done.  Picky! Picky! Picky!


When she got to my dish, the instructor nodded.  "What do you think went wrong?"  I looked at her squarely and said "I did."  Naturally.  

Home Ec and I weren't exactly getting along to that point. I mean, wasn't I the kid who just about sewed their hand to the skirt they were supposed to be making for a class project?  The one who sewed the skirt pleats inside out once their hand was liberated from the sewing machine's death grip? And wasn't I the one who was transferred over to cooking to save myself from myself?


Now this....this....puffy cakey thing, for lack of a better term, was about to be my undoing!  Ugh!  


The teacher, a true saint, smiled.  "Looks like you didn't do the roux correctly. Probably not enough flour."  If cooking ever needed a CSI, she'd have been perfect for the job!


The next day we tried it again....and voila!  It worked!  The thing puffed up like it should and was done clear through!   All it took was a bit of patience and a lot of attention to details. 

Those two things still hold true.  Patience and attention to details. You can't rush through making a souffle'...but you can use short cuts.  We'll get to those in a few moments.  But first things first.


BASIC 4 EGG CHEESE SOUFFLE'

Pre-heat oven to 350°
4 eggs (white and yolks separated)
    1 cup milk,warmed
    1/4 cup flour
    1/4 cup butter
    1 1/2 cup cheese grated
    1/4 tsp creme of tartar (optional)
    FOR TUNA SOUFFLE', add 2 cans of drained tuna, 2 diced green onions

Butter the bottom and sides of a large, tall walled bowl. It should be deep enough to allow your souffle' to expand and rise to almost double its size.
Sometimes I coat this with a bit of fine seasoned bread crumbs or a mixture of bread crumbs and Parmesan cheese.  Set it aside.


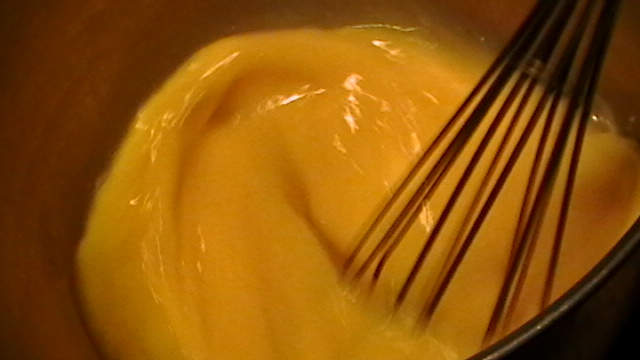
Beat the egg yellows until they are smooth. They'll probably even get a little lighter in color and stream evenly when you raise the whisk out of the bowl.  Set these aside.
The egg whites will be handled a little later...for now just make sure there are no bits of egg yellow floating in them.
Egg whites are finicky...they won't whip up if there are any impurities hanging around, even if those impurities are other egg parts. Sheesh!

Anyway....
Prepare your roux by melting about 1/4 cup of butter in a deep pan, as it's melting add 1/4 cup of flour and whisk, whisk whisk or stir, stir, stir while this cooks.  The flour/butter mixture should thicken and turn light brown.  (If you're using whole wheat flour it'll get darker than with regular flour). Turn off the heat but keep pan on the burner.

Add a small amount of the roux to the milk and mix. Set the burner on low,then add this milk/roux mixture back to the remaining roux while stirring. Stir until fully blended.  The roux will thicken the milk, which is a good thing.  If you go no further, you have made a white sauce.  Gee!  But we're not done yet.

Tempering egg with a little roux
Reduce the heat. Add a bit of this roux stuff to the egg yellows while whisking. This is how you "temper" the eggs-that is, add them to a hot ingredient without partially cooking them first. Once you see that the eggs and roux have incorporated, add it all back to the remaining roux/milk mixture in the pan...continuing to whisk over a low flame.

Once this is all mixed together, you can add the cheese. Stir constantly while the cheese melts.  If you go no further, you'll have mastered a basic cheese sauce.  Yay! But we're still not done.  Turn off the flame and let this rest while you handle the egg whites.

This is a make or break situation.  Done right, your souffle will be light, airy, soft and moist.  Done wrong, you'll have a dry, hard, springy thing that may or may not be edible.  Maybe as a bread? Hmmmm.
Beating egg whites
Eggs softly peaked
Watch carefully as your egg whites develop.  Some people use cream of tartar to help with this process, but its not necessary.  Sometimes it even makes them too stiff, but what ever is your preference so be it.
Personally I don't use cream of tartar in souffle', preferring it in meringue.

Folding egg white into batter
Now comes the next important step....folding the egg whites into the batter.  Notice I said "fold" not "stir" or "mix" or even "incorporate."

Batter and prepared bowl
You want the egg whites to still be and act like egg whites, so the batter is going to look wrong.
Our Home Ec teacher gave us a hint that still rings true today...when it comes to souffle' the wronger it looks the righter it is!

Next, pour the batter into the prepared bowl and put it in the oven to cook for 30-35 minutes.
While that happens, and if you want, you can make a nice simple sauce utilizing some of the steps we worked on at the start of this recipe. Of course, you'd use a lot less flour!  White sauce, cheese sauce, you name it.  Although not necessary, such a thing would add an extra dimension of flavor to the dish

WHITE SAUCE FOR SOUFFLE'
 1 cup milk
3 Tablespoons flour
3 Tablespoons butter or margerine

Put butter in pan, add flour and whisk over heat until butter and flour thicken.
Add milk and continue to whisk while this mixture thickens more.  Season with salt and pepper to taste. You can add other seasonings too. Some folk even add a bit of nutmeg.


The finished product, Cheese Souffle' with White Sauce will be an unexpected surprise for end of month dining. You don't have to stick to just cheese, either.  Add some tuna, chicken, ham or beef...veggies like diced onion, artichoke hearts, shaved carrots, peas...the sky's the limit!


Thanks to my Home Economics teacher, I learned that cooking is more than a chore and that making a souffle' can be a lot of fun.

Experiment! Enjoy!

Souffle' with white sauce and salad

SHORT CUT!          SHORT CUT!         SHORT CUT!
 
Sometimes there just isn't time to make a conventional white sauces. That's why God made condensed cream of whatever soups! They come in lots of different flavors and sure cut down on the preparations!
Of course you'll still have to make the roux, no way around that. The roux contains the flour that helps to hold the whole thing together. 
I learned that the hard way in Home Ec class.


Sunday, August 7, 2011

Been A While....good things take time

If Blogs truly reflect a person's life, mine is either too busy to write daily or too scattered to keep up the discipline.  As writing "Fifty Five Is The New..." would indicate, I am capable of the discipline of almost daily writing....so what gives? 

I don't know. What I do know is that cooking is a daily occurrence, at least for me.
Many mornings begin with eggs in our household.
Over easy with a dab of melted cheese over top of the slightly liquid yolk.
Sometimes I do something extra.....like so:

OVER EASY EGGS ON A RAFT OF TOAST

For each egg you need a piece of bread.
Take the bread and with a cookie cutter, glass or lid from non-stick spray can, cut a hole in the center of the bread.  Toast bread slightly on both sides, including the cut-out pieces. They will be the "caps" on top of the eggs.

Eggs cooking inside bread
Spray hot pan with release spray (Pan or so on), add toasted bread slice.  Crack egg into center of toasted bread slice hole.  Egg should begin cooking.  When it seems firm (white looses transparency, yolk still soft)
take spatula and lift toast piece.  Egg should come up with it at this point.  Turn or "flip" so that bottom side is up.  Cook for a few moments more, depending on how firm you want your egg yolk.  Turn off heat. Remove pan from hot burner.  Flip egg again so that original side is back on top.  Place cheese slice on top of yolk. Cover with lid and let sit for 2 minutes, until cheese melts.
Serve alone or with sausage, fruit or other sides.

That's a pretty good starter for the day.

So 'til next time!
Life is a feast- DIG IN!


Wednesday, July 20, 2011

METHOD - The Sound of One Hand Egg Cracking

Egg legerdemain
If you've ever watched a cooking show or a chef guest spot on a talk or news you've seen it.  That trick of cracking eggs with one hand.
Have you tried it yet?  Well I have.  And after several miserable attempts I actually got the hang of it!

Then after a while I did it so often it became commonplace. I had to raise the bar. I had to keep it fresh so proceeded to teach myself how one hand crack an egg in each hand. Then how to do both at the same time.  That was during a time when there wasn't really a lot else going on for me, so I learned origami and honed some cooking skills. 

There are some tricks to it, at least my version of doing it at any rate. You need a fair amount of dexterity in your fingers, especially the two middle ones....you know, the ones Spock uses in his special greeting.  I'll try to explain, and let the pictures tell the tale as well.

But first a bit of a disclaimer.  I don't claim that my method is the "professional" or right way. Nor do I claim you'll never get egg shells in your eggs.  To the contrary!  Most likely for the first several attempts you'll have 'em all over your fingers, in the bowl and where ever else they want to go. Fear not!  This too shall pass.

While you're practicing, make sure you're not just wasting eggs....plan on making something with them, and the sooner the better!  Eggs can go bad quicker when they're no longer in their shells.

Okay....here goes. 
Lightly tap the egg against the bowl
Grasp your egg firmly between your thumb and forefinger.  Tap the egg lightly against the edge of the bowl.  You just want to crack the egg, not have its contents spill out prematurely.

Position egg over center of bowl
Next, lift the egg away from the side of the bowl so it is positioned over the middle of the bowl.  If you look at this next picture you can see how I'm pulling the egg apart primarily  with my ring finger, index (or bad) finger, pointer and thumb.

Guiding egg to split apart
Here's a much  closer shot of the process, showing the little finger and ring finger pulling the egg shell in one direction while the unseen index and pointing finger pull it in the other.  The thumb and palm act as holders. You want to maintain a steady grip. Just be careful!  Don't go using a death grip! Squeeze too hard and you'll end up with egg all over the place.

Egg coming out of shell

In this photo (using my right hand) you can see how I'm pulling the egg shell apart and allowing the innards to spill out.  Yes, my hand gets sticky.  The egg kind of slides past my two middle fingers sometimes, that's hard to avoid.  No matter.  Once you've gotten to this stage, you've done it!  Congratulations!The index and little fingers are doing their part, too; guiding their part of the shell to make the opening wider.

The birth of the egg....or is it re-birth?
Don't worry if you don't get the hang of it right away.  You will with a little practice, then you'll be wowing them in the aisles!  Or at least in the kitchen.  Good luck!

Sunday, July 10, 2011

PRODUCT REVIEW - KITCHEN TOOLS - Ball Tipped Whisks

 Whisk, whisk whisk!   How many eggs, sauces and other things have you whipped into shape through the years?  My first such experience was as a child at home in the kitchen with my mother.

We didn't have any of those fancy-schmancy wire doo-dads like on the cooking shows.  Nope!   We used a plain old table fork, or occasionally one of those hand-cranked egg beaters.  Of course for the really big jobs we just used a mixer.
Standard wire whisk
 My first experience with an actual wire whisk happened in tenth grade Home Economics class. I was immediately taken with how that tool made quick work of fluffing eggs, smoothing sauces and such.  

The construction and concept were so simple, elegant.  I couldn't wait to get one of my own, to try it out at home.

It took a while but I finally got one....in a gift basket of kitchen gadgets at my wedding shower.
I was thrilled.

Although the marriage didn't last, we were both so very young, my fascination for cooking and kitchen gadgets has remained strong.  So when I saw this latest version of the whisk, I had to get one and try it out. 
Ball tipped whisk set

What we're looking at is a set of ball tipped whisks. There are three different lengths to accommodate any task.   These particular ones were ordered online and they arrived were not a disappointment.

 
Generous handle, balanced feel
 Unlike some other kitchen products I've ordered via the
internet, these felt well built and didn't get all bent out of shape after one use.  The cook in me was pleased about that.  The arthritic in me appreciated the generous handles and balanced feel of each tool.

 They work well on most things...taking on thick sauces with ease.  But I must confess that the old fashioned wire whisk still wins, hands down, in the whisking egg yolks division.  For some reason the ball tipped variety doesn't work as well in that area, leaving thready, transparent bits of egg white and membrane unincorporated in the mixing bowl.

Lumpy sauce needing help
But it did wonders on a stubborn  cheese and cream sauce!  What began as a hopeless, lumpy mess was soon tamed....turned smooth and lumpless under this tool's will.

Lumps?  Gon

Don't overlook the other possible uses for these things - icing drizzling was the first thing that came to my mind.  I have a friend who went to cooking school and they had to take a regular wire whisk and lop the bowed ends off to make an icing drizzler.

No need for cosmetic surgery with the ball tipped whisk!

I'll bet you could come up with several new uses too!  Feel free to send them and they'll be put up in the blog!

Rating Scale for this kitchen tool :

Five bowls!  I love them!


Submit Express SEO Services

Free Web Submission

Powered By Blogger