Monday, November 28, 2011

HOLIDAY RECIPE - Turkey with Stuffing Dinner TURKEY PREP

To begin at the beginning is to truly begin, so here it is.
Little City Meats
We begin with the bird....star of the show, piste de resistance, center piece of this culinary celebration....the turkey.  Arguably, fresh is always best but is not always possible.  We have a great little meat store down the street, Little City Meats....it's my dream to one day order a fresh holiday turkey from that place!  
Hey. Dreams do come true!

But until then I went as usual to the local Safeway to take advantage of their special Five Dollar Turkey sale.  Unfortunately they didn't have any of them left, but had a few in the next higher price range. So I got a 19.85 lb Tom Turkey for $9.00!  Frozen, yes...but affordable.  Yay!  While there I trolled the aisles for any other deals and came home with most of the meal shopping done with ten days to spare!  The remaining ingredients were picked up the following day at our local green grocer and  Foods Co. market. No muss, no fuss.

Meanwhile, back at the flat.....
While the turkey hibernated in our freezer for seven days, other preparations were underway.
I made bread....lots of bread....different varieties of bread....for Jack's family's Thanksgiving dinner and our own pending feast, and planned to use some as the bread for our stuffing.  As the time drew nigh, I collected the designated stuffing breads and broke them into pieces and stored the breads in a deep container. This mixture included cornbread, walnut bread and wheat/oat bread.

Stuffing packed to cure
One secret to good stuffing is hard or stale bread, so I left mixture in the container, but loosely covered so it could "stale up."  I didn't want the breads to get "bored," just laying around languishing so I added some of dry spices so they could start developing flavor.   
     These spices included a bit of poultry seasoning of course, a dash of extra sage, dried celery leaves, dried onion flakes, dried garlic flakes, thyme, a dash of pepper and salt (optional). Naturally, seasoning is a very personal thing...each to their own! Please use spices that suit your tastes.
     Once this was done, I set it in the pantry to dry-cure.

I made apple pie and apple sauce for Jack's family's feast and still had time on my hands, so used it to catch up on the blog.  I also took this opportunity to make the herb/butter rub that would be used in the marination of the turkey.  I put some butter in a container, added fine-chopped garlic, onion, poulty seasoning, sage and thyme and mixed it all together then put it in the fridge for a little blending time.

Then, at long last, it was time to begin the turkey process!

First thing was to defrost the thing.  I'm old school on this...a standard take it out of the freezer, put it on a cookie sheet on the bottom shelf of the fridge and let it do its thing for two days, kind of girl.
So that's what I did.
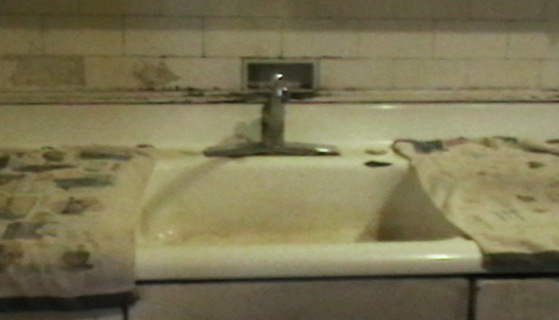
Sink prepared
While that happened I took the time to really clean the kitchen, stem to stern. All this began with a thorough wiping and sweeping. That took the better part of day one.
Day two found me concentrating on the sink, stove and other work surfaces.  Preparing the sink, particularly, took a lot of TLC.  After scrubbing it with cleanser and rinsing with hot water, I went in for the kill with a coarse salt and vinegar wash followed by another hot water rinse.  No self-respecting germ or bit of dirt dared show its face after such an onslaught of purification!

Turkey taking a bath
Then it was time for the turkey to come out of its wraps, face the world and have its Grand Bath. I always inspect the critter, inside and out, looking for things like freezer burn or discoloration.  I also use my nose....sniffing for any signs of purification.
Satisfied that all was fine, I continued by pulling out the package of giblets and neck that had been nestled within the turkey's large cavity, then  put the main body in the sink and turned on the cold water.   NOTE: cold not hot water, this is very important!    
Turkey covered and soaking


There were a few bits of ice inside the cavity, so I decided to let Mr. Gobbler soak in the sink for about 30 minutes.  Since we have a cat who is a turkey fiend, I covered our soaking friend with a couple of cookie sheets while I started the giblet basting broth and gravy base.

The giblets (heart, kidneys and liver) and neck (that long thing) are very useful!  There's a lot of flavor in those goodies and I was determined to unlock that yumminess, so put them in a pan of water on the stove for a good, long simmer.  Soon the house was filling with that familiar, rich, wonderful aroma!

Piercing pathways for flavor
Then it was time to check the turkey's condition, which by then was completely thawed.  I removed the bird to one of the towels, emptied the sink and then rinsed the bird inside and out before patting it dry. Then I pierced the turkey all over, inside and out, to develop "pathways" for flavor.

Now comes one of the most important parts of the process, getting the turkey ready for marination.
I took the butter out of the fridge and opened the lid.  Mmmmmmm!
 
Starting from the inside, I rubbed that bird from stem to stern with the herb butter, making sure to lift the skin along the two breast sides and rub some in there too.  Pretty much anywhere that could have butter rubbed onto it or into it, got it.   Then I sprinkled additional herbs throughout and on top of the turkey.  Same rule of thumb; if it could be spiced, it was.

Then it was time for a very important decision; what liquid or liquids should I use for the marination?

Any body can soak a turkey in wine; I do it all the time.  But gee whiz!  I wanted to do something different!  I saw the remaining oranges from Jack's sister sitting in a basket and began feeling twinges of inspiration.
There was some bourbon in the cupboard. Bourbon does something wonderful to to food, it goes well with oranges and I felt like doing something wild.  Before thinking twice, I added a healthy cup or thereabouts to the marinating bag.

Marinating in the bag
Once that was done I closed the bag and tied it tight, set it breast side down in a large bowl then started it on the first of many hours of marination in the refrigerator.  Four hours later I turned it breast up for another four hour fridge soak.  I did this rotating several times during the 12 hour marination.

NEXT INSTALLMENT: Stuffing and cooking the bird.

As always, feel free to share your recipes here....simply write them as comments, include your name and email....I'll be most happy to give credit where credit is due!  And above all else, Enjoy!

Sunday, November 27, 2011

HOLIDAY RECIPE - Turkey with Stuffing Dinner PROLOGUE

Holiday turkey dinner has always been very important to me....from earliest memories when I wondered what made the windows steam through my first chance to help in the kitchen all the way to present day, this meal above all others holds great significance. I'm not alone in this, either.

Entire magazines, television programs and even newspaper sections are year after year dedicated to the cause of sharing the latest craze, gizmo and secret so it must be important to somebody!

The goal is to make a turkey that is moist, tasty, savory and at the same time pleasing to a wide range of palates. Luckily for us, this particular breed of poultry lends itself to any number of expressions be it Cajun, Deep Fried, Curried, Roasted, Grilled or Stewed...to name just a few.

Guinea Hen
Originally known as a Guinea Hen, the birds of our forefathers were most likely not so plump and juicy as our present day, domesticated Tom or Thomasina. But they, nonetheless, served as a good and available food source.

Present day turkey
Back in 1621, when the original Thanksgiving celebration occurred, the tables were laden with these critters to be sure, but also there was seafood, corn, nuts, berries, squash and foodstuffs that never make it to our modern celebration. Although I'd not be surprised if there were a few traditionalists that included such things as venison as part of the festivities.

As far as stuffing goes, in the middle ages it was known as "farce," from the Latin "farcire" (and French "farcir") meaning to stuff. The term "stuffing" first appears in English print in 1538. Around 1880, it seems the term fell out of favor with the Victorian upper crust, who began referring to it as "dressing."

Happily we've come to terms with who we are and what we do with our food and are more tolerant with what things are called.  And I'll argue that stuffing by any other name would still taste good, so long as it is made right!


Everybody has their own "Classic" or "Traditional" recipe.  Far be it from me to say that mine is better than any body's, because that's certainly not the case!  This method and recipe is being shared not in an attempt to change any one's ways, but to simply have it out there on the off-chance that someone might want to try it.

I also publish this in homage to my mother and the things she taught me in the kitchen, to her mother who taught mine about the secret to making turkey brown and moist, to my sister Carolyn...my culinary cohort, to Jan and Vincent and my other cooking companions and collaborators through the years, to my home economics teacher who taught me to be courageous in the kitchen, to PBS, the Food Network and other food channels who through the years have added to my culinary education and to all cooking blogs and websites.
 

Warning to all - this is a multi-day, multi-stage process....not for the fainthearted or any one rushed for time.
But if you're willing to invest the time and put forth the effort, you'll be pleased with the results.


Due to the lengthy nature of this preparation, I'm breaking it up into a few blog entries....much like how it happens in real-time, spread over a few days.     


This entry covers a few thoughts and a few basics.  The thoughts we've already handled, the basics?  Here they are in Q and A format.


How much turkey should I buy?
That depends on how many people you're planning to serve and how much leftovers you want.  The rule of thumb is 1 lb of turkey per adult, anywhere from 1/4 to 1/2 lb per adolescent or child....after that it's all leftovers.   Again, that's a general rule of thumb.  This doesn't include your dear Cousin Ralph who can eat a 25 lb bird all by himself...so if you are inviting Ralphie, make sure to buy two turkeys so that others have a chance at something to eat!


What are the proper turkey cooking times? 

TURKEY COOKING TIMES AND TEMPS
Turkey Oven Roasted at 325°F
Type     Weight     Approximate Cooking Time
                               Unstuffed              Stuffed
Turkey (whole)     8 - 12 lbs.     2 3/4 - 3 hours     3 - 3 1/2 hours
Turkey (whole)     12 - 14 lbs.     3 - 3 3/4 hours     3 1/2 - 4 hours
Turkey (whole)     14 - 18 lbs.     3 3/4 - 4 1/4 hours     4 - 4 1/4 hours
Turkey (whole)    18 - 20 lbs.     4 1/4 - 4 1/2 hours     4 1/4 - 4 3/4 hours
Turkey (whole)     20 - 24 lbs.     4 1/2 - 5 hours     4 3/4 - 5 1/2 hours
Breast (half)     2 - 3 lbs.     50 - 60 minutes   
Breast (whole)     4 - 6 lbs.     1 1/2 - 1 1/4 hours
Breast (whole)     6 - 8 lbs.     2 1/4 - 3 1/4 hours
Drumsticks     3/4 - 1 lb.     2 - 2 1/4 hours
Thighs     3/4 - 1 lb.     1 3/4 - 2 hours
Wings     6 - 8 oz.     1 3/4 - 2 1/4 hours
Note: Start with turkey at refrigerator temperature. Remove the turkey from the oven when the
meat thermometer reads 175°- 180°F; the temperature will continue to rise as the turkey stands.


Grilled Turkey
(internal temperature 180°F)
Type                                                      Weight   
                                                 Approximate Cooking Time
                                                  Unstuffed     Stuffed
Whole turkey (indirect heat)     8 - 12 lbs.     2 - 3 hours   
Whole turkey (indirect heat)     12 - 16 lbs.     3 - 4 hours

Note: When grilling with Indirect Heat generally the coals (or burners on a gas grill) are heated to a high heat.
When grilling with Direct Heat the coals (or burners on a gas grill) are heated to a medium heat. Use these heat settings unless you have a recipe that states something different. See how to test the grill temperature.


Turkey Cooked at 350°F in an Oven Bag
 Type                                Total Weight       Approximate Cooking Time
Regular-Size  Oven Bag 10" x 16"       

Whole turkey (unstuffed)     8 - 12 lbs.     1 1/2 - 2 hours   
 Whole turkey (unstuffed)     12 - 16 lbs.     2 - 2 1/2 hours
Whole turkey (unstuffed)     16 - 20 lbs.     2 1/2 - 3 hours
Whole turkey (unstuffed)     20 - 24 lbs.     3 - 3 1/2 hours

Large-Size Oven Bag 14" x 20"     Turkey-Size
Whole turkey (stuffed)     8 - 12 lbs.     2 - 2 1/2 hours   
 Whole turkey (stuffed)     12 - 16 lbs.     2 1/2 - 3 hours
Whole turkey (stuffed)     16 - 20 lbs.     3 - 3 1/2 hours
 Whole turkey (stuffed)     20 - 24 lbs.     3 1/2 - 4 hours

Oven Bag 19" x 23 1/2"

Turkey breast (bone-in)     4 - 8 lbs.     1 1/4 - 2 hours   
Turkey breast (bone-in)     10 - 12 lbs.     2 1/4 - 2 3/4 hours
 Turkey breast (boneless)     2 1/2 - 3 lbs.     1 1/4 - 1 3/4 hours   
Turkey breast (boneless)     5 lbs.         2 - 2 1/4 hours
Turkey breast (boneless)     8 - 12 lbs.     3 - 3 1/2 hours
Turkey drumsticks     1 1/2 - 2 lbs.     1 1/2 - 1 3/4 hours   
Turkey drumsticks     2 - 3 lbs.         1 1/2 - 1 3/4 hours

Oven Bag Instructions: Preheat the oven to 350°F. Add 1 tablespoon flour to the oven bag and distribute evenly on the inside of the bag prior to inserting the turkey. Brush the turkey with vegetable oil or butter. Remove the turkey from the oven when the meat thermometer reaches 175°- 180°F. If using a turkey-size oven bag for a turkey smaller than 12 lbs., gather the oven bag loosely around the meat allowing room for heat circulation; then close the bag with a nylon tie, and cut away any excess oven bag.


Next installment, Bird Prep!


As always, please feel free to share your recipes here...you'll be given full credit for your contributions.
Happy holidays!
Enjoy!


Thursday, November 24, 2011

THOUGHT FOR FOOD - Thanksgiving Day Thoughts

Well, here it is....T day.
Foodies everywhere have been practically living in kitchens, preparing their stellar dishes and filling the air with wonder!  The holiday season is upon us, actually the winter holiday season...if you consider there are many "cluster celebrations" throughout the year.  Including solstices and equinoxes, various religious, national and local holidays as well as family celebrations, we're a partying kinda crowd!

I am going to be back-loading a few blog entries, which include the apple lattice pie and various bread explorations that took place on the days leading up to today.  Time is one of those things that gets hard to juggle.

The cooking took place on the dates that are claimed on the entries....pictures were taken at the time, too.  It's just that there wasn't much left of me by the end of the day, once the kitchen was cleaned up.

For today....the recipe is simple. 

We as a people, regardless of race, color, creed, sex or sexual preference, age or other declarative, need to remember that we are all part of this universe.....all part of that which makes each of us meaningful, individually and collectively.

We are all related.
But being related doesn't mean some get to take others for granted or that each, to their ability, can and should contribute something to their society. Most of us do.

Even those who seem to be "unemployed" or "homeless."  Most are trying to eek out a living, be it begging, busking or day labor.

Even those who seem derelict were made by that same Commonality that made us all.

So as we sit down to our meals, from that sandwich under the railroad trestle to that opulent nine course Thanksgiving Belly Buster, let's pause to be mindful and grateful for our blessings....which includes one another and all of life- all our Relations.

Sunday, November 20, 2011

Bourbon Sweet Potato Pie

Bourbon Sweet Potato Pie

I love pies, don't you?  Cakes are okay too, don't get me wrong.  But biting into a pie is like taking your mouth to a party!  The textures, tastes and contrasts make it a very popular desert option on most menus.

Holidays in my childhood home meant pies.  Usually apple and pumpkin for Thanksgiving, pumpkin and mincemeat for Christmas.  My father's mother even got her nickname from her popular rendition of the stuff - Nanny Pumpkins.

With all that history behind me, you'd think I'd be gearing up to make the traditional desert too.
Usually I do make at least pumpkin.   Mincemeat is usually a vegetarian version - recipe coming soon!
Jack had even asked about pumpkin pie.  We talked about it.  I was even planning on making it.
But did I?

Well......no.
As fate would have it, I'd completely forgotten to get pumpkin, canned or otherwise, during the holiday food shopping trip.  I did however have an overabundance of Beauregard Red yams and even a few cans of Princella's in the pantry....so guess what kind of pie got made?

Having covered pie crusts in a previous blog entry, I'll skip all but a few important details.
1) Make sure everything is cold - water, flour, shortening, salt......bowl and rolling pin too!
2) Spread waxed paper over your rolling surface - clean up is a lot easier!
3) Don't overwork the dough!  Let it rest in the fridge between steps!
4) Don't add all the liquid at once!  Watch for subtle changes as you mix!

Once your dough is prepped, let it rest in the fridge before rolling it into the pie pan.

Cooked yams in the bowl
Rather than boiling the yams, I wash them, score them with a knife and microwave them.  Depending on how many you're using (four being the minimum), cooking time (on HIGH setting) could be anywhere from 10 to 15 minutes.  Good rule of thumb is to check after 10 minutes.

Oh! Make sure you have enough piecrust for 2 pies!

Once the sweets are done, scoop out their innards into a bowl and let them cool slightly.


BOURBON SWEET POTATO PIE

Preheat oven to 425 degrees
Place a cookie sheet on the shelf being used for baking, this will help cut down on spill-over.

Hand mixing the yams
NOTE: Due to yam's fibery nature, I've found it better to use a food processor rather than a hand mixer for making this pie. But if you don't have one, mix it a lot and check the texture often!

2 cups cooked sweet potatoes or 1 1/2 can cooked sweet potatoes
2 eggs well beaten
1 1/4 cup milk (or liquid from canned sweets with 3 1/2 Tablespoons of powdered milk blended into it)
2 teaspoons bourbon
3/4 cups brown sugar (or 2/4 cups brown sugar and 1/4 cup white sugar)
1/4 teaspoon salt o substitutes (optional)
1/2 teaspoon cinnamon
1/4 teaspoon cloves
1/4 teaspoon nutmeg
4 Tablespoons melted butter

Bourbon, milk and eggs
Food processor
Combine all ingredients in the food processor if you have one. Otherwise, put the yams in a mixing bowl and have at it! Hand mixing may take about five minutes or so. Food processor at high setting may take about three to four minutes.  Check the texture.  If it's still a little "stringy," process it for an additional two minutes.  That should take care of it.

Place pie crust in pan and pour this mixture into it.  This mixture is enough for two pies, so prepare two shells.
Once the pies are poured, place them on the cookie sheet in the oven.  My oven is wide enough to fit both pies on one shelf.  If yours is not, use two shelves or-even better-cook one pie at a time.

Let the pie bake for 10 minutes at 425 degrees then immediately lower the heat to 300 degrees and bake it for an additional 50 minutes.  Then its done! Let cool on a wire rack for a bit...if you can wait that long!
Time for pie!

Please feel free to share your ideas, memories and recipes on this site via the comments box.  All credit will be given where it is due...and I promise to try the recipes too!
Enjoy!

Saturday, November 19, 2011

Breadly Speaking

Bread baking for the holidays!!!!   I don't know of a better way to warm up the house on a chilly day (or night) than to crank up the oven and fill the space with that sweet aroma that only comes with the baking of bread!


For Thanksgiving at Jack's sister's house this year, we were asked to bring the bread.  I didn't want to just stop by a store and pick up some biscuits...that would have been okay, but GEE!


Rather than do that, I decided to make a selection of wholesome whole grain offerings....2 corn breads, 1 whole wheat/oat and a whole wheat walnut loaf.  It took a few days, but I loved every minute of it!


The whole wheat/oat bread is a yeast based so it takes a bit longer than the others, which could be classified as Quick Breads. So I started with that.


BREAD A THON  PART ONE - Whole Wheat Oat Bread

1 1/2 Tablespoons active dry yeast
1/2 cup LUKEWARM water - for activating the yeast
1 teaspoon molasses or brown sugar - for activating the yeast
2 1/4 cup HOT water - for softening the oats
1/2 cup unprocessed oats or oat bran
1/2 cup white flour (pure gluten flour will make it rise higher)
1 Tablespoon salt or salt substitute
1/4 cup safflower oil
1/4 cup molasses
6 1/2 cups whole wheat flour (as needed)
2 Tablespoons powdered whole or nonfat dry milk 

First things first....the yeast. I have a very fine opinion of yeast and want to treat it very well throughout the process of it becoming bread.  So I'm careful to make sure the water used for activating it is Lukewarm....not too hot, not too cool. 
Yeast starting to foam
After foaming 15 minutes
I like to feed the yeast with molasses or brown sugar rather than regular sugar.  Either one of these works and seems to get the little yeast critters foaming like crazy!  
After activating the yeast,  put it somewhere warm-not hot! Let those yeasties honker down on that molasses or brown sugar and let it rip!  First time I did that, I was amazed!


The oats or bran need some attention, too. Put them in a small bowl, pour the 1 1/4 cups of HOT water over them and give the whole thing a stir.  I let this rest and moved on to the dry ingredients.

While that was going on, I combined the dry ingredients in a large bowl.  
Hint :  Make sure these ingredients are well blended. This is a good time to add any dry base seasonings, too.   
Blending wet and dry
Then I started adding the wet ingredients - starting with the oats then mixed with a spoon.  This dough can be blended with a sturdy upright mixer with a dough hook, too.   

After that I added the oil, molasses and finally the yeast.  Note that I added the yeast last.  It's a personal preference....not sure why but it's how I've always done it.  Then it was more elbow grease until the dough left the sides of the bowl.
Ingredients well blended-no longer sticking to sides of bowl
Dough division
 Then I turned the dough out onto a slightly floured piece waxed paper,  divided into two equal portions and tucked each portion into its very own greased loaf pan, covering each with a towel for a 30 minute rising nap.   
Bread on the rise!
 During this time, the dough should rise....maybe even double its original size!  Ain't yeast just awesome?!

Grow little yeasties, grow!
The 30 minute rising time was a great opportunity to clean up a little then take a break...so that's what I did!
A little coffee, a little soapy water and the kitchen no longer looked like a disaster area! That done, I double-checked the oven settings, made sure the bread had risen enough, removed the towels then put the filled loaf pans on the on a mid-oven shelf and let them bake for 40 minutes in a 350 degree oven. 

Once done, the loaves were placed on a wire rack to cool before packaging for transport.
Breads cooling on a rack
  These loaves didn't rise a lot...I didn't have any gluten flour, so didn't expect them to grow much more than they did...but they were delicious!  The wheat acted as a perfect foil for the oats sweetness, and like all good breads it had that crunchy exterior and soft interior...it even had enough flavor to stand up with or without butter!  Yum!

Feel free to share your recipes, too!  As always, Enjoy!


Friday, November 18, 2011

KITCHEN THOUGHTS - kenamewakehena

Thanksgiving is right around the corner, and foodies everywhere are working overtime on creating a wonderful feast.  There are special dishes, courageous creations and even a few daring dabbles that are bound to find their way into the annals of family traditions.

Turduken, deep fried turkey....one has to wonder about the next craze!  Will the turkey be chocolate dipped? Or perhaps wrapped in pastry and baked?  Or maybe just shot out of a cannon?   Who's to say....?  Food creativity is like that.  But underneath it all, this holiday is about folks getting together and sharing a little quality time.  So in the spirit of Thanksgiving, the following....


....which is Lenape for giving thanks (kenamewakehena) and amen (literally "thank you, you're welcome").

We dedicate the season to this spirit.

This week will be a busy one for all.  More recipes with next blog entry.  Feel free to submit some of your own, too!
Enjoy~

Thursday, November 17, 2011

What's For Dinner? Chicken, Asparagus, Coleslaw....Really?

Chicken, cole slaw, asparagus...ingredients for dinner
Food shopping near a Food Holiday is a tricky venture; not only are you getting what you need for the festivities, you have to remember about the "regular" days as well.

I do my best...don't we all?!
But there's bound to be a bit of menu strangeness when juggling like that.

Tonight's menu is a pretty good example.  I've been concentrating on apples a lot lately; Jack's sister gave us a bunch from her wonderful apple tree, so I was knee deep in pies, breads, apple sauce cakes and so on.   This morning when I looked up at the clock it was 11 a.m.; when Jack came down to the kitchen and asked "What's for dinner?"  I noticed the time....4:35 p.m.

Hmmmmm. "Chicken," I replied, then looked in the fridge.  Fortunately I'd remembered to defrost the chicken.  "It won't take long."  Jack smiled, grabbed a glass of water then left me to the task at hand.

I'd been in the process of chopping apples when Jack asked that fateful question.  So I decided to use them in the meal.   A second cruise of the refrigerator secured the ingredients for the meal; the aforementioned chicken, a bag of pre-shredded cabbage and carrots (a/k/a a "cole slaw kit"), some asparagus, an onion, some orange juice....didn't sound like things I could combine into one dish.  So I opted for separates.

I rinsed the chicken then patted it dry.  Lucky for me it was a pack of skinless, boneless thighs...lots less work! Thank heavens for sales!   After that, I sprinkled a little low salt, pepper, dried onions and garlic powder on both sides of the chicken and placed it in a bowl.  Then I poured some orange juice over it and covered the bowl.  This sat for about fifteen minutes while I prepared the rest of the meal.

The asparagus was a no-brainer.  Hot water, steamer, seven minutes....done!
Jack likes his asparagus with a side of mayo, so I didn't have to make a fancy sauce or anything. Yay!

Waldorf Coleslaw - slaw with walnuts
Cole slaw?  Been there, done that.   But I wanted something a little more interesting, so I found some walnuts, chopped 'em up and added them, along with the chopped apples and raisins...kind of a Waldorf Cole Slaw.
It's always better to make your slaw ahead time and let the flavors mingle and mature.  Best scenario is the day before service, but 45 minutes will do in a pinch.  So that's what I did.


Chicken in the pan
Then it was time to take on the chicken. I drained the meat and let it sit on a wire rack then put some heat under a cast iron skillet, chopped then added onion and garlic.  After the onions started going transparent, I added the chicken and browned it for five minutes on each side.  After browning, I poured the orange juice over the chicken, covered and cooked it for an additional 3 minutes per side then removed the chicken to a plate while making a pan reduction.

Reductions really make the flavor happen!   It takes a little time, but is well worth the effort!

Once the juice is reduced, add the chicken to the pan and coat each piece with the reduction.  I drained the asparagus, put it in with the chicken, mixed everything around a little  then put the skillet with everything in it in the oven (at 350 degrees) for about 10 minutes more.  Then it was time for plating and service.

Orange chicken w/cranberry sauce, asparagus and slaw
And you know what?  It was pretty good!  The flavors seemed to compliment each other, even the slaw. Jack thought I'd been planning the meal all day.  And in a sense he was right....after all I did defrost the chicken!

So feel free to try this idea, feel free to share your recipes and ideas too! I look forward to hearing from you!
Enjoy!

Sunday, November 13, 2011

Turnip Turn On!

Turnip turn on
Mom had her hands full when we kids were growing up!  Imagine, five kids.  Enough to make a person go on strike....and I'll be the first to admit that my brand of insanity didn't make her job any easier.  Somehow she and Dad managed and in the process taught us how to do the same.

One way of managing was stretching the food dollar.  Mom could make that eagle scream and give change!
She used vegetables a lot to make the main course go further.  One of my favorites of hers was so simple, Steamed Mashed Turnips.  These were a favorite, especially with a little extra melted butter or gravy. 

Like many other kids, some of her brood could be picky. She got us kids to like turnips by saying they were magic....they turned colors as they cooked!

Peeling turnip with knife
 Preparation for this dish is simple.
You have to peel the turnip in order to use it.  Rather than using a veggie peeler, I just have at it with a very sharp knife.  As the photo demonstrates, I chop down the side at a slight angle.  This seems to work pretty good. I don't chop the top off 'til last, but I did chop off the bottom so that it would sit flat on the table.
Steaming turnip

Once peeled, chop the turnips into cubes and put in a steamer.  I prefer steaming to boiling as it retains more of the vegetables' nutrients and flavors.  If you don't have a steamer, that's okay...just don't fill the pan completely with water.  Only fill it to about 1 inch or so.

Turn the flame on high until the water is boiling rapidly, then turn the flame to medium and let steam for about 10 minutes. It's a good idea to stir the turnips once in a while, especially if the pan is full.

The turnips are done when they're soft enough to cut with a spoon.   Once done, remove from heat and place steamed turnip cubes in a warmed bowl.  Add butter to taste.  With a potato masher or hand mixer, work the butter into the turnips until the vegetables are mashed.  Taste.  Add more butter if need be.  That 's it!

Some people add a bit of heavy cream....bacon bits....garlic.   What ever you like, go for it!
Turnips are great as a side dish when made like this....they're a great substitute for potatoes, too!

As always, feel free to share your recipes, thoughts and so on.  Just do so in the comment section.  Use the comment box or check the email icon.

Enjoy!

Steamed Mashed Turnips


Saturday, November 5, 2011

KITCHEN TOOLS - George Foreman Grill


Isn't it great when something works like it's supposed to?  Such is the case with the George Foreman Grill. Mind you, I have the small version, actually two of them, bought at a garage sale.  They were used when I got them, about six years ago, but they still work like new!

For grilling burgers, hot dogs and sandwiches, the Foreman Grill is a natural!  Heating elements on both lid and base assure even cooking.  One of my grills has a special bun warmer in the lid, and it actually works pretty good.

Foreman Lean Mean Grillin' Machine w/ bun warmer lid
The grill works pretty good on other cuts of meat like chicken breast fillet and sausages. Vegetarians will find it useful for grilling those thick portabello mushrooms, eggplant "steaks"  and other such goodies.

Dripping into the drip pan
No matter what you're grilling, be sure to keep an eye on the drip pan.  It's probably a good idea to have a spare on hand if you're making a lot of things...that way a fresh one can be slid underneath while the old one is being emptied.

Not submersible, the George Foreman Grill' s clean-up is still fairly easy, with its non-stick, raised surfaces.  A warm sponge usually does the trick.

My main complaint about my grill is that it is too small. 


Friday, November 4, 2011

Boxing With Carrot Cake

Boxed mix basics
Some people think there's a standing rule about baking.  You're either baking from scratch or you're not baking at all.  I disagree

Boxed cake mixes have the same ingredients as you or I would be using.  Of course when it comes to brands some are better than others, but this article is not out to choose which is which.  I'm here to talk about using cake mixes rather than choosing which to use. I leave that part up to you.

I like cake, like making it, decorating it and eating it.  Lots of my friends like cake too...leastways that's how it seems.  They sure hold enough gatherings throughout the year and each one has at least one cake as its centerpiece.

This morning, one of our buddies called with an invitation to a party.  During the conversation they asked if I knew how to make carrot cake.  After fifteen minutes of trying to explain how to make it, I broke down and volunteered to make the cake.

Grating extra carrots into the mix
As luck would have it, I had a Betty Crocker cake mix in the pantry....and it was a carrot cake at that!  Yay!

I could do it the easy way, just follow the instructions, throw it in a pan and let it bake.  Piece of...pardon the expression...cake.  But that's not me.  So while the oven pre-heated to 350 degrees,  I set about augmenting what Betty Crocker began.

The original mix comes with flecks of carrot, but not enough if you ask me.  So I started by grating 2 carrots.
There were no raisins in the mix, so I got some out of the pantry and looked around for any other treasures.  Eureka! Walnuts!  This cake was gonna rock!

Mixing the mix
The thing about adding raisins to breads or cakes is that they will, by nature, sink to the bottom as the cake is baking - that is unless you prevent it from happening.  And how does one do that?  Simple! Take your raisins and put them in a little bowl.  Now take about 1/4 cup of cake mix (or flour mix if making from scratch) and add it to the raisins.  Stir until everybody is coated evenly, then add everything back into the cake mix...raisins and all.  That little trick will prevent raisins from sinking. Actually I did the trick with the raisins and walnuts mixed together....just in case the nuts wanted to "go south" too.

Cooking carrot cake
Follow all instructions on the cake mix box. You may have to allow for 5 extra minutes cooking time but don't just assume this is so.  Check the cake as you normally do, with a toothpick or thin knife.  Let it cool for about 10 minutes before removing from the cake pan.   This cake can be served frosted or not.  I usually just sprinkle some sifted powdered sugar over the top.  But if I'm really out to impress I make cream cheese icing.

Carrot, Walnut, Raisin Cake
Of course, there is a pre-made version of the stuff too if you want to follow the "store bought" theme to its very end.  But I'd suggest adding a little extra cream cheese to the boxed icing.

I'll be adding a from-scratch carrot cake recipe to the blog soon for all the purists out there.  If you'd like to send some of your cake recipes....from scratch or boxed additions, feel free.  And don't forget to Enjoy!

Thursday, November 3, 2011

KITCHEN THOUGHTS Holiday Kitchen Time at last!

It's....HOLIDAY KITCHEN TIME!

The news is full of mayhem and murder....people angry - for good reason....people frustrated - again for good reason.  Lots of us are feeling more than just "the pinch,"  we're feeling the punch in the gut of our nation's economic woes.
There's that and the global economy.
And the wars here and there....
and the people that hate us....
and the people that like us but are catching grief from the people who hate us....
on and on and on.

I looked at the calendar after watching the morning events.....and found myself smiling. It's holiday baking time at last!  Time for the house to be filled with hints of cinnamon, cloves, bread, fruits and nuts....spicy, tactile, alive.

Sure, money's tight and it's gonna be hard to get enough walnuts; coffee's prices are through  the roof too but what the heck!  Making due is a very special kind of magic; more satisfying....more meaningful than throwing a store bought mix together in 20 minutes.  Not that there's anything wrong with that.
Artwork from Grand Canyon Tower

So with glad heart and ready hands,  a few special prayers of thanks and a box full of recipes we begin this Food Holiday Season with playful anticipation....hoping that all the warmth, joy, lightness and love that's generated in this and other kitchens all over the world spread and grow.

May the Holy Spirit of Peace and the Healing Power of Love Abide and Grow in the Hearts and Minds of All, Amen.

As always, please feel free to share your memories, recipes, traditions, ideas and so on!
Enjoy

Wednesday, November 2, 2011

Pie in the Sky


There's nothing like a basket (or so) of fresh harvested apples! 

Jack's sister has a great back yard filled with seasonal fruits and flowers.  Among these is a wonderful apple tree and we've been blessed with some of its bounty.

All the way home from our visit, the fruit's aromatics teased my senses.  I envisioned pies, cobblers, cakes, cookies, breads and ciders.....roasts with apples, chops with apples, chicken with apples....stuffings, sauces and relishes - to say the least, I had a lot on my mind!

I wanted to make something to bring to Jack's family Thanksgiving dinner....using the apples would make it even more special.  I asked him what he thought and Jack voted for apple pie.  It was up to me to decide which type of pie, crust and so on.

Some may wonder what I mean.  "Apple pie is apple pie, right?"

Well, yes and no.  There are different types, different ways to make it, different crusts.   For example, maybe instead of just plain old apple I might want to throw in some raisins and walnuts....or maybe pears.   I
Baked Pie
may want to make it with a crumb topping, or lattice, or plain old slit-top pie crust, or even just go crazy and make the crust with cereal.  I may even make a "Cookie Pie,"  which is a pie with a thin "cookie" top crust.  For that matter, maybe make the whole crust like a cookie.....who knows?


As far as the fruit goes, I don't peel the apples before pie-ing them.  But if you have digestive problems perhaps you should peel them.


There are a lot of ways to make an apple pie!  Do I make it in a paper bag?  Do I put plain apples in a pie shell, lattice the top and pour sugared, thickened liquid through the lattice before baking?
The sky's the limit!

I decided to try a few different recipes, after we had plenty of apples!

This first one is a standard double-crust pie.  I'll be doing another pie crust in a couple of days, so watch for it! The pie crust is the most complicated part.  Common rule of thumb is to keep everything cold, cold butter, cold liquids, heck even cold bowl and rolling pin!

PIE CRUST 1
 
Chill butter and liquids before you begin. 
2/3 cup + 2 Tablespoons butter
4 Tablespoons liquid  (Try using apple juice (or other fruit juice) instead of water)

2 cups of flour
1/2 tsp. salt
1/2 tsp. cinnamon
1/4 tsp. cloves

Preheat oven to 450 Degrees
Place a cookie sheet in the oven.

Sift flour, salt, cinnamon and cloves into a large bowl. Stir until evenly mixed.   Cut 1/2 of chilled butter into dry ingredients using pastry knife, mezzaluna or two table knives until it reaches a cornmeal state.  Add the remaining butter and continue cutting in until it looks like cornmeal with large bits in it.
Filled Pie ready for oven

Add liquid a little at a time, stirring with a fork, add more liquid until dough, when squeezed in hand, stays together.  Put in the fridge for 30 minutes to allow the flour to absorb all the moisture.

Dust a dry, clean surface with flour.  I use a large sheet-cake pan; plenty of working room and no flour mess on the counter.  Some people roll their dough out in between layers of waxed paper.  If you do, just be sure to dust it with flour first! Otherwise it'll stick.

Pie filled, extra crust around edge
Working quickly roll dough to 1/4 "  thick or smaller. While rolling, turn the dough one-quarter turn at a time to keep rolling even.  When you've reached the desired thickness, roll the dough over the pin and unroll it over the top of a pie pan.   Make sure to leave a little overhang of dough around the edges, this will be part of what crimps the pie together.

For filled fruit pies, pierce bottom of crust before filling it.

APPLE PIE FILLING
Mixing the apples, sugars and spices

5-6 apples cored and sliced
Juice of one lemon
1 cup sugar (mixed brown and white)
2 Tablespoons cornstarch
1/4 tsp cinnamon
1/8 tsp cloves
1/8 tsp nutmeg (optional)
1 Tablespoon butter


Crimping the pie edge
Mix apples with lemon juice, corn starch, sugars, cinnamon, cloves and nutmeg until apples are evenly coated.
Fill empty pie shell, dot top with butter .  Cover with top crust.
 Fold the excess bottom crust over the top crust edge then crimp using your fingers or a fork.


Venting the top
Pierce the top with a knife to vent the pie. Place pie on pre-heated cookie sheet in the oven.
Cook for 15 minutes at 450 degrees then lower heat to 350 degrees and cook for 50 minutes longer.
If your oven is slow, rotate the pie once during 350 degree cooking.  Pie will be done when top crust is golden brown.

This is just one recipe.  More to come!
Please feel free to share your pie recipes, thoughts and ideas!
Enjoy!
Cutting into pie
 

Submit Express SEO Services

Free Web Submission

Powered By Blogger