Showing posts with label roast turkey. Show all posts

Tuesday, November 29, 2011

HOLIDAY RECIPE - Stuffing, Cooking and Serving

After two days defrosting, a great bath and rub down with herb butter and a 12 hour soak in orange juice and bourbon, the turkey was finally ready to be stuffed and cooked.

Stuffing
But before writing about that, I thought it a good idea to talk about the stuffing itself.  As mentioned previously, I used a combination of breads made for a family dinner.  These included Cornbread, Wheat/Oat and Walnut breads.  After breaking the breads into pieces and adding dried spices and herbs (listed in previous blog entry), I let it cure in the pantry for a day so the bread could get a little stale.  That's critical to good stuffing.

The night before the bird was to be stuffed, I chopped onions, celery and apples, browned them and added them to the bread.  Next I browned some bulk sausage....guess where that went?  After that, I took some of the basting juice made by simmering giblets, added some butter and poured it into the bread mixture.  After mixing it around so that everything got a little of it, I recovered the stuffing and put it into the fridge for the final leg of its curing.

Good morning, Turkey

Preparing roasting pan
While all that rested I prepared the turkey pan - actually little more than a glorified lasagna pan- by first misting it inside with some release spray. Let's be honest, no matter how many layers of wrap you use to line it, that foil's gonna leak somewhere and pan drippings are bound to accumulate underneath.   This step makes clean-up a lot easier.  Nothing sticks!
Anyway, after that I lined the pan with aluminum foil -shiny side up-and coated it with release spray too.  Then it was time for the brown paper.

Paper rubbed with herb butter
"HOLD THE PHONE," I hear some saying,  "Brown Paper?"
Yes. Brown paper is another very important element in this process.  It is the defining difference between this recipe and any other version of making roast turkey.  It is also how my mother and her mother before her did it.  Roasting bags, aluminum foil, parchment....they all have their place, but to get a turkey that browns as it cooks but stays moist, there's nothing like a sheet of brown paper, greased on one side only with some of the herb butter, to make magic.

Once all that was ready, I came back to the turkey. I moved it near the sink, put on some plastic gloves and carefully opened the bag. A wonderful smell came forth. Citrus, spices, whiskey....a true bouquet! 
Turkey coming out
After reserving the marination liquid, I removed the plastic bag and discarded it then positioned the turkey so that smaller cavity could be filled.

First I rubbed it with some of the herb butter, then filled the space loosely with stuffing.  Rather than sewing the turkey closed, I opted to simply fold the extra skin under.  Because the stuffing was loose, it would be able to swell without causing undue pressure, so I didn't think the bird would spring much of a leak.

Before turning said turkey to its other side, I rubbed some herb butter on the underside and sprinkled it with some extra garlic, poultry seasoning and garlic.  Then I flipped the bird....so to speak.

Stuffing the large cavity
I repeated the herb butter rub, making sure to lift the skin over the breast and giving it a rub, too.  I filled these pockets loosely
with stuffing, rubbed the cavity with herb butter and filled it too.
I'm never sure just how much to make, but as it turned out there was just enough stuffing for the job.

Ready for roasting!
Rather than sew the front closed, I put half an orange in the opening, then crossed the legs over it and trussed them together with some thick thread.  Then I transferred the turkey to its roasting rack in the specially prepared roasting pan, rubbed more herb butter on the breast, legs and wings (the parts that weren't tucked under). After a final spice sprinkling, I enveloped the turkey in its paper and put it in the 320 degree oven for about four and a half to five hours.

The beauty of this method is that you don't have to baste a lot.  But I'd recommend about two to four bastings through the cooking time, and if your oven is slow like mine you might consider raising the oven temp by five to ten degrees.  Also if your oven doesn't heat evenly make sure you turn the turkey a couple times during the roasting.

NOTE: Remember that when you open the oven door, you loose heat.  So keep the openings to a minimum, keep 'em quick and make allowances in your cooking time for any time the door is opened for more than 3 minutes.   Believe it or not, you can loose up to 100 degrees for each minute that door is open!

As time passed, the house filled with an incredible aroma!  Sweet.....savory.....turkey!

Wylie T. Katz, turkey fanatic
The cat kept coming into the kitchen every few moments, sniffing the air around the oven and licking his chops. Although we don't as a rule give Wylie table scraps, turkey is one of those things that he just absolutely loves....well, let's be honest - he's a turkey fanatic!  So when it comes to the holiday meal we always give Mr. W a little treat.
He wouldn't have it any other way. 


While the turkey cooked, I tended to lasts minute things. Jack wanted mashed potatoes, so that needed being done.  But truth be told, they weren't  to be "mashed," per se.
They were to be whipped with my trusty, ancient hand mixer-featured in an earlier blog entry.
But first, those spuds had to be cooked.

Whipped potatoes
The potatoes went into the microwave after a thorough scrubbing, de-eyeing and slitting.  Since there were 15 medium and small taters, I figured it would take about 15 minutes on HIGH to get the job done.   I know there are folks who insist the only way to make mashed potatoes is to boil them after peeling.
That's a fine way to do it, too.  I just like getting all the flavor and it's more accessible by baking, steaming or 'waving.  Too many times veggies are "overboiled" and their tastiness gets lost to the boiling water. So if you do opt for this method, be careful.
Anyway.....

That underway, I ran down my check list. Beverages were chilling. Check. Cranberries chilling. Check.
The yams had been done the day before, so that just needed reheating. Check. The cole slaw was done and only needed to be set on the table. Check.

The table.....THE TABLE!!!!!

Jack set the table
It was time for that to get done. Jack pulled the table out from behind some microphone stands and opened it out in the middle of our dining room/recording studio.  I handed him one of his mother's wonderful table cloths and smiled as he pointed to the little china cabinet with our special dishes and offered to set the them 'round.  What a sweet guy!  Check!

I just sat down with a glass of sparkling cider when the oven timer chimed. Turkey time at last!

Both Jack and Wylie stood in the kitchen doorway as I opened the oven and liberated our main course from its dark, hot chamber.  There was only one word to describe the aroma as I peeled the brown paper away from the golden brown bird....."succulent," or as Jack put it, "Mmmmmmmmmmmmmmmmmm."

Squeezing orange juice over turkey
While the turkey rested, I put the yams and some of our home made dinner bread into the still hot oven for a bit of warming.  I also put the bowl of potatoes in with a pat of butter on top of them, just to make sure they were warm too.
Then I drizzled orange juice over the resting bird, just for fun and double checked the meat thermometer.

It had been a perfect 180 degrees when first put up, and after sitting for fifteen minutes it was still within range.  Time to  carve and present.  But first I grabbed a bowl and filled it with the stuffing. "Mmmmmmm" I heard from beneath me. Apparently the cat approved, too.
Carving the bird

Carving was easy.  First the legs and wings then the breasts. I didn't cut the whole thing down right then, we were all way too hungry for that!

So I covered the rest with a damp towel then a sturdy pan lid.  The former to keep it moist, the latter to keep it away from Wylie.  After that, everything was brought to the table and we sat down to eat with a prayer of hope for those who were not so fortunate as us, and a prayer of thanksgiving for all the blessings we've been given.

To say the least, the meal was fantastic-this according to both Jack and Wylie, and in truth I had to give it a thumbs up too.

Labor intensive?  Completely!  Time consuming?  Absolutely! 
Worth it?  You betcha!   But hey! If you've ever eaten a dry turkey you know how miserable it can be!
This turkey always comes out moist and flavorful....that's true of both the dark and white meat.  This is a guaranteed moist turkey!
 
Please feel free to share your Turkey recipes here, and don't be afraid to try this recipe for yourself. Let me know any discoveries and modifications you make.  I'm always anxious to learn more.  Enjoy!

Monday, November 28, 2011

HOLIDAY RECIPE - Turkey with Stuffing Dinner TURKEY PREP

To begin at the beginning is to truly begin, so here it is.
Little City Meats
We begin with the bird....star of the show, piste de resistance, center piece of this culinary celebration....the turkey.  Arguably, fresh is always best but is not always possible.  We have a great little meat store down the street, Little City Meats....it's my dream to one day order a fresh holiday turkey from that place!  
Hey. Dreams do come true!

But until then I went as usual to the local Safeway to take advantage of their special Five Dollar Turkey sale.  Unfortunately they didn't have any of them left, but had a few in the next higher price range. So I got a 19.85 lb Tom Turkey for $9.00!  Frozen, yes...but affordable.  Yay!  While there I trolled the aisles for any other deals and came home with most of the meal shopping done with ten days to spare!  The remaining ingredients were picked up the following day at our local green grocer and  Foods Co. market. No muss, no fuss.

Meanwhile, back at the flat.....
While the turkey hibernated in our freezer for seven days, other preparations were underway.
I made bread....lots of bread....different varieties of bread....for Jack's family's Thanksgiving dinner and our own pending feast, and planned to use some as the bread for our stuffing.  As the time drew nigh, I collected the designated stuffing breads and broke them into pieces and stored the breads in a deep container. This mixture included cornbread, walnut bread and wheat/oat bread.

Stuffing packed to cure
One secret to good stuffing is hard or stale bread, so I left mixture in the container, but loosely covered so it could "stale up."  I didn't want the breads to get "bored," just laying around languishing so I added some of dry spices so they could start developing flavor.   
     These spices included a bit of poultry seasoning of course, a dash of extra sage, dried celery leaves, dried onion flakes, dried garlic flakes, thyme, a dash of pepper and salt (optional). Naturally, seasoning is a very personal thing...each to their own! Please use spices that suit your tastes.
     Once this was done, I set it in the pantry to dry-cure.

I made apple pie and apple sauce for Jack's family's feast and still had time on my hands, so used it to catch up on the blog.  I also took this opportunity to make the herb/butter rub that would be used in the marination of the turkey.  I put some butter in a container, added fine-chopped garlic, onion, poulty seasoning, sage and thyme and mixed it all together then put it in the fridge for a little blending time.

Then, at long last, it was time to begin the turkey process!

First thing was to defrost the thing.  I'm old school on this...a standard take it out of the freezer, put it on a cookie sheet on the bottom shelf of the fridge and let it do its thing for two days, kind of girl.
So that's what I did.

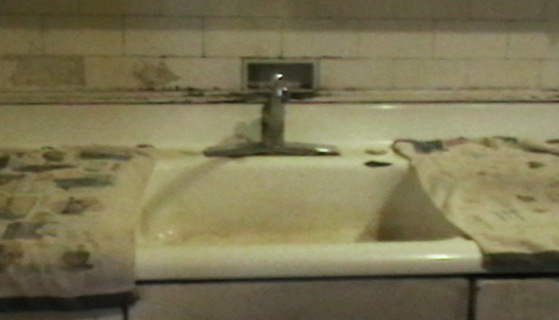
Sink prepared
While that happened I took the time to really clean the kitchen, stem to stern. All this began with a thorough wiping and sweeping. That took the better part of day one.
Day two found me concentrating on the sink, stove and other work surfaces.  Preparing the sink, particularly, took a lot of TLC.  After scrubbing it with cleanser and rinsing with hot water, I went in for the kill with a coarse salt and vinegar wash followed by another hot water rinse.  No self-respecting germ or bit of dirt dared show its face after such an onslaught of purification!

Turkey taking a bath
Then it was time for the turkey to come out of its wraps, face the world and have its Grand Bath. I always inspect the critter, inside and out, looking for things like freezer burn or discoloration.  I also use my nose....sniffing for any signs of purification.
Satisfied that all was fine, I continued by pulling out the package of giblets and neck that had been nestled within the turkey's large cavity, then  put the main body in the sink and turned on the cold water.   NOTE: cold not hot water, this is very important!    
Turkey covered and soaking


There were a few bits of ice inside the cavity, so I decided to let Mr. Gobbler soak in the sink for about 30 minutes.  Since we have a cat who is a turkey fiend, I covered our soaking friend with a couple of cookie sheets while I started the giblet basting broth and gravy base.

The giblets (heart, kidneys and liver) and neck (that long thing) are very useful!  There's a lot of flavor in those goodies and I was determined to unlock that yumminess, so put them in a pan of water on the stove for a good, long simmer.  Soon the house was filling with that familiar, rich, wonderful aroma!

Piercing pathways for flavor
Then it was time to check the turkey's condition, which by then was completely thawed.  I removed the bird to one of the towels, emptied the sink and then rinsed the bird inside and out before patting it dry. Then I pierced the turkey all over, inside and out, to develop "pathways" for flavor.

Now comes one of the most important parts of the process, getting the turkey ready for marination.
I took the butter out of the fridge and opened the lid.  Mmmmmmm!
 
Starting from the inside, I rubbed that bird from stem to stern with the herb butter, making sure to lift the skin along the two breast sides and rub some in there too.  Pretty much anywhere that could have butter rubbed onto it or into it, got it.   Then I sprinkled additional herbs throughout and on top of the turkey.  Same rule of thumb; if it could be spiced, it was.

Then it was time for a very important decision; what liquid or liquids should I use for the marination?

Any body can soak a turkey in wine; I do it all the time.  But gee whiz!  I wanted to do something different!  I saw the remaining oranges from Jack's sister sitting in a basket and began feeling twinges of inspiration.
There was some bourbon in the cupboard. Bourbon does something wonderful to to food, it goes well with oranges and I felt like doing something wild.  Before thinking twice, I added a healthy cup or thereabouts to the marinating bag.

Marinating in the bag
Once that was done I closed the bag and tied it tight, set it breast side down in a large bowl then started it on the first of many hours of marination in the refrigerator.  Four hours later I turned it breast up for another four hour fridge soak.  I did this rotating several times during the 12 hour marination.

NEXT INSTALLMENT: Stuffing and cooking the bird.

As always, feel free to share your recipes here....simply write them as comments, include your name and email....I'll be most happy to give credit where credit is due!  And above all else, Enjoy!

Submit Express SEO Services

Free Web Submission

Powered By Blogger